BUY MY STUFF

HIGH QUALITY Bespoke 3D PRINTED CAMERA GEAR

MAKE ANY CAMERA TACTICAL !
WARNING: Don’t get yourself hurt or killed because someone thinks this is a gun. This item is being sold as a desk weight or wall art. This 3d Printed adapter attaches your camera to a genuine gun stock and makes it into a tactical Camera Rig or classic Wood Stock Rig. (Does not include gun stock - Sold separately - (California law won’t allow purchase or real stocks FYI)
Buy this 3d Print Adapter (Choose your camera model or Choose Universal). Includes 1/4-20 Hardware
Buy a real tactical stock with grip sold separately here for $59-$119 (Genuine Gun Parts Made from Aluminum and Composite) Or buy a Classic Wooden Stock Sold here (Note: Wooden Stocks do not come with the hand grip, which need to be purchased separately here )
Wireless Trigger ? Yes! This one slides right into the side of the adapter. Buy SmallRig Bluetooth Remote $27.99 (Works for select Sony and Canon Cameras)
Assemble! ( installs in 5 minutes, Instructions provided in kit)
Hang on wall, crack a beer. Please don’t get yourself killed.
IMPORTANT NOTES:
California law won’t allow retailers to sell real gun stocks - If your shipping address is in California, these links wont work, you may need to buy used on eBay from private sellers.
Adapters will work with *most Mossberg 500 Maverick 88 12 GA/20GA stocks with the grip. However, this is not guaranteed, please use links below, and double check the stock grip says “m500” on the side, this adapter will work with that specific off the shelf part.
While there is a Universal mount that works for most cameras, the custom mounts for specific camera models offered are significantly stronger hold with more evenly distributed load. Its recommend that those who intend to use this for actual filming, use those models that are custom fit. (We offer discounts for one of each if you want to try both)
3D Print Includes Hardware - (2) 1/4-20 bolts + 1/4-20 nut.
3d Print is made with PETG with 80% infill, very solid, does not warp or deform in hot cars ( Holds form well up to 90°C 195°F). Comes with 2 year warranty - just pay for shipping.
Great for camera racks, wall mounts, talking pieces etc….
Buyer beware, this item is being sold for novelty and desk weight purpose - this could get you shot or killed if used in public. Please be smart and place Orange tape around the lens before using, and don’t use in public spaces.
Tactical Grips that work (Sold separately)
Heres a list of some tactical Mossberg 500 Maverick 88 12 GA/20GA that will work, there are many more that will fit, but heres some we like
Mossberg m500 w/ cheek rest $65
Trinity Tactical (Tan and Black) $80
Pistol grip only (No Stock) $20
ADD ONS - “WOOD STOCKER” Version
Make it work with tactical stocks or the classic wood stocks ( Wood stock requires additional parts)
An additional 3d Part that connects the rear of the Wood stock, to the back of the Tactical Grip.
Includes 8” x 1/4-20 lag bolt to attach the wood stock to the grip.
Requires to purchase wood stock separately here.
Requires to purchase tactical hand grip separately here.
Heres a few listings that provide classic wood stocks that will fit (Sold Seperatly)
Free Shipping USA
Free shipping USA. International shipping offered for $24.50 (2-5 day Fed Express or UPS Expedited)
2 Year Warranty
Terms and Conditions: Our 3d Parts come with a 2-year warranty. If your part is damaged or defective, simply provide proof of purchase, and we’ll ship you a replacement at no extra cost except for shipping fees. This adapter is suitable for display purposes only, we are not responsible for anyones cameras getting damaged from using this adapter for cosplay - real life filming etc…
Made from Quality
Made from high quality 3d printed material : PETG
Don’t see Your camera model? Tell us which ones you want us to add!
Want this in Aluminum? Want in PETG-CF / PETG-GF ? Message us!
Got any product suggestions or alterations?
Message us at Josh@makeartnow.com
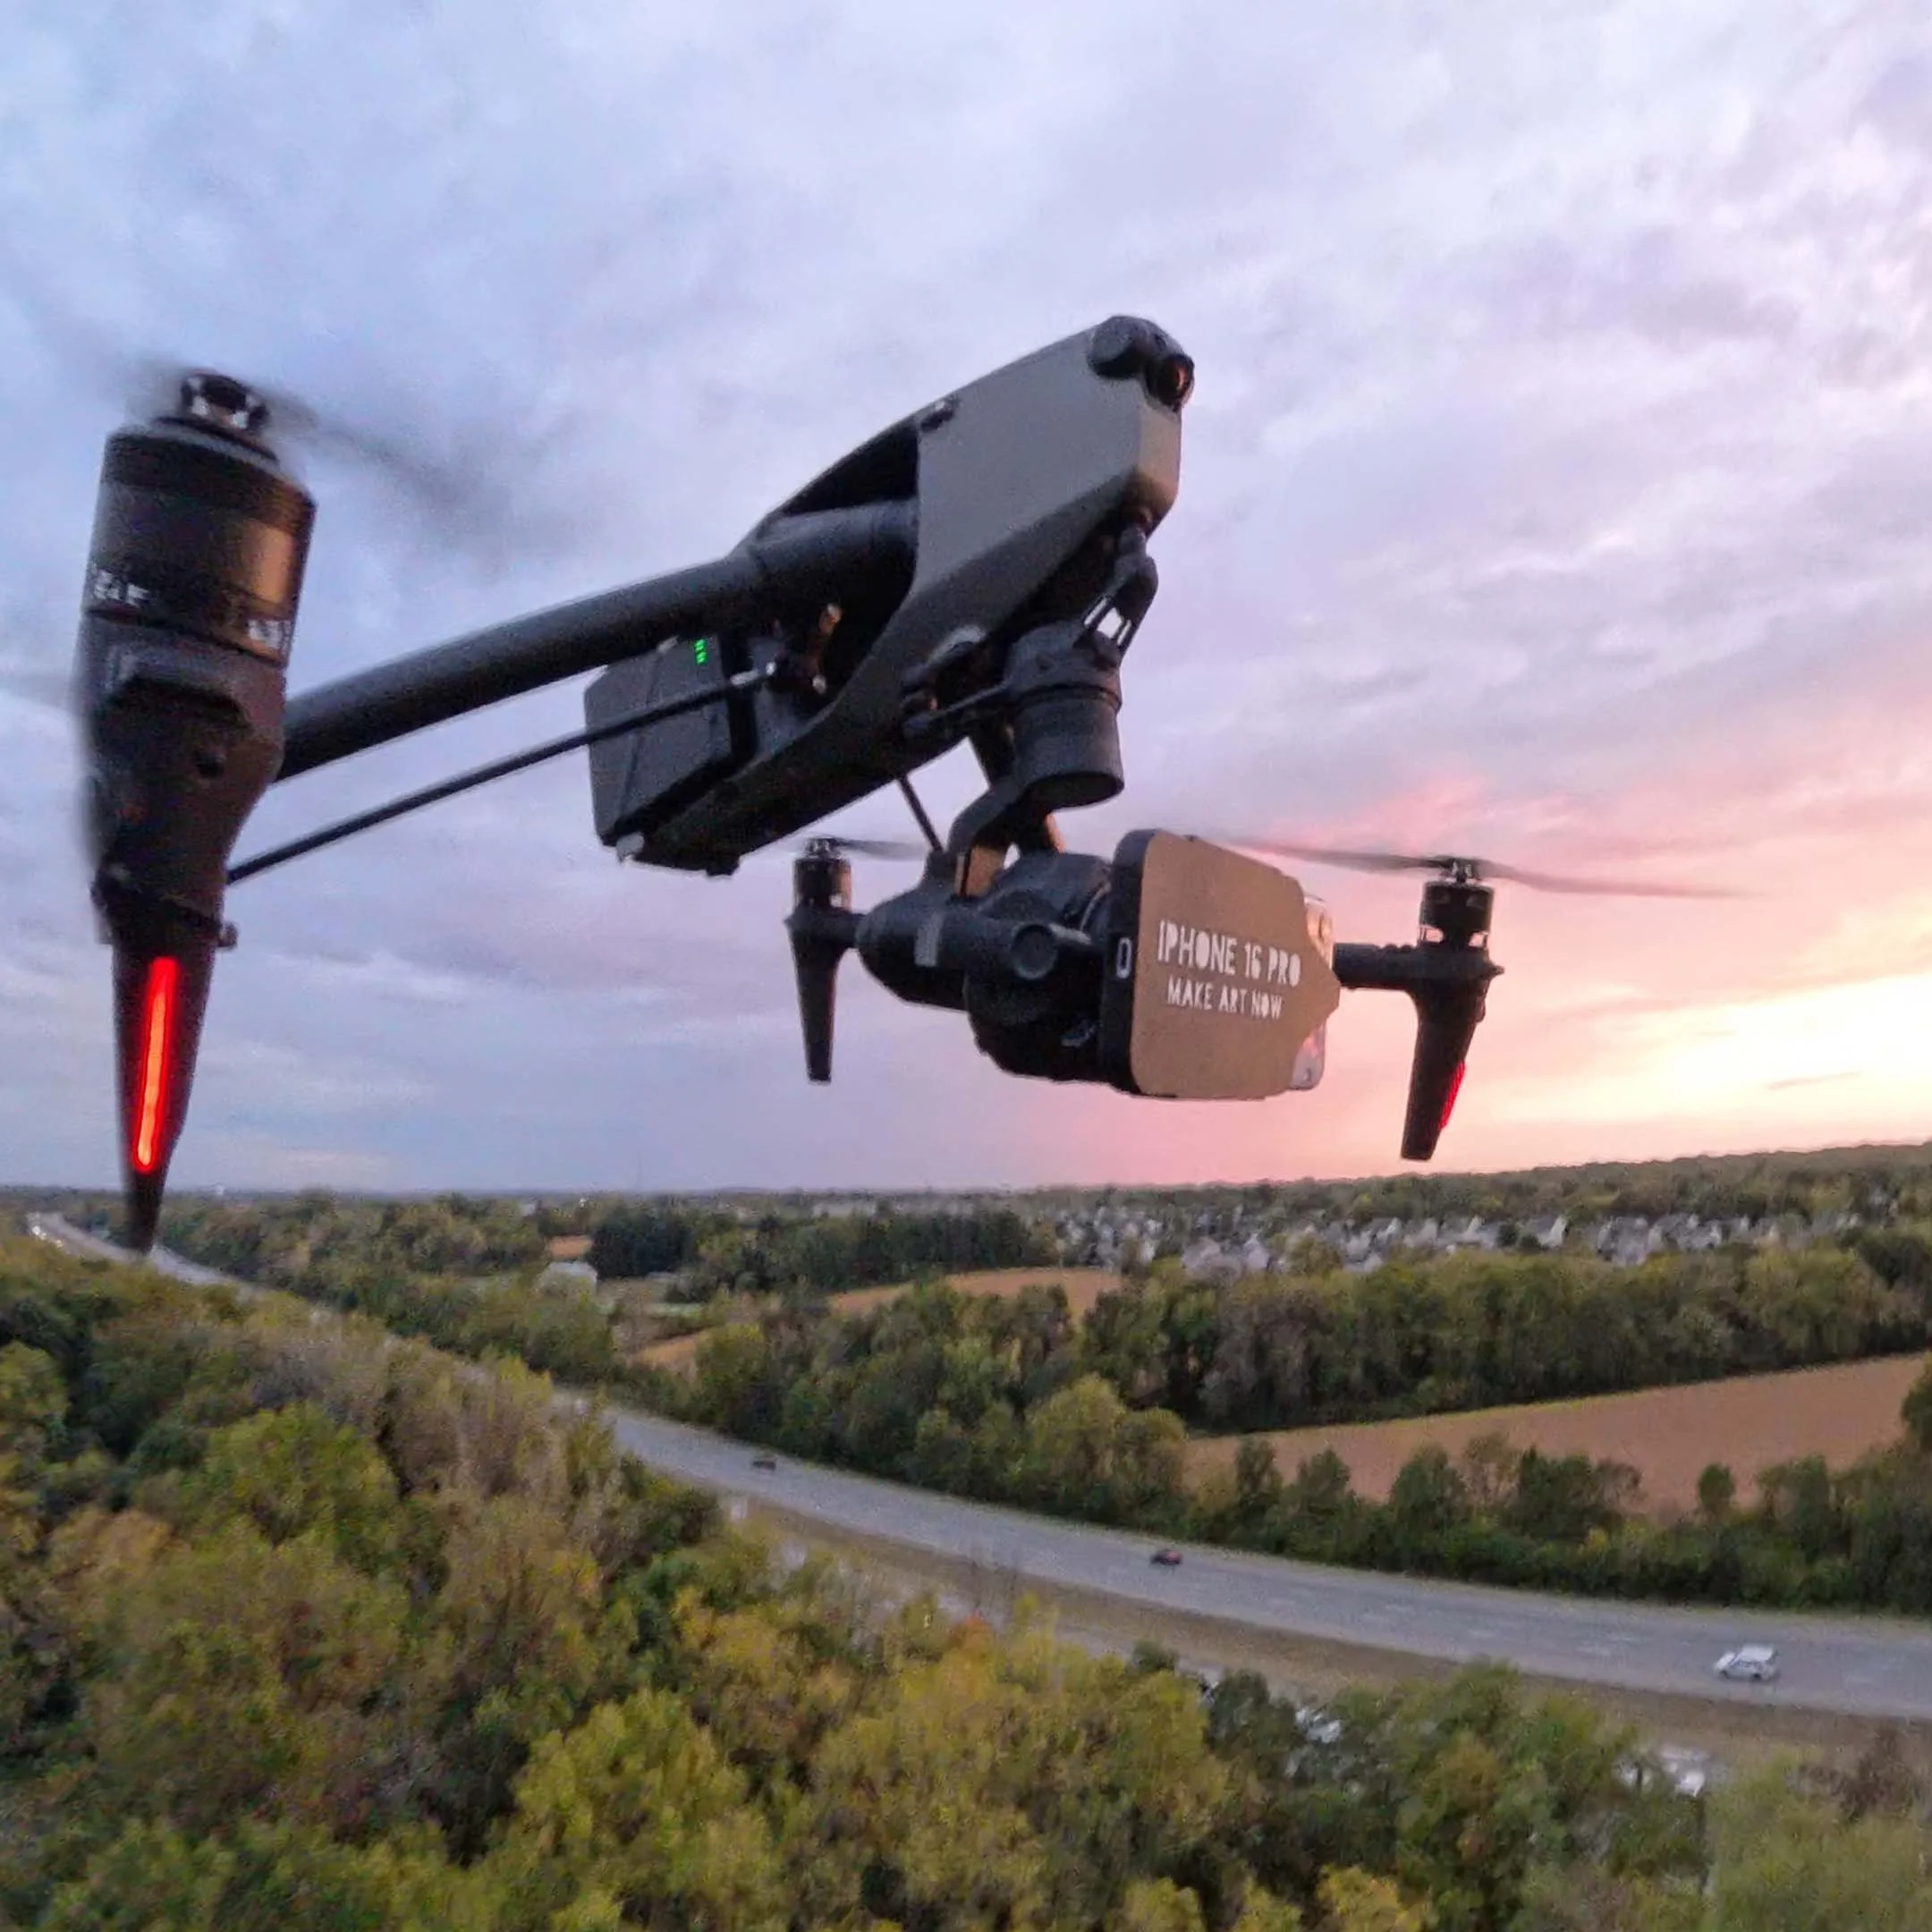
- INSPIRE 3 -

3 Piece Counter Weight Set for DJI Inspire 2 X7
Specifically designed for Inspire 2 X7 Gimbal
Fly 25+ lenses.
Clears without rubbing, all three axis.
Fly lenses up to 400g (Anamorphic, Telephoto, Lowlight, and Ultra wide angle)
What’s Included
(1) Rear Gimbal Plate + (4) 46g Tungsten Weights
(1) Roll Arm Bracket + (2) 7g Tungsten Weights
(1) Pan Arm Bracket +(2) 46g Tungsten Weight
(2) 7g Blank disks ( Holds additional 7g derby weights that are sold on Amazon seperatly)
The i2 Kit flys lenses under 360g and 86mm in length.
HOW DOES IT WORK?
3 separate adjustable counterweights for all three axis; Pan Axis, Tilt Axis, & Roll Axis.
Kits Include Tungsten Weights.
Additional Weights can be purchased separately.
Counter weights can be adjusted in seconds to fit different size / weight lenses.
Fly different lenses (anamorphic lenses, low light lenses, vintage lenses, telephoto lenses) .
Made with highly durable PETG (3D printed materials). Wont deform in hot car.
2 Year Warranty or all 3D Printed Products.
FULL AXIS PAN AND TILT
These are designed specifically for the Inspire 2 for minimal changes to aerodynamics and retain full gimbal movement on all axis.
Each kit can adjust for all three axis, (tilt, pan, roll) by adding or removing tungsten counter weights.
*This depends on lenses weight and size, and users skill and accuracy in counter balancing them; not all lenses will perform as smooth as native DL lenses and heavier / longer lenses will have vibrations at certain degrees of Tilt or Pan. This kit makes no guarantee that footage will be smooth with all lenses listed.
INSTALL ONCE, LEAVE IT MOUNTED
Dry weight is only a few grams.
Can still fly DL lenses when installed but without weight.
When using a 3rd party lens, simply install lens and add required weights until balance is achieved.
LENSES YOU CAN FLY WITH THIS KIT ?
NOTE: I make no guarantee that these all these lenses can fly vibration free for all tilt angles and speeds, skill and finesse at balancing and flying are required.
You can fly lenses with either Adapters (see below) or select lenses like Sony lenses with specially designed bayonets (also see below)
Nikon 100mm f2.8 (Buy used on ebay)
ADD ON PRODUCTS
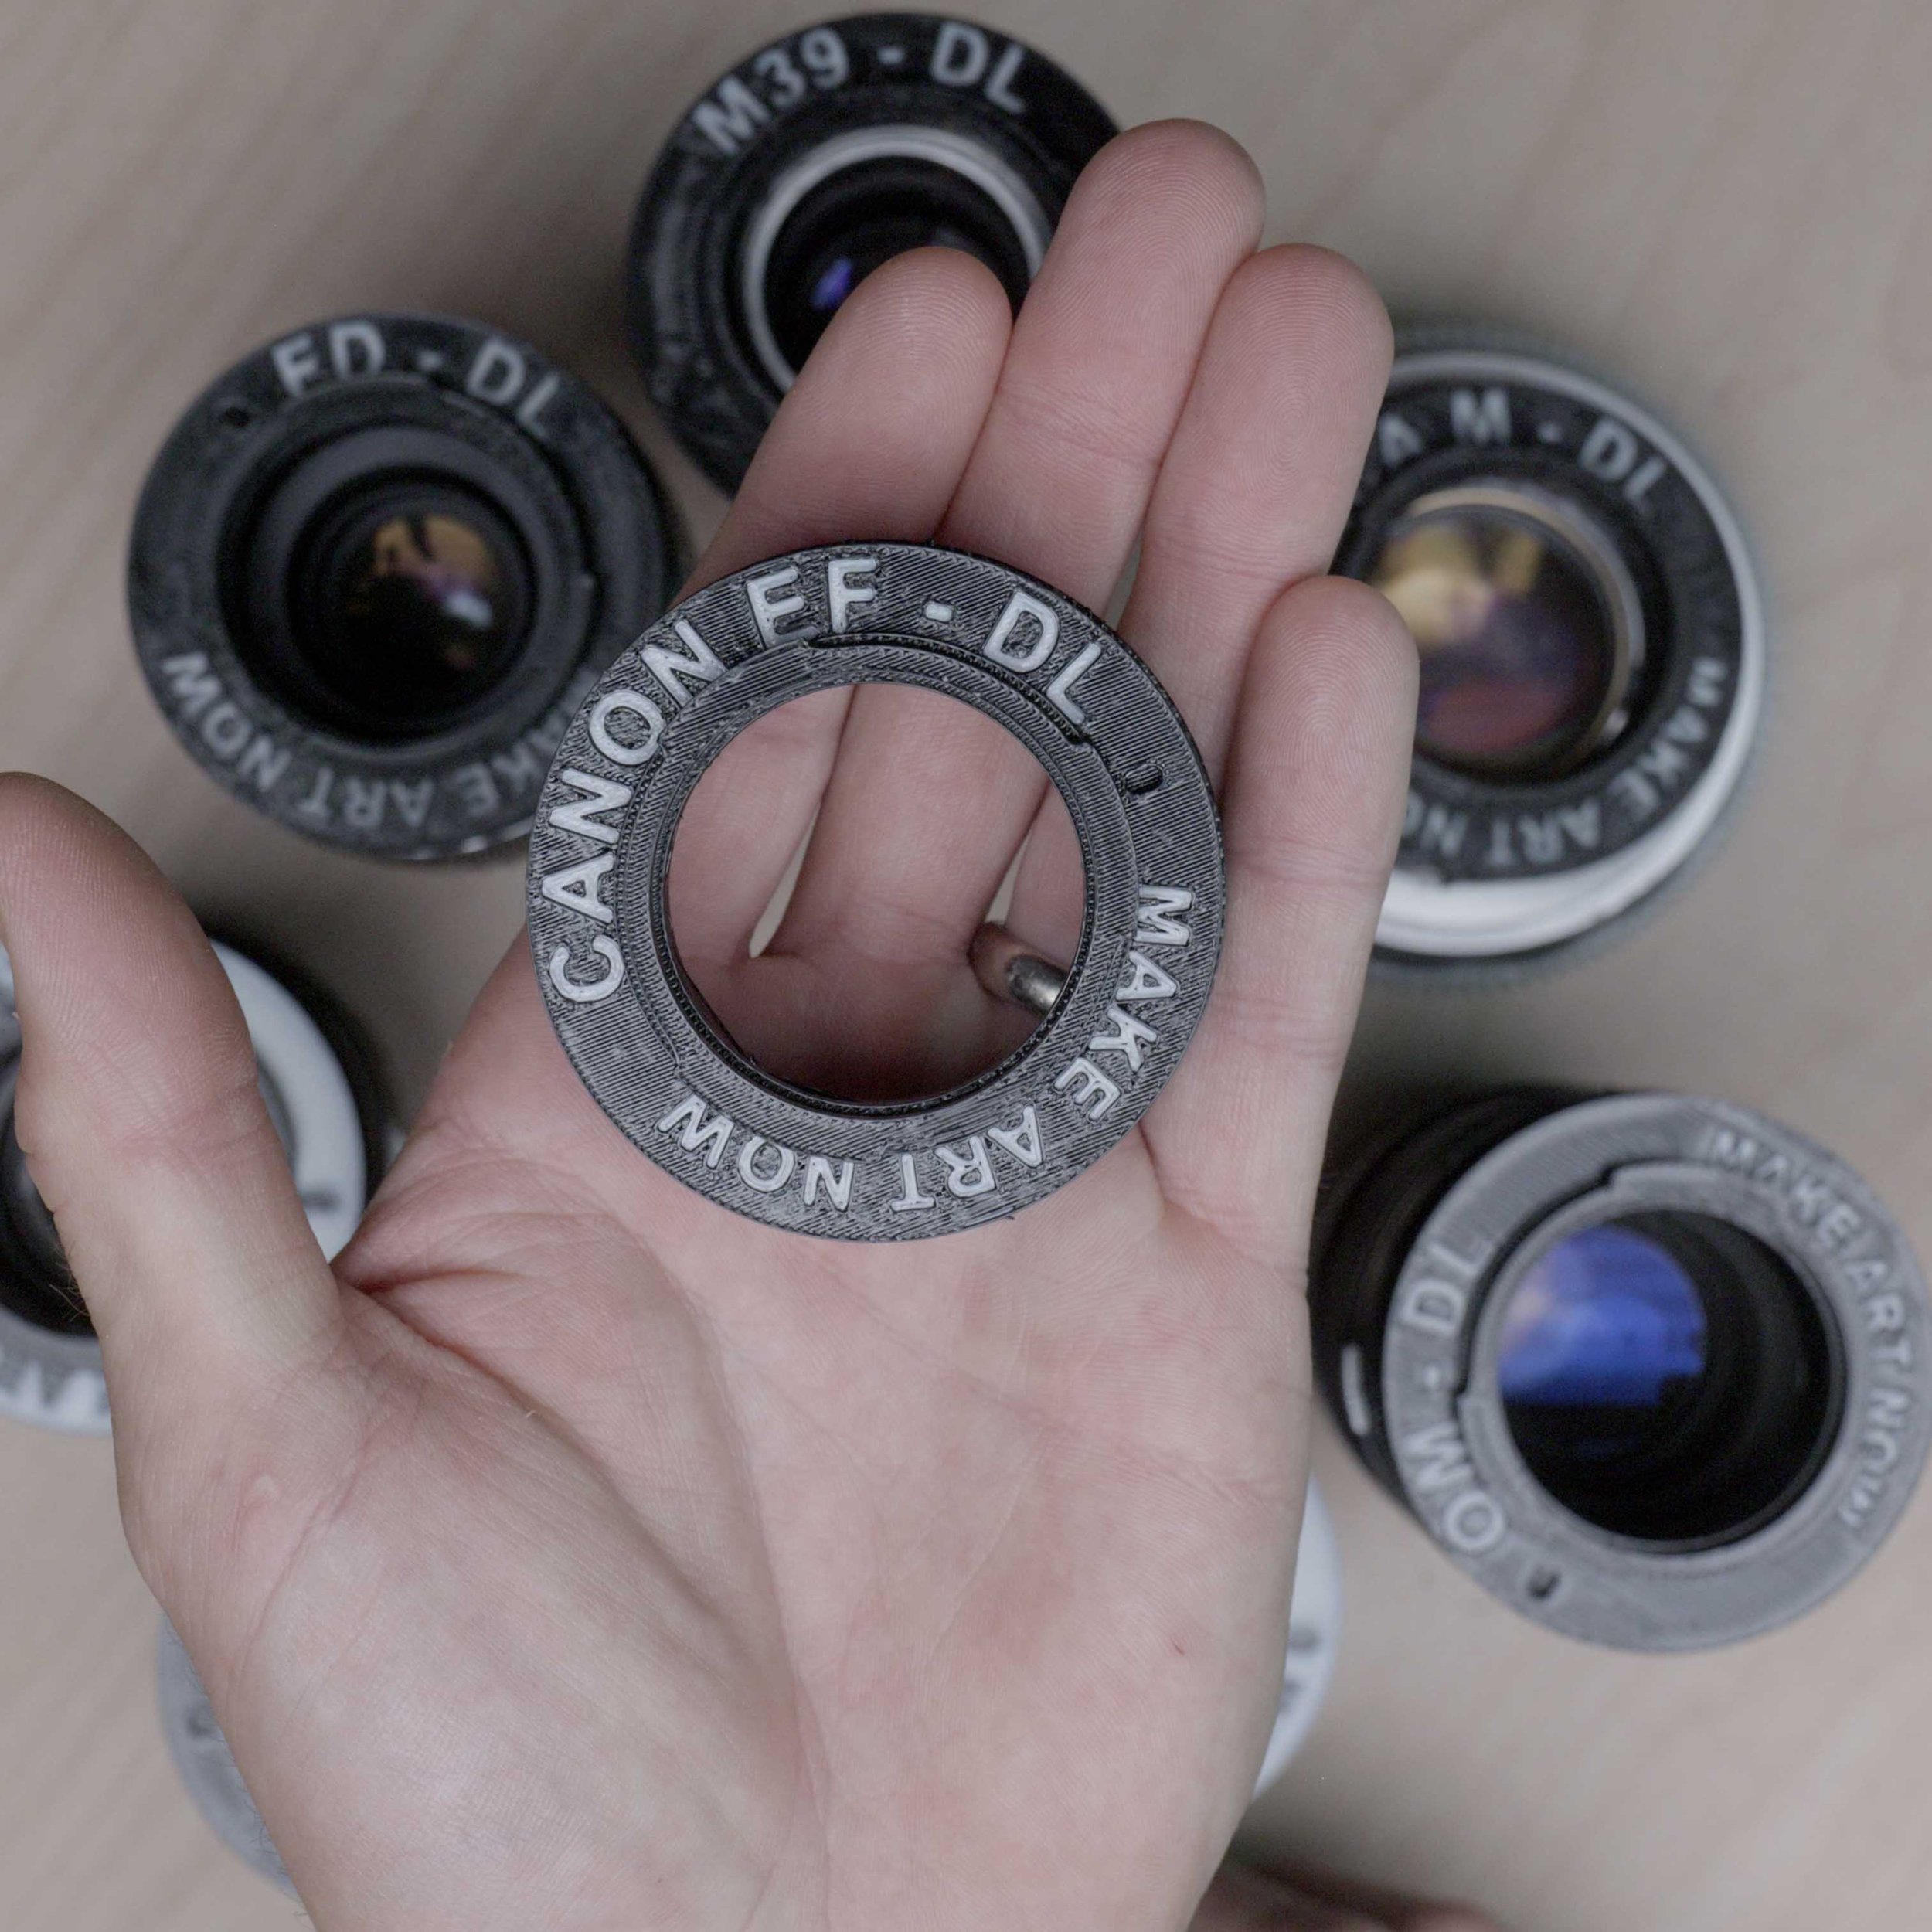
DL Lens Adapters
(Buy 4 Adapters $65)
(Buy all 8 $120)
Leica M to DL $20
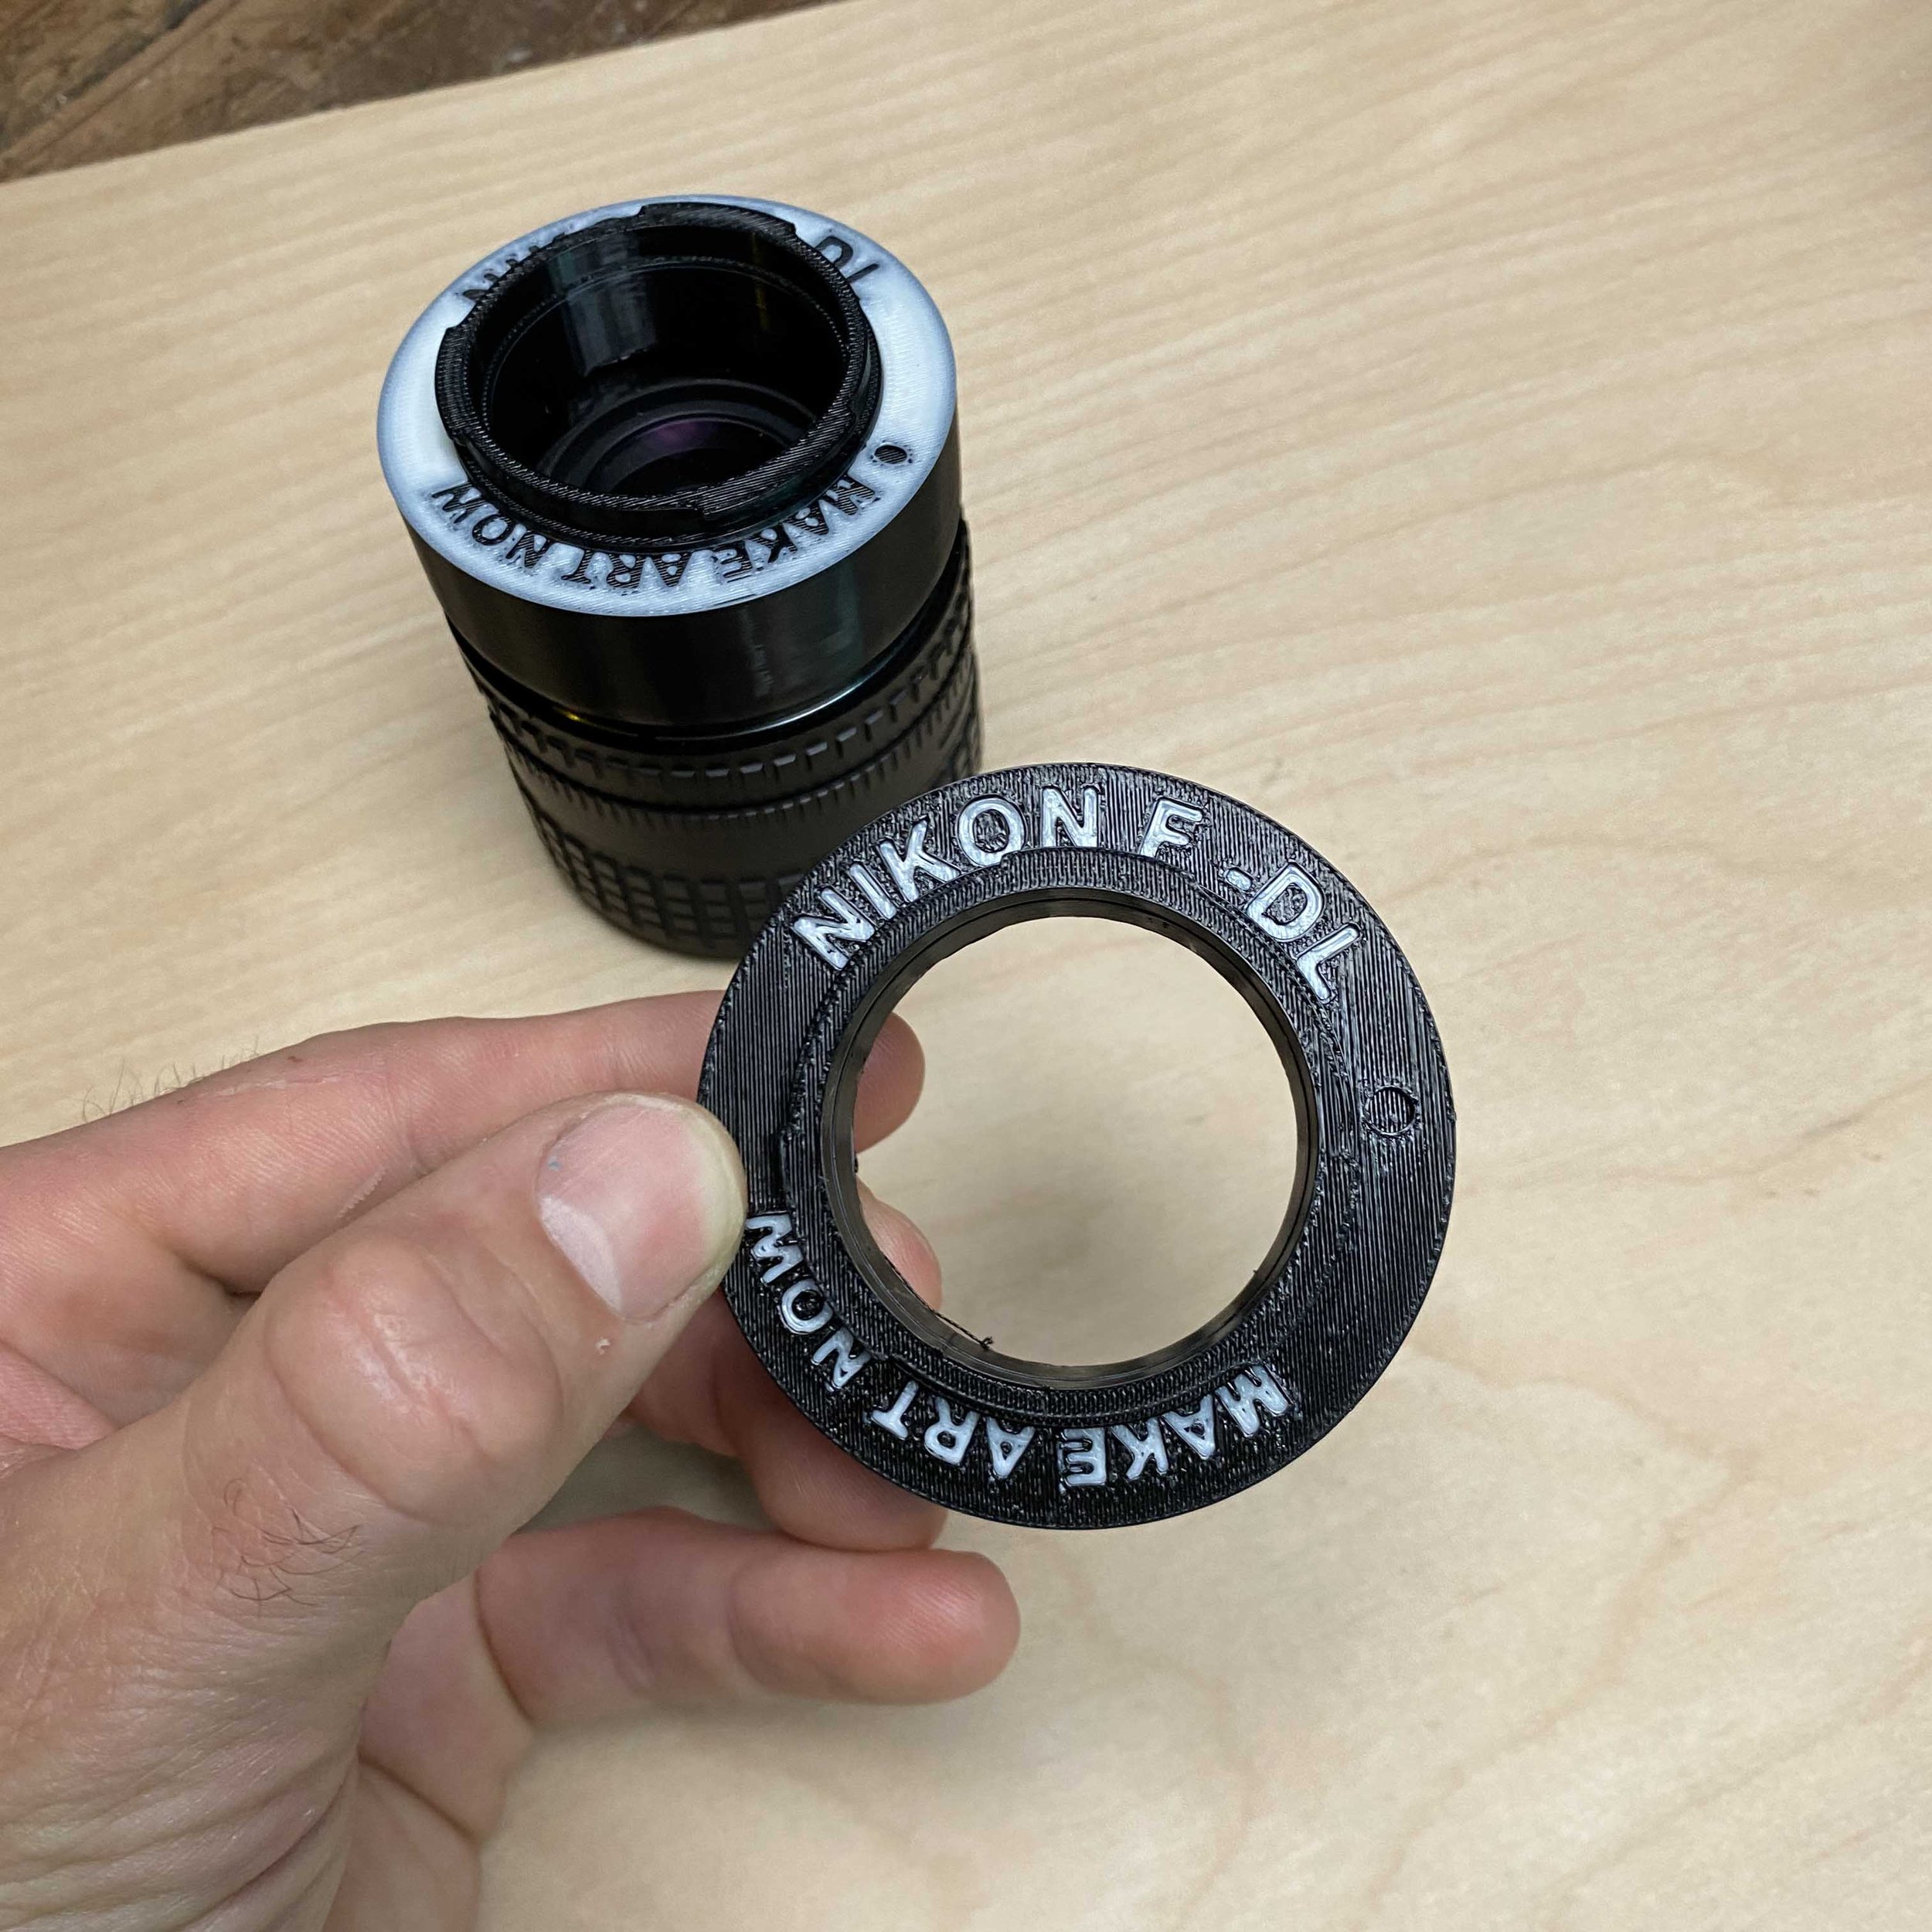
Nikon F to DL $20
Minolta MD to DL $20
Canon EF to DL $20
Canon FD to DL $20
Olympus OM to DL $20
M39 to DL $20
M42 to DL $20
REAR ND FILTER - FireCrest $75
Firecrest ND fits any of the adapters above, now you can fly any lens with rear mount ND. These are color nuetral and are trusted with cinematographers everywhere.
Not only does this make ND possible for every lens, (saves a ton of money), but it prevents ghosting from front mount ND, and it also adds more stability to flight by adding more weight towards the center mass. Sometimes adding weight to front of lens can make lenses much harder to balance and fly vibration free, using a Rear ND is our way around this and works very well.
Fire Crest ND 32, ND64, ND128, ND256
$75 each (these pop in and out easily and fit all the DL adapters)
Lens Bayonets
TT Artisan 50mm f0.95 APS-C to DL - Lens Bayonet for Inspire 3 $20
Laowa 9mm f5.6 to DL - Lens Bayonet for Inspire 3 $20
7 Artisan 35mm F0.95 APS-C to DL - Lens Bayonet for Inspire 3 $20

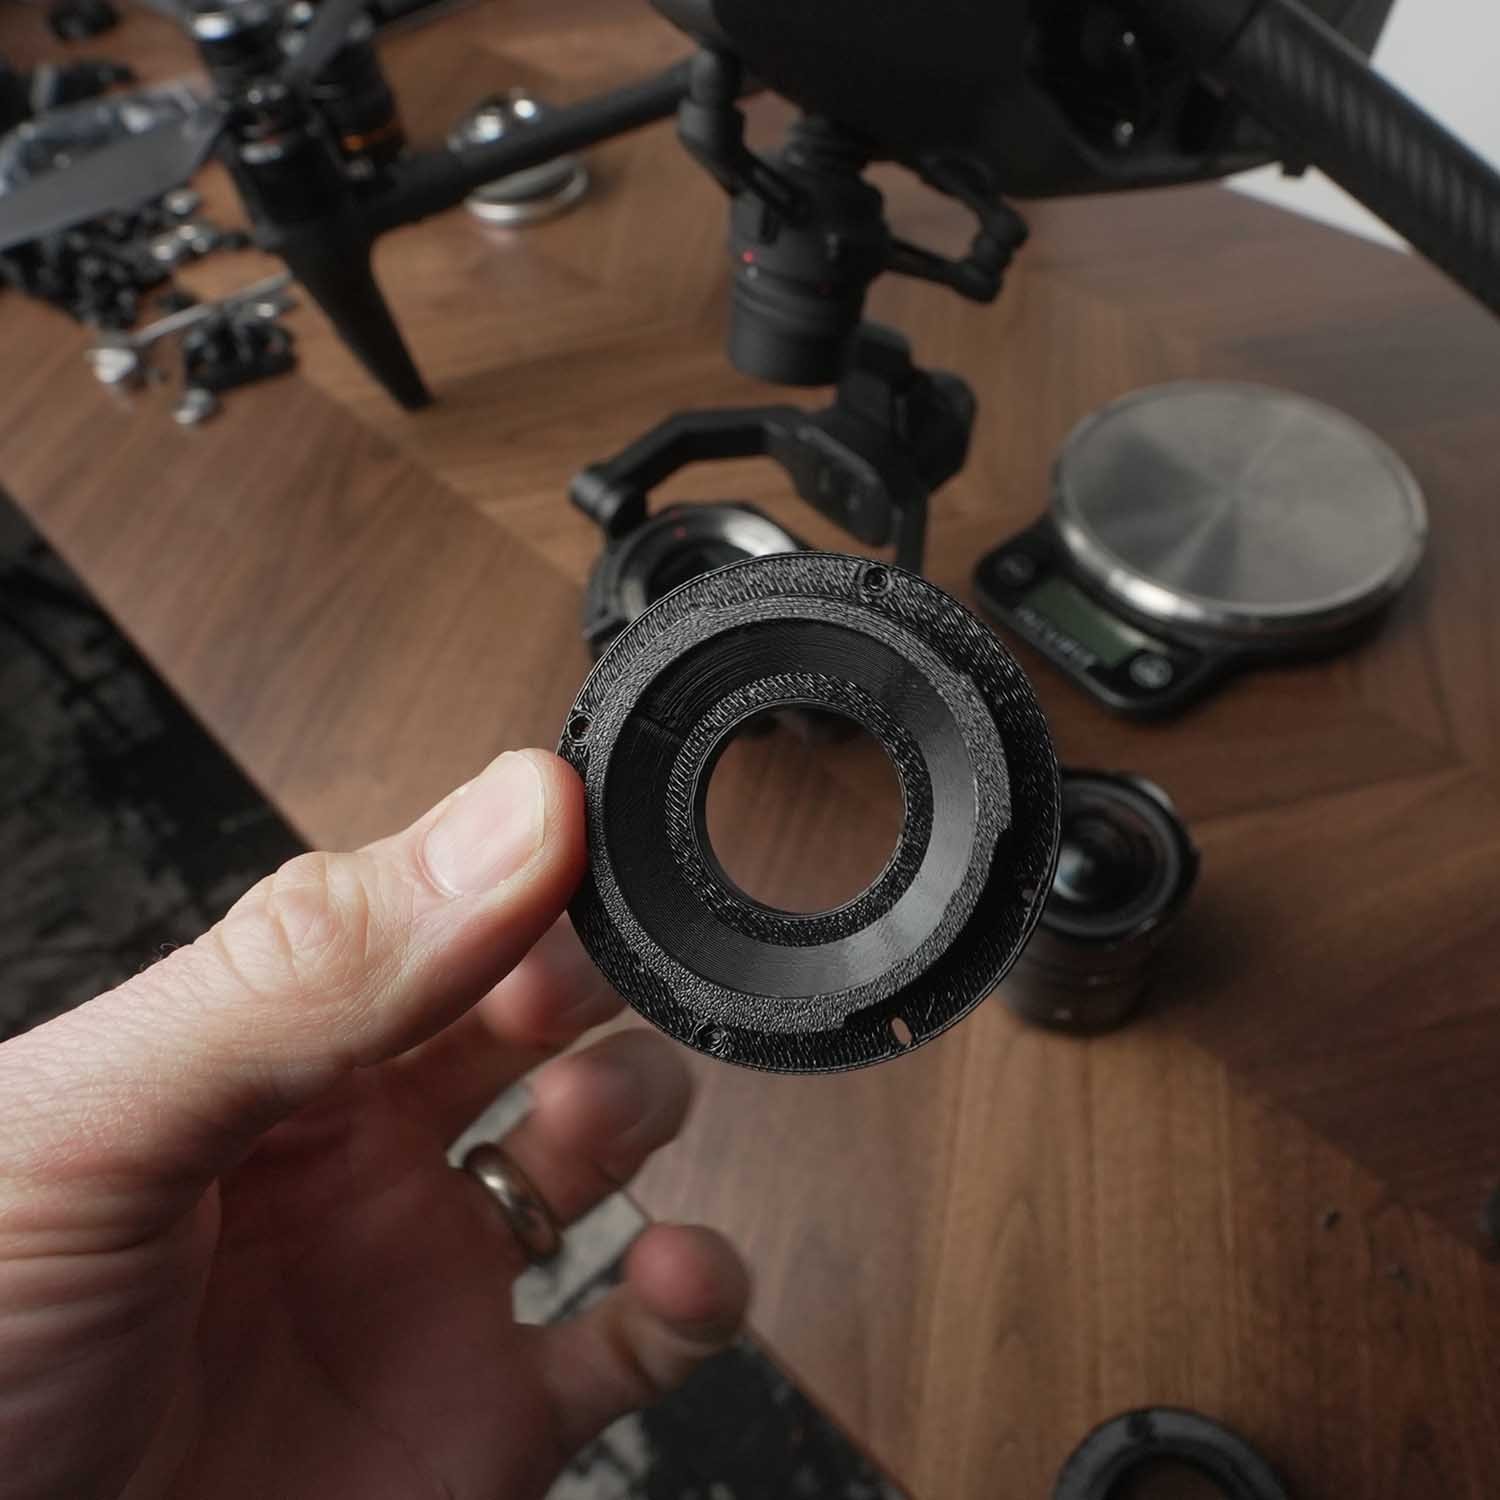
High Quality PETG 3D Printed Lens Adapter
This is a DJI DL Mount lens bayonet that screws into the back of the Canon dual Fisheye 5.2mm lens, and also screws into a stripped down version of the Inspire 3. This takes 1-2 hours for first time install, and is advised to leave on lens for faster install times later. Once mounted to the lens, the install time on the Inspire 3, is reduced to 20 minutes. Therefore, it is suggested that this kit be used on back up drones, as the sheer install and un install time is not conducive for a fast moving set.
Watch Spatial video sample here
If needing a fast option, you can rent my Inspire 3 gimbal with lens attached here on sharegrid ( can ship as long as the rental is in USA)
This kit is 100% reversible, but it takes just as much work to reverse as it does to install.
What’s Included
(1) 3d printed - Replacement bayonet for Canon RF mount 5.2mm dual fisheye FF lens. (does not include lens)
(1) 3d printed - Replacement Focus Gear for 5.2mm RF lens. (In order to fit, you must remove lens housing and old focus ring and replace with this slimmer one)
(4) screws to mount to drone
Only works with L mount version.
Necessary tools and accessories
XL counter weight for Inspire 3.
this lens is significantly heavier than any other lenses that work for inspire 3, and you will need the MAKE ART NOW , XL Counter weight kit, sold separately.
You will need Micro screwdriver (electric preferred)
Plastic Gloves
Steady hands.
Flight Characteristics
Flight characteristics are significantly modified with heavy lenses. Fly with extreme caution with this lens. Not only are you flying with more lens weight but also more counter weight. Fly very slow and avoid windy conditions or high altitudes (above 8,000ft). Some vibrations are to be expected at certain gimbal tilt angles or various climate conditions. Warmer, high altitude conditions increase propellor speed, thus increases wind vibration.
DISCLAIMER - YOU FLY AT YOUR OWN RISK
The DJI inspire 3 is designed to fly compact lenses that are 169g, and flying heavier and bigger lenses will change flight and gimbal characteristics. By purchasing this adapter you accept the risk of personal injury, death and or destruction of property due to the changes to the flight characteristics. This sale makes no guarantee that the lenses the adapter is intended for will work with full functionality, mobility, and aerodynamics. Be smart, fly slow, make a test flight first, YOU FLY AT YOUR OWN RISK.
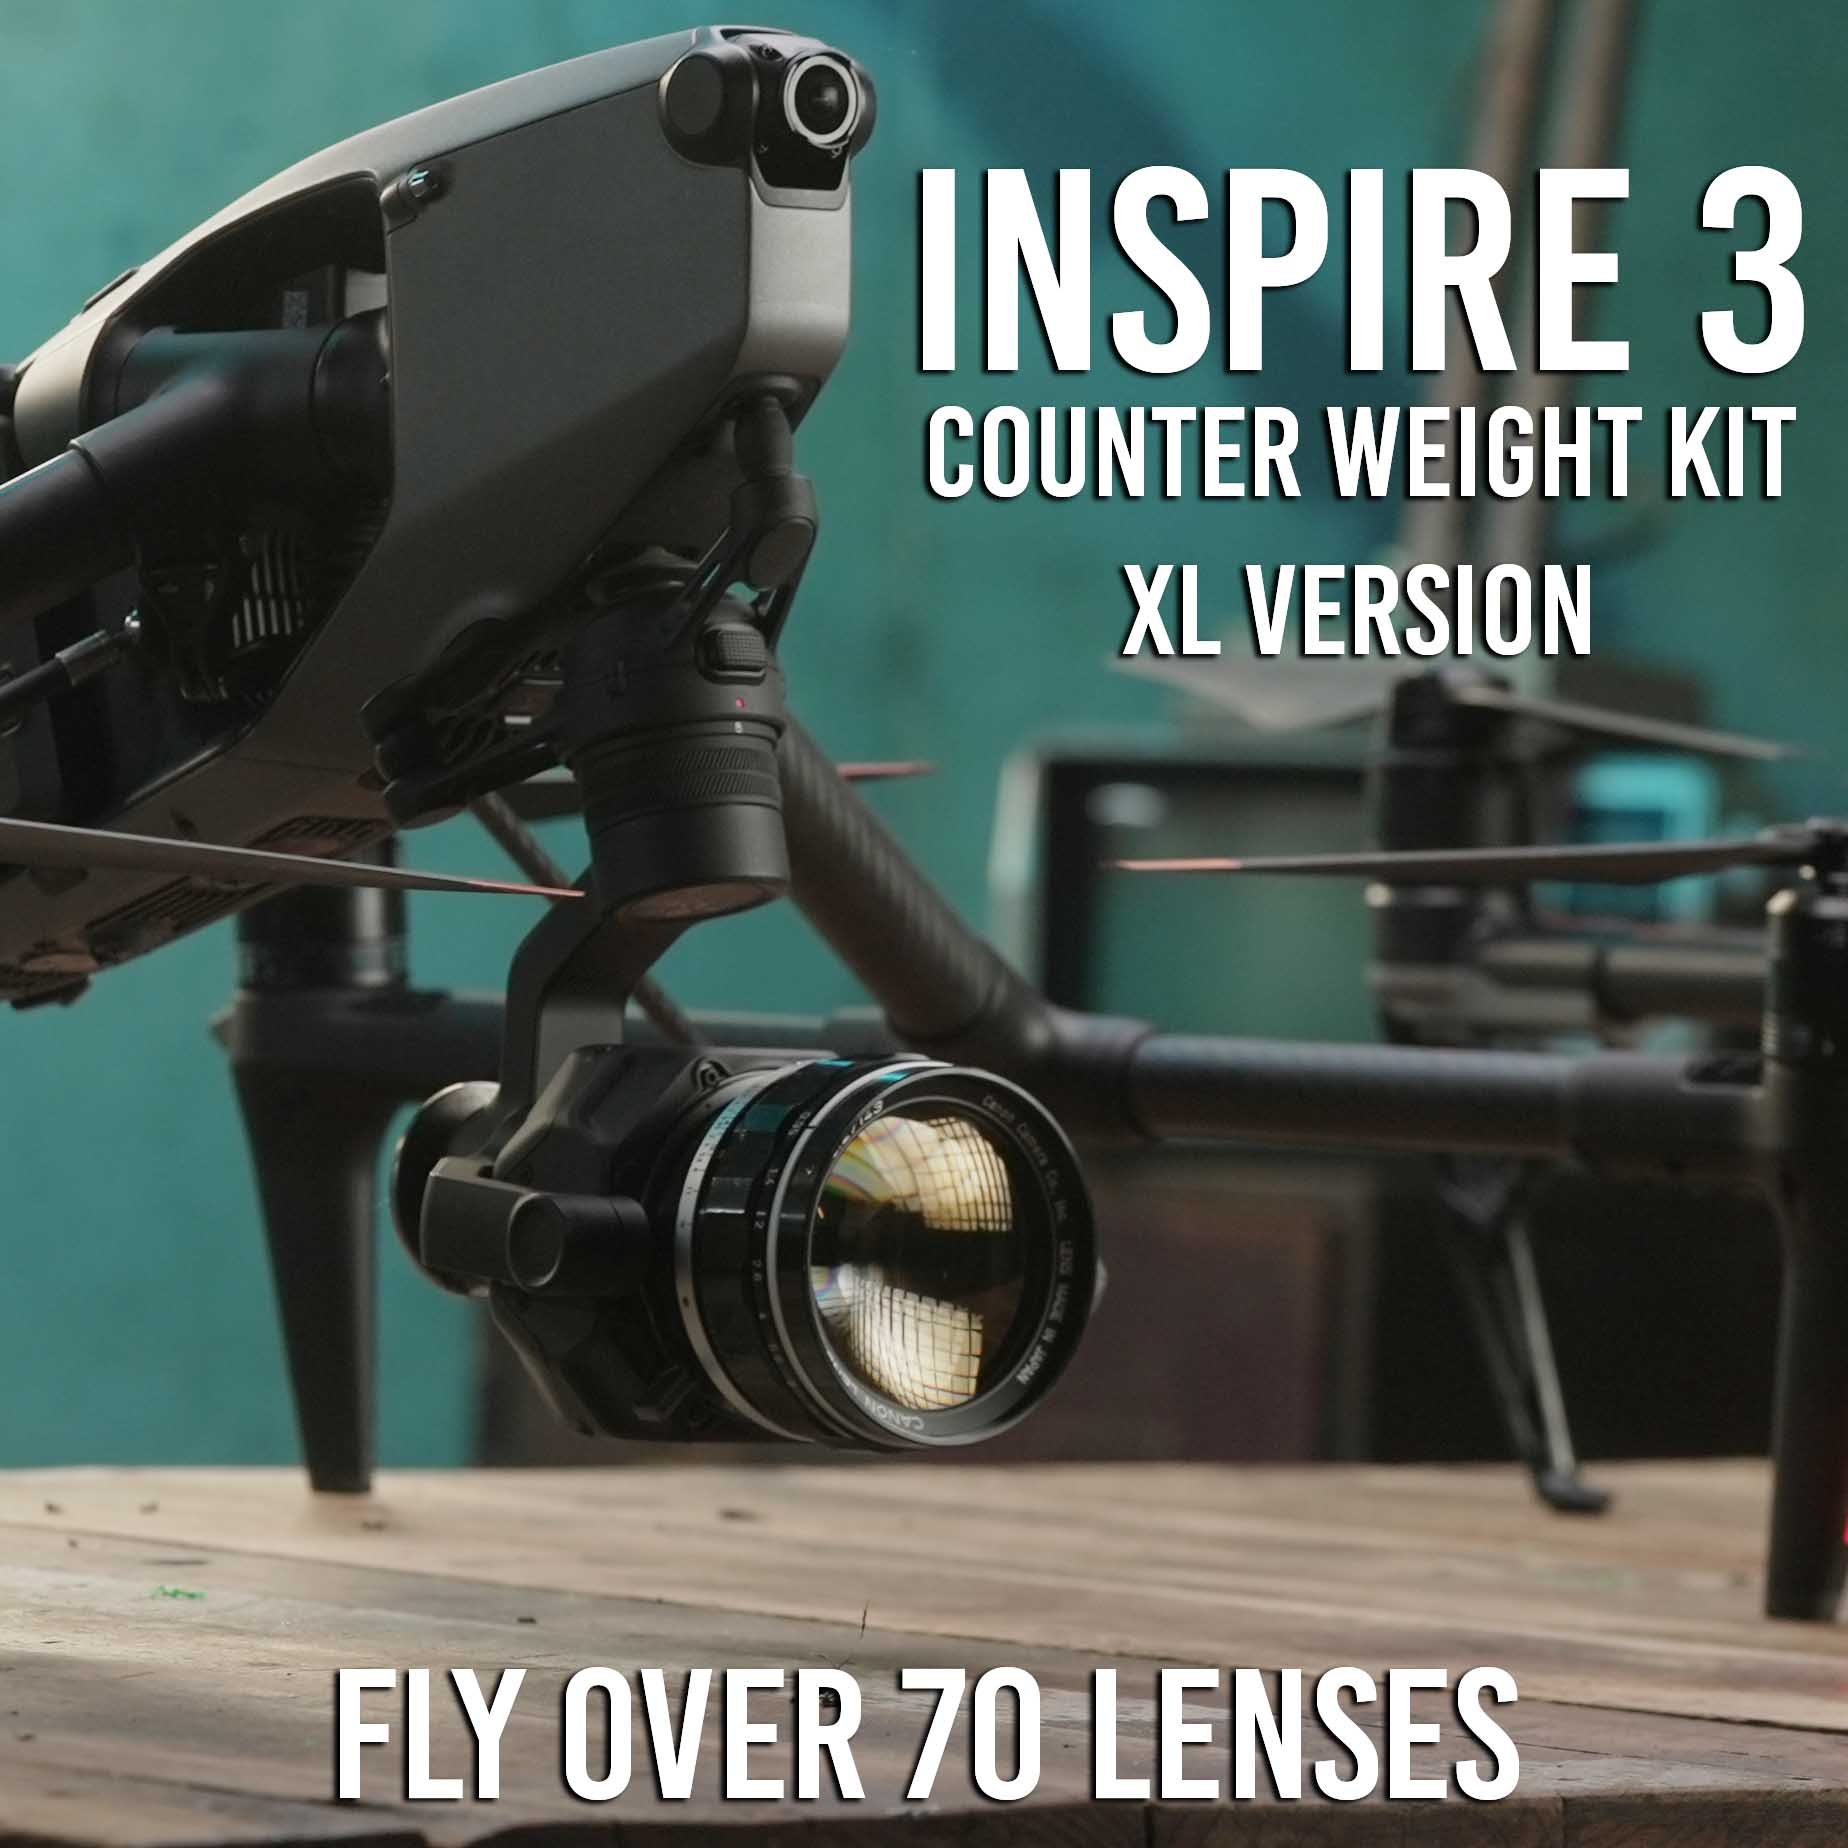
3 Piece Counter Weight Set for DJI Inspire 3 - XL VERSION
Specifically designed for Inspire 3.
Fly up to 70+ different lenses.
Clears without rubbing, all three axis.
Fly lenses up to 600g (Anamorphic, Telephoto, Lowlight, Ultra wide angle)
WHAT’S IN THE XL KIT?
(1) Rear Gimbal Plate + (2) 92g Tungsten Weights + (2) 46g Tungsten Weights
(1) Roll Arm Bracket + (4) 7g Tungsten Weights
(1) Pan Arm Bracket +(1) 92g Tungsten Weight + (1) 46g Tungsten Weight
(2) 7g Blank disks (Additional 7g derby weights sold on Amazon)
(2) 14g Blank disks (Additional 7g derby weights sold on Amazon)
This kit is ideal for flying all the lenses, light or heavy. With this kit, we have flown lenses as heavy as 600g.
*Flying 600g lenses is a balancing challenge, and while total axis movement was achived, smooth vibration free flight was only possible at fixed forward orientation and slow flying.
HOW DOES IT WORK?
3 separate adjustable counterweights for all three axis; Pan Axis, Tilt Axis, & Roll Axis.
Kits Include Tungsten Weights.
Additional Weights can be purchased separately.
Counter weights can be adjusted in seconds to fit different size / weight lenses.
Fly 50 different lenses (anamorphic lenses, low light lenses, vintage lenses, telephoto lenses) .
Made with highly durable and flexible PETG, and TPU (3D printed materials).
2 Year Warranty or all 3D Printed Products.
FULL AXIS TILT AND PAN
These are designed specifically for the Inspire 3 for minimal changes to aerodynamics and retain full gimbal movement on all axis.
Each kit can adjust for all three axis, (tilt, pan, roll) by adding or removing tungsten counter weights.
*This depends on lenses weight and size, and users skill and accuracy in counter balancing them; not all lenses will perform as smooth as native DL lenses and heavier / longer lenses will have vibrations at certain degrees of Tilt or Pan.This kit makes no garantee that footage will be smooth with all lenses listed.
INSTALL ONCE, LEAVE IT MOUNTED
Dry weight is only a few grams.
Can still fly DL lenses when installed but without weight.
When using a 3rd party lens, simply install lens and add required weights until balance is achieved.
FLY WAY MORE LENSES
Fly most lenses under 500grams and less that 4 inches in length with this counter weight set.
See our growing list of lenses in the photo below.
Standard VS XL kit
The only draw back is the XL kit is a little larger and bulkier and you will be flying around extra weight when flying the smaller lenses, (slightly worse battery performance)
You can fly all the lenses from the standard kit plus heavier lenses.
Anamorphic Lenses
Wide Angle Lenses
Telephoto Lenses
Low Light Lenses
ADD ON PRODUCTS
DL Lens Adapters
(Buy 4 Adapters $65)
(Buy all 8 $120)
Leica M to DL $20
Nikon F to DL $20
Minolta MD to DL $20
Canon EF to DL $20
Canon FD to DL $20
Olympus OM to DL $20
M39 to DL $20
M42 to DL $20
REAR ND FILTER - FireCrest $75
Firecrest ND fits any of the adapters above, now you can fly any lens with rear mount ND. These are color neutral and are trusted with cinematographers everywhere.
Not only does this make ND possible for every lens, (saves a ton of money), but it prevents ghosting from front mount ND, and it also adds more stability to flight by adding more weight towards the center mass. Sometimes adding weight to front of lens can make lenses much harder to balance and fly vibration free, using a Rear ND is our way around this and works very well.
( MOST SOLD OUT: Only ND filters left are (1-stop, 7-stop, 8-stop)
$75 each (these pop in and out easily and fit all the DL adapters)
Lens Bayonets
TT Artisan 50mm f0.95 APS-C to DL - Lens Bayonet for Inspire 3 $20
Laowa 9mm f5.6 to DL - Lens Bayonet for Inspire 3 $20
7 Artisan 35mm F0.95 APS-C to DL - Lens Bayonet for Inspire 3 $20
DL Adapters
High Quality PETG 3D Printed Lens Adapter
This is a DL Mount lens Adapter . This works along with the standard counter weight kit or XL counter weight kit to adapt and use the following lenses on the DJI Inspire 3 (lenses sold separately)
What’s Included
(1) 3d Printed Adapter - Canon EF to DL
*These are specifically designed for i2 and i3, and NOT intended for R4D and may not fit correctly or fall off under rigorous use on the R4D.
Lenses this Adapts:
This can adapt most any canon EF thats less than 450g and under 4 inches, which is about 55-60 lenses.
Works well with Helios 44m2 (thats adapted to EF)
Works with small EF manual lenses under aforementioned size restrictions.
How this works
Step 1. Install lens on Inspire 3 along with the Counter Weight kit and appropriate weights.
Step 2. Set focus to infinity on the ground.
Step 3. Lock focus with a small piece of gaffe tape on the lens. You will not get Autofocus with these lenses.
Step 4. Make sure gimbal lens lock has locked in lens correctly.
Counter weight kit needed to fly
You will need the Standard or XL Counter Weight Kit
amounts of weights vary with different lenses.
Balls of steel
ADD ON ITEMS
REAR ND FILTER - FireCrest $75
Firecrest ND fits any of the adapters above, now you can fly any lens with rear mount ND. These are color nuetral and are trusted with cinematographers everywhere.
Not only does this make ND possible for every lens, (saves a ton of money), but it prevents ghosting from front mount ND, and it also adds more stability to flight by adding more weight towards the center mass. Sometimes adding weight to front of lens can make lenses much harder to balance and fly vibration free, using a Rear ND is our way around this and works very well.
Fire Crest ND 32, ND64, ND128, ND256
$75 each (these pop in and out easily and fit all the DL adapters)
DISCLAIMER - YOU FLY AT YOUR OWN RISK
The DJI inspire 3 is designed to fly compact lenses that are 169g, and flying heavier and bigger lenses will change flight and gimbal characteristics. By purchasing this adapter you accept the risk of personal injury, death and or destruction of property due to the changes to the flight characteristics. This sale makes no guarantee that the lenses the adapter is intended for will work with full functionality, mobility, and aerodynamics. Be smart, fly slow, make a test flight first, YOU FLY AT YOUR OWN RISK.
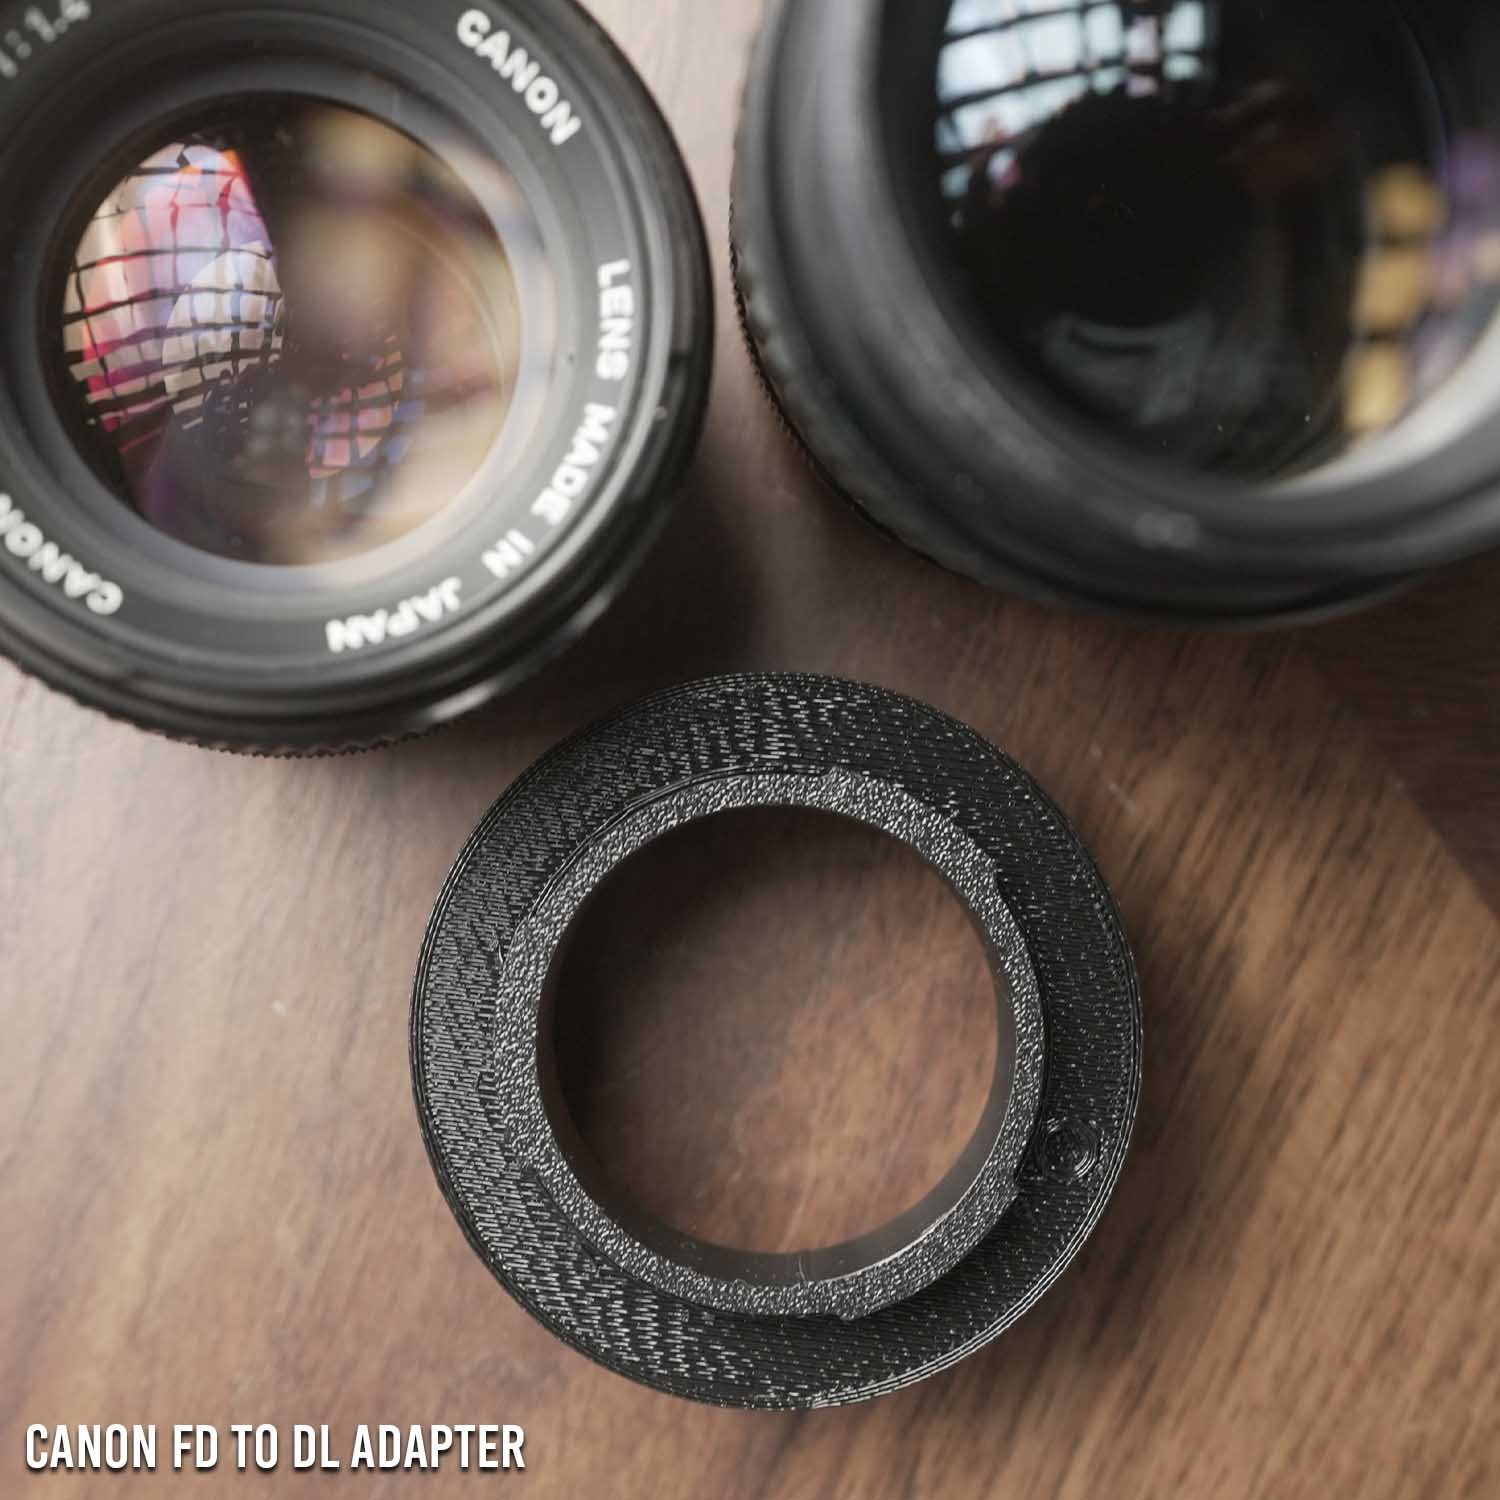
High Quality PETG 3D Printed Lens Adapter
This is a DL Mount lens Adapter . This works along with the standard counter weight kit or XL counter weight kit to adapt and use the following lenses on the DJI Inspire 3 (lenses sold separately)
What’s Included
(1) 3d Printed Adapter - Canon FD to DL
*These are specifically designed for i2 and i3, and NOT intended for R4D and may not fit correctly or fall off under rigorous use on the R4D.
Lenses this Adapts:
This can adapt most any canon fd thats less than 450g and under 4 inches, which is about 55-60 lenses.
Heres a compiled list of every canon FD lens ever made with barrel length and weight.
Canon FD 50mm f1.4 scc - Tested works with Standard or XL Counter weight kit.
Canon FD 135mm f2.8 - Tested, works only with XL kit and extra tungsten putty. Has some vibrations in wind, vibration free flying only possible in ideal circumstances and slow speeds.
How this works
Step 1. Install lens on Inspire 3 along with the Counter Weight kit and appropriate weights.
Step 2. Set focus to infinity on the ground.
Step 3. Lock focus with a small piece of gaffe tape on the lens. You will not get Autofocus with these lenses.
Step 4. Make sure gimbal lens lock has locked in lens correctly.
Counter weight kit needed to fly
You will need the Standard or XL Counter Weight Kit
amounts of weights vary with different lenses.
Balls of steel
DISCLAIMER - YOU FLY AT YOUR OWN RISK
The DJI inspire 3 is designed to fly compact lenses that are 169g, and flying heavier and bigger lenses will change flight and gimbal characteristics. By purchasing this adapter you accept the risk of personal injury, death and or destruction of property due to the changes to the flight characteristics. This sale makes no guarantee that the lenses the adapter is intended for will work with full functionality, mobility, and aerodynamics. Be smart, fly slow, make a test flight first, YOU FLY AT YOUR OWN RISK.
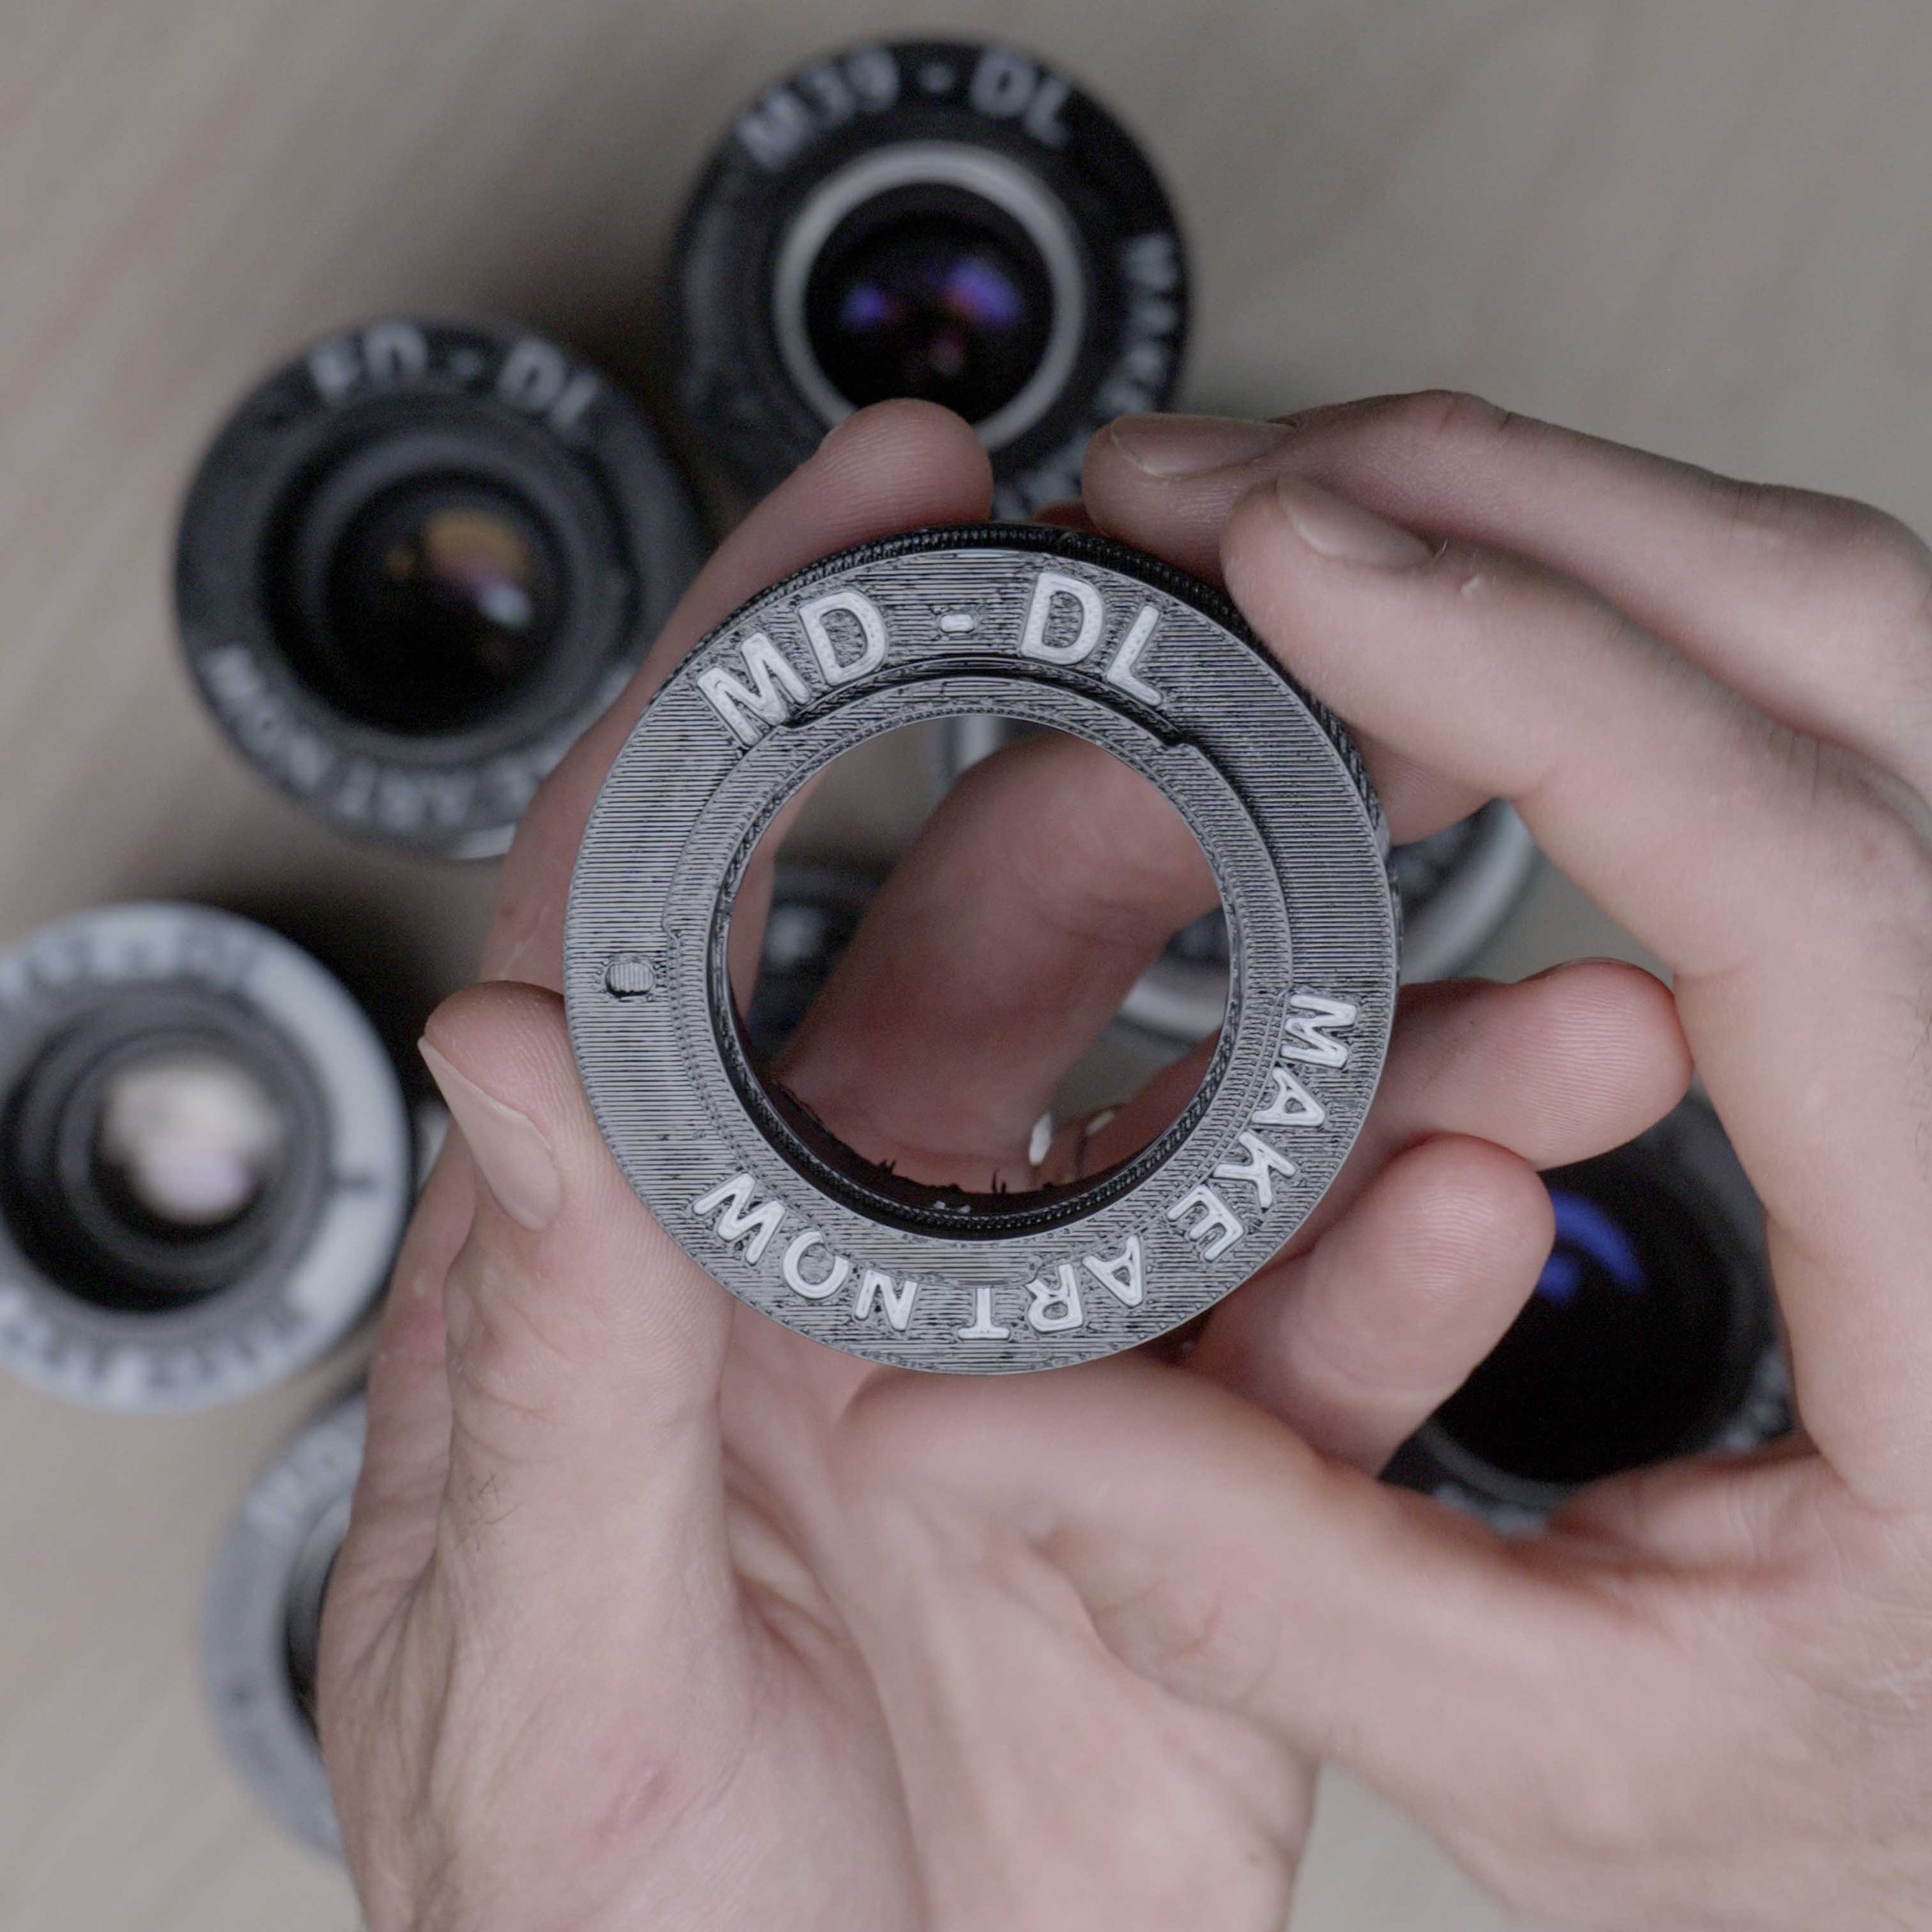
High Quality PETG 3D Printed Lens Adapter
This is a DL Mount lens Adapter . This works along with the standard counter weight kit or XL counter weight kit to adapt and use the following lenses on the DJI Inspire 3 (lenses sold separately)
*These are specifically designed for i2 and i3, and NOT intended for R4D and may not fit correctly or fall off under rigorous use on the R4D.
What’s Included
(1) 3d Printed Adapter - Minolta MD (also known as Minolta SR) to DL
See the Minolta 250mm Lens in action
https://youtu.beWatch this video-6jtvsNsTq4
Lenses this Adapts:
Minolta Rokkor 250mm (Used on Ebay) - (weight 350g) - tested, verified flight
Minolta Rokkor 135mm f3.5 - tested, verified flight
Minolta Rokkor 90mm f4
Minolta Rokkor 85mm f2.0
Minolta Rokkor 85mm f1.7
Minolta Rokkor 58mm f1.4 - tested, verified flight
Minolta Rokkor 45mm f2.0 - tested, verified flight
Minolta Rokkor 35mm f1.7
Minolta Rokkor 35mm f1.8
Minolta Rokkor 35mm f2.8
Minolta Rokkor 35mm f4
Minolta Rokkor 24mm f2.8
Minolta Rokkor 21mm f2.8
Minolta Rokkor 17mm f4
Flight Characteristics
Flight characteristics are significantly modified with heavy lenses. Fly with extreme caution with this lens. Not only are you flying with more lens weight but also more counter weight. Fly very slow and avoid windy conditions or high altitudes (above 8,000ft). Some vibrations are to be expected at certain gimbal tilt angles or various climate conditions. Warmer, high altitude conditions increase propellor speed, thus increases wind vibration.
How this works
Step 1. Install lens on Inspire 3 along with the Counter Weight kit and appropriate weights.
Step 2. Set focus to infinity on the ground.
Step 3. Lock focus with a small piece of gaffe tape on the lens. You will not get Autofocus with these lenses.
Step 4. Make sure gimbal lens lock has locked in lens correctly.
Counter weight kit needed to fly
You will need the Standard or XL Counter Weight Kit
amounts of weights vary with different lenses.
Balls of steel
DISCLAIMER - YOU FLY AT YOUR OWN RISK
The DJI inspire 3 is designed to fly compact lenses that are 169g, and flying heavier and bigger lenses will change flight and gimbal characteristics. By purchasing this adapter you accept the risk of personal injury, death and or destruction of property due to the changes to the flight characteristics. This sale makes no guarantee that the lenses the adapter is intended for will work with full functionality, mobility, and aerodynamics. Be smart, fly slow, make a test flight first, YOU FLY AT YOUR OWN RISK.
High Quality PETG 3D Printed Lens Adapter
This is a DL Mount lens Adapter . This works along with the standard counter weight kit or XL counter weight kit to adapt and use the following lenses on the DJI Inspire 3 (lenses sold separately) .
*These are specifically designed for i2 and i3, and NOT intended for R4D and may not fit correctly or fall off under rigorous use on the R4D.
What’s Included
(1) 3d Printed Adapter - Nikon F to DL
Lenses this Adapts:
Nikon 100mm f 2.8 - (used on ebay ) tested, verified flight
NIkon AIS 135mm f 2.8 (used on ebay ) Tested, very challenging lens to balance and fly vibration free, but still possible.
How this works
Step 1. Install lens on Inspire 3 along with the Counter Weight kit and appropriate weights.
Step 2. USet focus to infinity on the ground.
Step 3. Lock focus with a small piece of gaffe tape on the lens. You will not get Autofocus with these lenses.
Step 4. Make sure gimbal lens lock has locked in lens correctly.
Counter weight kit needed to fly
You will need the Standard or XL Counter Weight Kit
amounts of weights vary with different lenses.
Balls of steel
ADD ON ITEMS
REAR ND FILTER - FireCrest $75
Firecrest ND fits any of the adapters above, now you can fly any lens with rear mount ND. These are color nuetral and are trusted with cinematographers everywhere.
Not only does this make ND possible for every lens, (saves a ton of money), but it prevents ghosting from front mount ND, and it also adds more stability to flight by adding more weight towards the center mass. Sometimes adding weight to front of lens can make lenses much harder to balance and fly vibration free, using a Rear ND is our way around this and works very well.
Fire Crest ND 32, ND64, ND128, ND256
$75 each (these pop in and out easily and fit all the DL adapters)
DISCLAIMER - YOU FLY AT YOUR OWN RISK
The DJI inspire 3 is designed to fly compact lenses that are 169g, and flying heavier and bigger lenses will change flight and gimbal characteristics. By purchasing this adapter you accept the risk of personal injury, death and or destruction of property due to the changes to the flight characteristics. This sale makes no guarantee that the lenses the adapter is intended for will work with full functionality, mobility, and aerodynamics. Be smart, fly slow, make a test flight first, YOU FLY AT YOUR OWN RISK.
High Quality PETG 3D Printed Lens Adapter
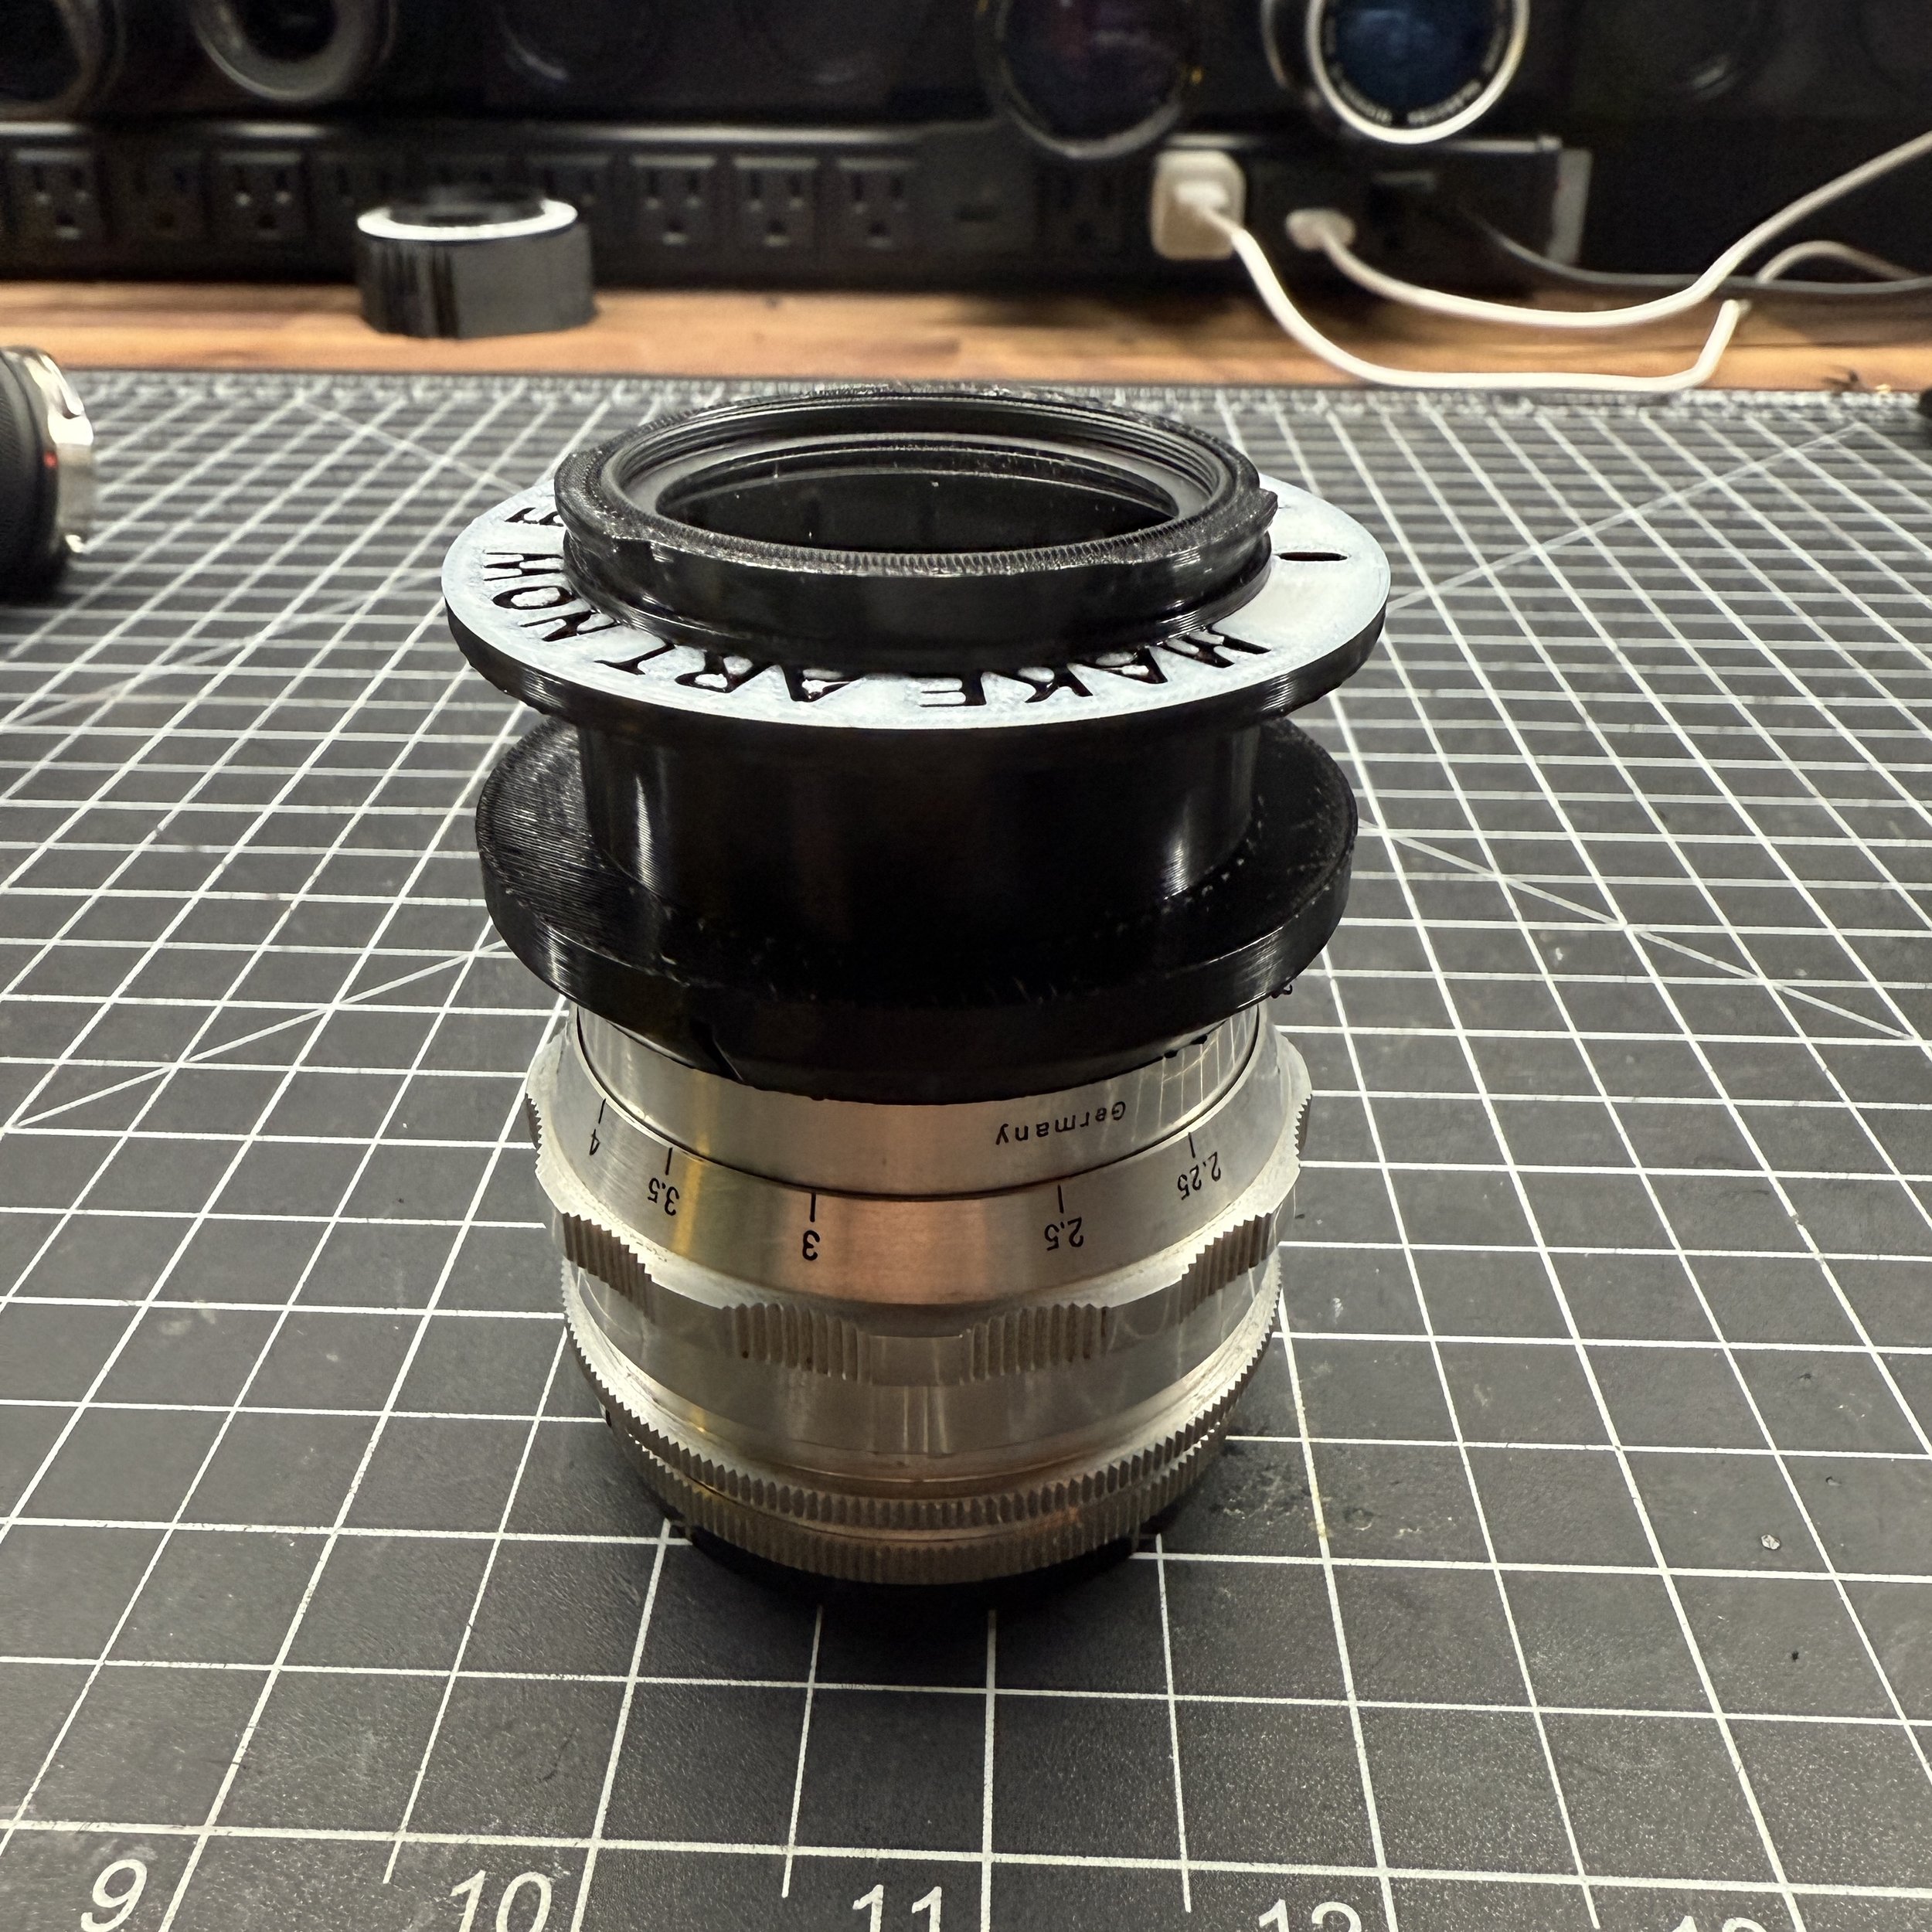
This is a DJI DL Mount lens Adapter for m39 glass to DJI cameras (inspire 2 &3 ) . This works along with the standard counter weight kit or XL counter weight kit to adapt and use the following lenses on the DJI Inspire 3 (lenses sold separately)
Fly some vintage lenses
Minolta Lenses
Helios 44m2
Jupiter 9 lenses
Zeiss Carl Zeiss Jena 58mm f2 Biotar
*These are specifically designed for i2 and i3, and NOT intended for R4D and may not fit correctly or fall off under rigorous use on the R4D.
What’s Included
(1) 3d Printed Adapter - M39 to DL
How this works
Step 1. Install lens on Inspire 3 along with the Counter Weight kit and appropriate weights.
Step 2. Set focus to infinity on the ground.
Step 3. Lock focus with a small piece of gaffe tape on the lens. You will not get Autofocus with these lenses.
Step 4. Make sure gimbal lens lock has locked in lens correctly.
Counter weight kit needed to fly
You will need the Standard or XL Counter Weight Kit
amounts of weights vary with different lenses.
Balls of steel
DISCLAIMER - YOU FLY AT YOUR OWN RISK
The DJI inspire 3 is designed to fly compact lenses that are 169g, and flying heavier and bigger lenses will change flight and gimbal characteristics. By purchasing this adapter you accept the risk of personal injury, death and or destruction of property due to the changes to the flight characteristics. This sale makes no guarantee that the lenses the adapter is intended for will work with full functionality, mobility, and aerodynamics. Be smart, fly slow, make a test flight first, YOU FLY AT YOUR OWN RISK.

High Quality PETG 3D Printed Lens Adapter
This is a DL Mount lens Adapter . This works along with the standard counter weight kit or XL counter weight kit to adapt and use the following lenses on the DJI Inspire 3 (lenses sold separately)
What’s Included
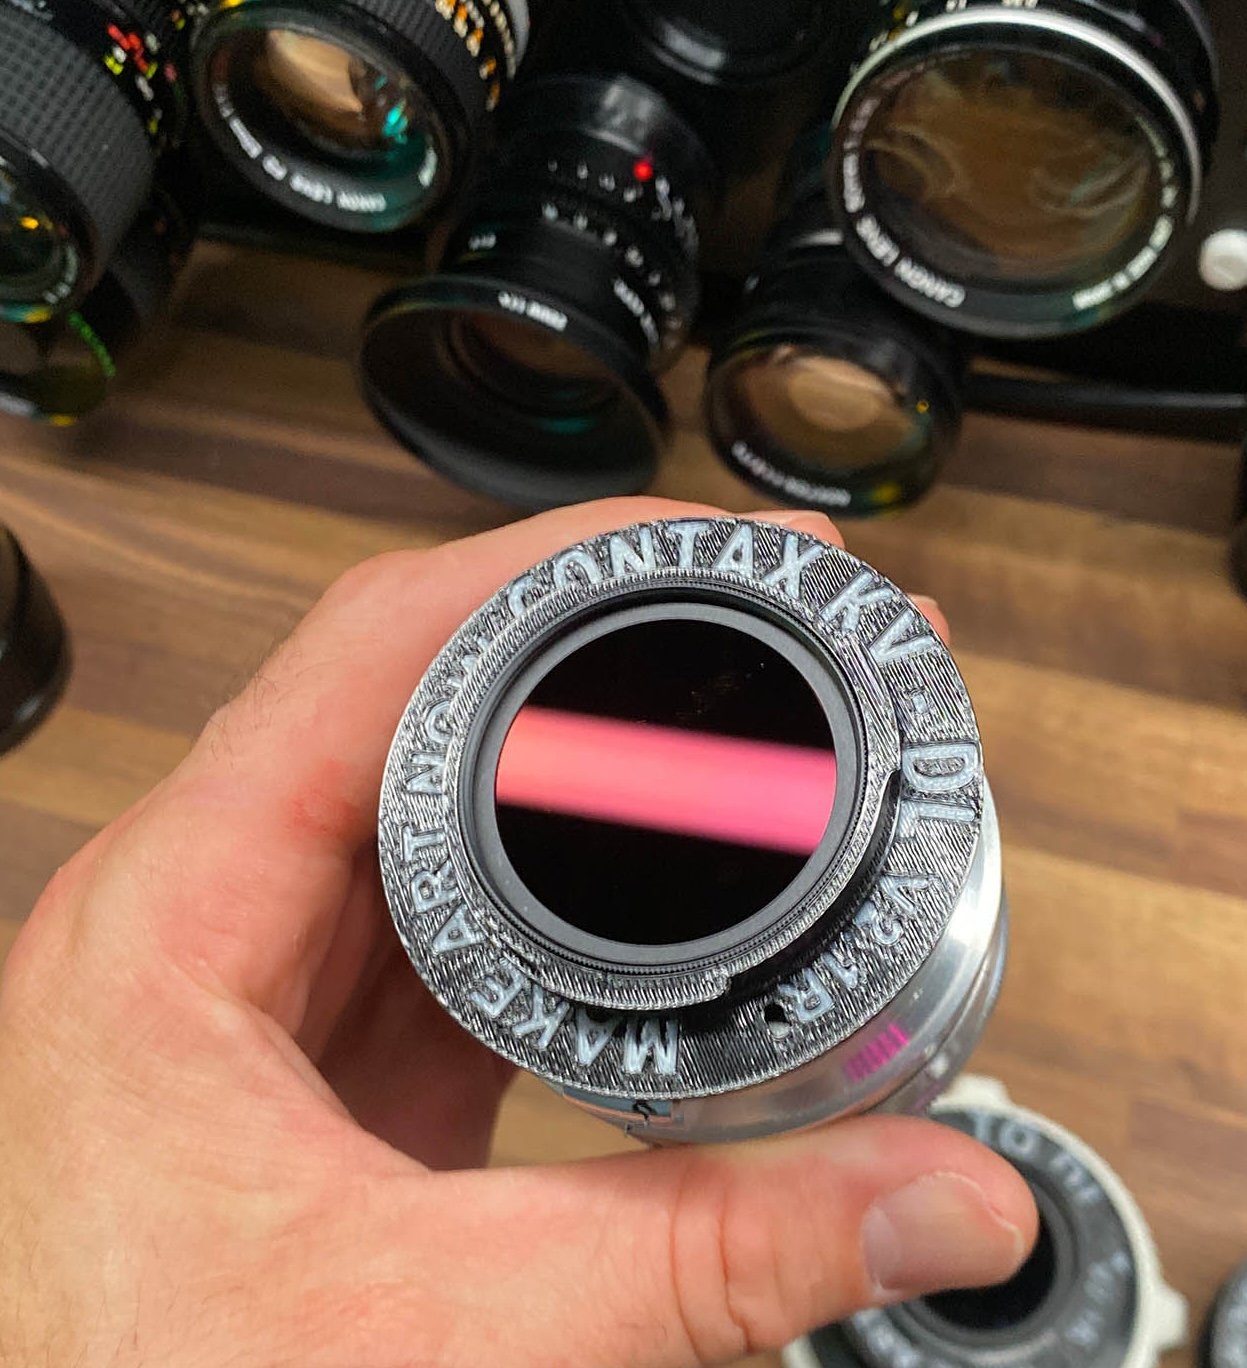
(1) 3d Printed Adapter - Contax C/Y to DL
*These are specifically designed for i2 and i3, and NOT intended for R4D and may not fit correctly or fall off under rigorous use on the R4D.
Lenses this Adapts
( These are within weight and size limits for flights on i3)
Carl Zeiss Planar T 50mm f/1.4
Carl Zeiss Distagon T 28mm f/2.8
Carl Zeiss Distagon T 35mm f/2.8
Carl Zeiss Sonnar T 85mm f/2.8
Carl Zeiss Planar T 85mm f/1.4
Carl Zeiss Distagon T 25mm f/2.8
Yashica ML 50mm f/1.7
Yashica ML 35mm f/2.8
There are more, that can be flown, as long as lens weight is not heavier than 500g and barrel length is not longer than 114mm
ADD ON ITEMS
REAR ND FILTER - FireCrest $75
Firecrest ND fits any of the adapters above, now you can fly any lens with rear mount ND. These are color nuetral and are trusted with cinematographers everywhere.
Not only does this make ND possible for every lens, (saves a ton of money), but it prevents ghosting from front mount ND, and it also adds more stability to flight by adding more weight towards the center mass. Sometimes adding weight to front of lens can make lenses much harder to balance and fly vibration free, using a Rear ND is our way around this and works very well.
Fire Crest ND 32, ND64, ND128, ND256
$75 each (these pop in and out easily and fit all the DL adapters)
How this works
Step 1. Install lens on Inspire 3 along with the Counter Weight kit and appropriate weights.
Step 2. Set focus to infinity on the ground.
Step 3. Lock focus with a small piece of gaffe tape on the lens. You will not get Autofocus with these lenses.
Step 4. Make sure gimbal lens lock has locked in lens correctly.
Counter weight kit needed to fly
You will need the Standard or XL Counter Weight Kit
amounts of weights vary with different lenses.
Balls of steel
DISCLAIMER - YOU FLY AT YOUR OWN RISK
The DJI inspire 3 is designed to fly compact lenses that are 169g, and flying heavier and bigger lenses will change flight and gimbal characteristics. By purchasing this adapter you accept the risk of personal injury, death and or destruction of property due to the changes to the flight characteristics. This sale makes no guarantee that the lenses the adapter is intended for will work with full functionality, mobility, and aerodynamics. Be smart, fly slow, make a test flight first, YOU FLY AT YOUR OWN RISK.
High Quality PETG 3D Printed Lens Adapter
This is a DL Mount lens Adapter . This works along with the standard counter weight kit or XL counter weight kit to adapt and use the following lenses on the DJI Inspire 3 (lenses sold separately)
What’s Included
(1) 3d Printed Adapter - Leica M to DL
*These are specifically designed for i2 and i3, and NOT intended for R4D and may not fit correctly or fall off under rigorous use on the R4D.
Lenses this Adapts
( These are within weight and size limits for flights on i3)
Leica Summilux-M 50mm f1.4 -(337g) Would need XL kit to fly. Flight should not be an issue.
Leica Summilux-M 35mm f1.4 -(338g) Would need XL kit to fly. Flight should not be an issue.
Thypoch Simera 28mm f1.4 -(330g) Would need XL kit to fly. Flight should not be an issue.
Leitz Cine 21mm M 0.8 F/1.4 - (515g) Would need XL kit to fly. Vibration free flight would be possible but not guaranteed.
Leitz Cine 24mm M 0.8 F/1.4 - (505g) Would need XL kit to fly. Vibration free flight would be possible but not guaranteed.
Leitz Cine 28mm M 0.8 F/1.4 - (480g) Would need XL kit to fly. Flight should not be an issue.
Leitz Cine 35mm M 0.8 F/1.4 - (380g) Would need XL kit to fly. Flight should not be an issue.
Leitz Cine 50mm M 0.8 F/1.4 - (466g) Would need XL kit to fly. Flight should not be an issue.
Leitz Cine 75mm M 0.8 F/2.0 - (572g) Extremely heavy lens, vibration free flight very challenging to pull off.
Leitz Cine 90mm M 0.8 F/2.0 Full Frame M-Mount Lens - (605g) Extremely heavy lens, vibration free flight very challenging to pull off.
Voigtlander Nokton 21mm f1.4 - (480g) Would need XL kit to fly. Flight should not be an issue.
Voigtlander Nokton 35mm Mk III FF f1.2 - (332g) Easy lens to fly. Needs standard or XL kit.
Voigtlander Nokton 35mm mk II MC f1.4 - (189g) Very easy lens to fly. Possibly no counter weights needed or standard kit.
Voigtlander Nokton 40mm f1.4 - (175g) Very easy lens to fly. Possibly no counter weights needed or standard kit.
Voigtlander Nokton 40mm f1.2 - (315g) Easy lens to fly. Needs standard or XL kit
Voigtlander Nokton 75mm f1.5 - (350g) Easy lens to fly. Needs standard or XL kit
Voigtlander Nokton 50mm f 1.0 - (484g) Would need XL kit to fly. Vibration free flight would be possible but not guaranteed.
Voigtlander Nokton 50mm f 1.2 -(344g) Easy lens to fly. Needs standard or XL kit
Voigtlander Nokton 50mm f 1.1 (Buy used on Ebay) - (428) Would need XL kit to fly. Flight should not be an issue.
Venus Optics Laowa D-Dreamer 15mm f2 - (418) Would need XL kit to fly. Flight should not be an issue.
Venus Optics Laowa 9mm f5.6 - (350g) Would need XL kit to fly. Flight should not be an issue.
Canon Dream Lens 50mm f0.95 (Buy used on EBay) - (552g) Would need XL kit to fly. Vibration free flight would be possible but not guaranteed.
Meyer-Optik Gorlitz Triplan 100mm f2.8 - (332g) Would need XL kit to fly. Flight should not be an issue.
Zeiss Sonnar 50mm f1.5 (Buy used on EBay) - (250g) Easy lens to fly. Needs standard or XL kit
Zeiss Planar 50mm f2 (Buy used on EBay) - (230g) Easy lens to fly. Needs standard or XL kit
TTArtisan 50mm f/1.4 - (399g) Easy lens to fly. Needs standard or XL kit
How this works
Step 1. Install lens on Inspire 3 along with the Counter Weight kit and appropriate weights.
Step 2. Set focus to infinity on the ground.
Step 3. Lock focus with a small piece of gaffe tape on the lens. You will not get Autofocus with these lenses.
Step 4. Make sure gimbal lens lock has locked in lens correctly.
Counter weight kit needed to fly
You will need the Standard or XL Counter Weight Kit
amounts of weights vary with different lenses.
Balls of steel
DISCLAIMER - YOU FLY AT YOUR OWN RISK
The DJI inspire 3 is designed to fly compact lenses that are 169g, and flying heavier and bigger lenses will change flight and gimbal characteristics. By purchasing this adapter you accept the risk of personal injury, death and or destruction of property due to the changes to the flight characteristics. This sale makes no guarantee that the lenses the adapter is intended for will work with full functionality, mobility, and aerodynamics. Be smart, fly slow, make a test flight first, YOU FLY AT YOUR OWN RISK.
High Quality PETG 3D Printed Lens Adapter
This is a DL Mount lens Adapter . This works along with the standard counter weight kit or XL counter weight kit to adapt and use the following lenses on the DJI Inspire 3 (lenses sold separately)
What’s Included
(1) 3d Printed Adapter - Contax Kiev to DL
*These are specifically designed for i2 and i3, and NOT intended for R4D and may not fit correctly or fall off under rigorous use on the R4D.
Lenses this Adapts
( These are within weight and size limits for flights on i3)
Make sure your mount is Contax Kiev, many of these lenses below may have been retrofitted with other mounts like (m42, or Contax C/Y, both of which we offer separately) The contax Kiev mount copies of these lenses can often be found cheaper as there are not a lot of adapters on the market for this mount.
Jupiter-8 50mm f/2
Jupiter-9 85mm f/2
Helios-44 58mm f/2
Mir-1 37mm f/2.8
Jupiter-11 135mm f/4
Industar-61 L/Z 50mm f/2.8
There are more, that can be flown, as long as lens weight is not heavier than 500g and barrel length is not longer than 114mm
ADD ON ITEMS
REAR ND FILTER - FireCrest $75
Firecrest ND fits any of the adapters above, now you can fly any lens with rear mount ND. These are color nuetral and are trusted with cinematographers everywhere.
Not only does this make ND possible for every lens, (saves a ton of money), but it prevents ghosting from front mount ND, and it also adds more stability to flight by adding more weight towards the center mass. Sometimes adding weight to front of lens can make lenses much harder to balance and fly vibration free, using a Rear ND is our way around this and works very well.
Fire Crest ND 32, ND64, ND128, ND256
$75 each (these pop in and out easily and fit all the DL adapters)
How this works
Step 1. Install lens on Inspire 3 along with the Counter Weight kit and appropriate weights.
Step 2. Set focus to infinity on the ground.
Step 3. Lock focus with a small piece of gaffe tape on the lens. You will not get Autofocus with these lenses.
Step 4. Make sure gimbal lens lock has locked in lens correctly.
Counter weight kit needed to fly
You will need the Standard or XL Counter Weight Kit
amounts of weights vary with different lenses.
Balls of steel
DISCLAIMER - YOU FLY AT YOUR OWN RISK
The DJI inspire 3 is designed to fly compact lenses that are 169g, and flying heavier and bigger lenses will change flight and gimbal characteristics. By purchasing this adapter you accept the risk of personal injury, death and or destruction of property due to the changes to the flight characteristics. This sale makes no guarantee that the lenses the adapter is intended for will work with full functionality, mobility, and aerodynamics. Be smart, fly slow, make a test flight first, YOU FLY AT YOUR OWN RISK.

High Quality PETG 3D Printed Lens Adapter
This is a DJI DL Mount lens Adapter for m42 glass to DJI cameras (inspire 2 &3 ) . This works along with the standard counter weight kit or XL counter weight kit to adapt and use the following lenses on the DJI Inspire 3 (lenses sold separately)
Fly some vintage lenses
Minolta Lenses
Helios 44m2
Jupiter 9 lenses
Zeiss Carl Zeiss Jena 58mm f2 Biotar
*These are specifically designed for i2 and i3, and NOT intended for R4D and may not fit correctly or fall off under rigorous use on the R4D.
What’s Included
(1) 3d Printed Adapter - M42 to DL
How this works
Step 1. Install lens on Inspire 3 along with the Counter Weight kit and appropriate weights.
Step 2. Set focus to infinity on the ground.
Step 3. Lock focus with a small piece of gaffe tape on the lens. You will not get Autofocus with these lenses.
Step 4. Make sure gimbal lens lock has locked in lens correctly.
Counter weight kit needed to fly
You will need the Standard or XL Counter Weight Kit
amounts of weights vary with different lenses.
Balls of steel
DISCLAIMER - YOU FLY AT YOUR OWN RISK
The DJI inspire 3 is designed to fly compact lenses that are 169g, and flying heavier and bigger lenses will change flight and gimbal characteristics. By purchasing this adapter you accept the risk of personal injury, death and or destruction of property due to the changes to the flight characteristics. This sale makes no guarantee that the lenses the adapter is intended for will work with full functionality, mobility, and aerodynamics. Be smart, fly slow, make a test flight first, YOU FLY AT YOUR OWN RISK.
High Quality PETG 3D Printed Lens Adapter
This is a DL Mount lens Adapter . This works along with the standard counter weight kit or XL counter weight kit to adapt and use the following lenses on the DJI Inspire 3 (lenses sold separately)
What’s Included
(1) 3d Printed Adapter - Exakta to DL to DL
*These are specifically designed for i2 and i3, and NOT intended for R4D and may not fit correctly or fall off under rigorous use on the R4D.
Lenses this Adapts
( These are within weight and size limits for flights on i3)
Carl Zeiss Jena Biotar 58mm f/2
Carl Zeiss Jena Flektogon 35mm f/2.8
Exakta 135mm f/3.5
Exakta 50mm f/2.8
Schneider-Kreuznach Curtagon 35mm f/2.8
Hanimex Manual Aperture 28mm f/2.8
Carl Zeiss Pancolar 50mm F2
Carl Zeiss Jena Tessar Q1 red T 50mm f/2.8
Meyer-Gorlitz 58mm f1.9 Primoplan RED V
There are more, that can be flown, as long as lens weight is not heavier than 500g and barrel length is not longer than 114mm, but each lens is unique and no guarantees for vibration free flight can be made.
ADD ON ITEMS
REAR ND FILTER - FireCrest $75
Firecrest ND fits any of the adapters above, now you can fly any lens with rear mount ND. These are color nuetral and are trusted with cinematographers everywhere.
Not only does this make ND possible for every lens, (saves a ton of money), but it prevents ghosting from front mount ND, and it also adds more stability to flight by adding more weight towards the center mass. Sometimes adding weight to front of lens can make lenses much harder to balance and fly vibration free, using a Rear ND is our way around this and works very well.
Fire Crest ND 32, ND64, ND128, ND256
$75 each (these pop in and out easily and fit all the DL adapters)
How this works
Step 1. Install lens on Inspire 3 along with the Counter Weight kit and appropriate weights.
Step 2. Set focus to infinity on the ground.
Step 3. Lock focus with a small piece of gaffe tape on the lens. You will not get Autofocus with these lenses.
Step 4. Make sure gimbal lens lock has locked in lens correctly.
Counter weight kit needed to fly
You will need the Standard or XL Counter Weight Kit
amounts of weights vary with different lenses.
Balls of steel
DISCLAIMER - YOU FLY AT YOUR OWN RISK
The DJI inspire 3 is designed to fly compact lenses that are 169g, and flying heavier and bigger lenses will change flight and gimbal characteristics. By purchasing this adapter you accept the risk of personal injury, death and or destruction of property due to the changes to the flight characteristics. This sale makes no guarantee that the lenses the adapter is intended for will work with full functionality, mobility, and aerodynamics. Be smart, fly slow, make a test flight first, YOU FLY AT YOUR OWN RISK.

High Quality PETG 3D Printed Lens Adapter
This is a DL Mount lens Adapter . This works along with the standard counter weight kit or XL counter weight kit to adapt and use the following lenses on the DJI Inspire 3 (lenses sold separately)
What’s Included
(1) 3d Printed Adapter - Olympus OM to DL
*These are specifically designed for i2 and i3, and NOT intended for R4D and may not fit correctly or fall off under rigorous use on the R4D.
Flight Characteristics
Flight characteristics are significantly modified with heavy lenses. Fly with extreme caution with this lens. Not only are you flying with more lens weight but also more counter weight. Fly very slow and avoid windy conditions or high altitudes (above 8,000ft). Some vibrations are to be expected at certain gimbal tilt angles or various climate conditions. Warmer, high altitude conditions increase propellor speed, thus increases wind vibration.
How this works
Step 1. Install lens on Inspire 3 along with the Counter Weight kit and appropriate weights.
Step 2. Set focus to infinity on the ground.
Step 3. Lock focus with a small piece of gaffe tape on the lens. You will not get Autofocus with these lenses.
Step 4. Make sure gimbal lens lock has locked in lens correctly.
Counter weight kit needed to fly
You will need the Standard or XL Counter Weight Kit
amounts of weights vary with different lenses.
Balls of steel
DISCLAIMER - YOU FLY AT YOUR OWN RISK
The DJI inspire 3 is designed to fly compact lenses that are 169g, and flying heavier and bigger lenses will change flight and gimbal characteristics. By purchasing this adapter you accept the risk of personal injury, death and or destruction of property due to the changes to the flight characteristics. This sale makes no guarantee that the lenses the adapter is intended for will work with full functionality, mobility, and aerodynamics. Be smart, fly slow, make a test flight first, YOU FLY AT YOUR OWN RISK.

High Quality PETG 3D Printed Lens Adapter
This is a DL Mount lens Adapter . This works along with the standard counter weight kit or XL counter weight kit to adapt and use the following lenses on the DJI Inspire 3 (lenses sold separately)
What’s Included
(1) 3d Printed Adapter - Pentax K to DL
*These are specifically designed for i2 and i3, and NOT intended for R4D and may not fit correctly or fall off under rigorous use on the R4D.
Lenses this Adapts
( These are within weight and size limits for flights on i3)
Make sure to verify the lens you have is Pentax K mount and has not been adapted to Pentax m42 mount. (We offer m42 adapter for those copies separately)
Pentax Takumar 28mm f/3.5
Pentax Super-Takumar 135mm f/3.5
Pentax Super-Takumar 105mm f/2.8
Pentax Super-Takumar 35mm f/3.5
Pentax Super-Takumar 50mm f/1.4
Pentax SMC K 135mm f/2.5
Pentax SMC K 28mm f/3.5
Pentax SMC DA 21mm f/3.2 Limited
Pentax SMC FA 77mm f/1.8 Limited
There are more, that can be flown, as long as lens weight is not heavier than 500g and barrel length is not longer than 114mm
ADD ON ITEMS
REAR ND FILTER - FireCrest $75
Firecrest ND fits any of the adapters above, now you can fly any lens with rear mount ND. These are color nuetral and are trusted with cinematographers everywhere.
Not only does this make ND possible for every lens, (saves a ton of money), but it prevents ghosting from front mount ND, and it also adds more stability to flight by adding more weight towards the center mass. Sometimes adding weight to front of lens can make lenses much harder to balance and fly vibration free, using a Rear ND is our way around this and works very well.
Fire Crest ND 32, ND64, ND128, ND256
$75 each (these pop in and out easily and fit all the DL adapters)
How this works
Step 1. Install lens on Inspire 3 along with the Counter Weight kit and appropriate weights.
Step 2. Set focus to infinity on the ground.
Step 3. Lock focus with a small piece of gaffe tape on the lens. You will not get Autofocus with these lenses.
Step 4. Make sure gimbal lens lock has locked in lens correctly.
Counter weight kit needed to fly
You will need the Standard or XL Counter Weight Kit
amounts of weights vary with different lenses.
Balls of steel
DISCLAIMER - YOU FLY AT YOUR OWN RISK
The DJI inspire 3 is designed to fly compact lenses that are 169g, and flying heavier and bigger lenses will change flight and gimbal characteristics. By purchasing this adapter you accept the risk of personal injury, death and or destruction of property due to the changes to the flight characteristics. This sale makes no guarantee that the lenses the adapter is intended for will work with full functionality, mobility, and aerodynamics. Be smart, fly slow, make a test flight first, YOU FLY AT YOUR OWN RISK.
REAR ND - FILTER
High Quality PETG 3D Printed Lens Adapter
This is an iPhone 16/17 to DL adapter - This adapter uses the DL port on the gimbal, and locks the iphone sleeve into place like a normal lens. The iPhone can then slide into the sleeve, and you can operate the gimbal (pan and tilt) like normal. Requires i3 XL Counter weight kit (sold here)
This adpter blocks / disables the main camera of the drone, and flying must be done by VLOF, or using the 2nd cam POV.
What’s Included
(1) 3d printed - DL adapter plate DL adapter
(1) 3d printed - iPhone 16/ 17 Sleeve
Functions
Easy to change vertical or horizontal orientation within seconds.
Full pan, and tilt.
*Straight down POV, may induce vibrations due to airflow hitting more surface area of the phone.
Necessary tools and accessories
Flight Characteristics
Vibration free flight is not guaranteed. While I have modified this to be pretty smooth, there are still some conditions like high altitudes /high winds / high speeds / sport mode, that may introduce some vibrations.
Fly very slow and avoid windy conditions or high altitudes (above 8,000ft). Some vibrations are to be expected at certain gimbal tilt angles or various climate conditions. Warmer, high altitude conditions increase propellor speed, thus increases wind vibration.
DISCLAIMER - YOU FLY AT YOUR OWN RISK
While this adapter fits Inspire 2 and Ronin 4D it is not designed for that use case. The Inspire 3 is the only of the three to have a lens locking mechanism, and use this product on either the Inspire 2 or Ronin 4D is only advised with extreme caution as the mount can be dismounted during operation.
The DJI inspire 3 is designed to fly compact lenses that are 169g, and flying heavier and larger shaped lenses will change flight and gimbal characteristics.
By purchasing this adapter you accept the risk of personal injury, death and or destruction of property due to the changes to the flight characteristics.
This sale makes no guarantee that the lenses the adapter is intended for will work with full functionality, mobility, and aerodynamics. Be smart, fly slow, make a test flight first, YOU FLY AT YOUR OWN RISK.
DL Bayonets
High Quality PETG 3D Printed Lens Adapter
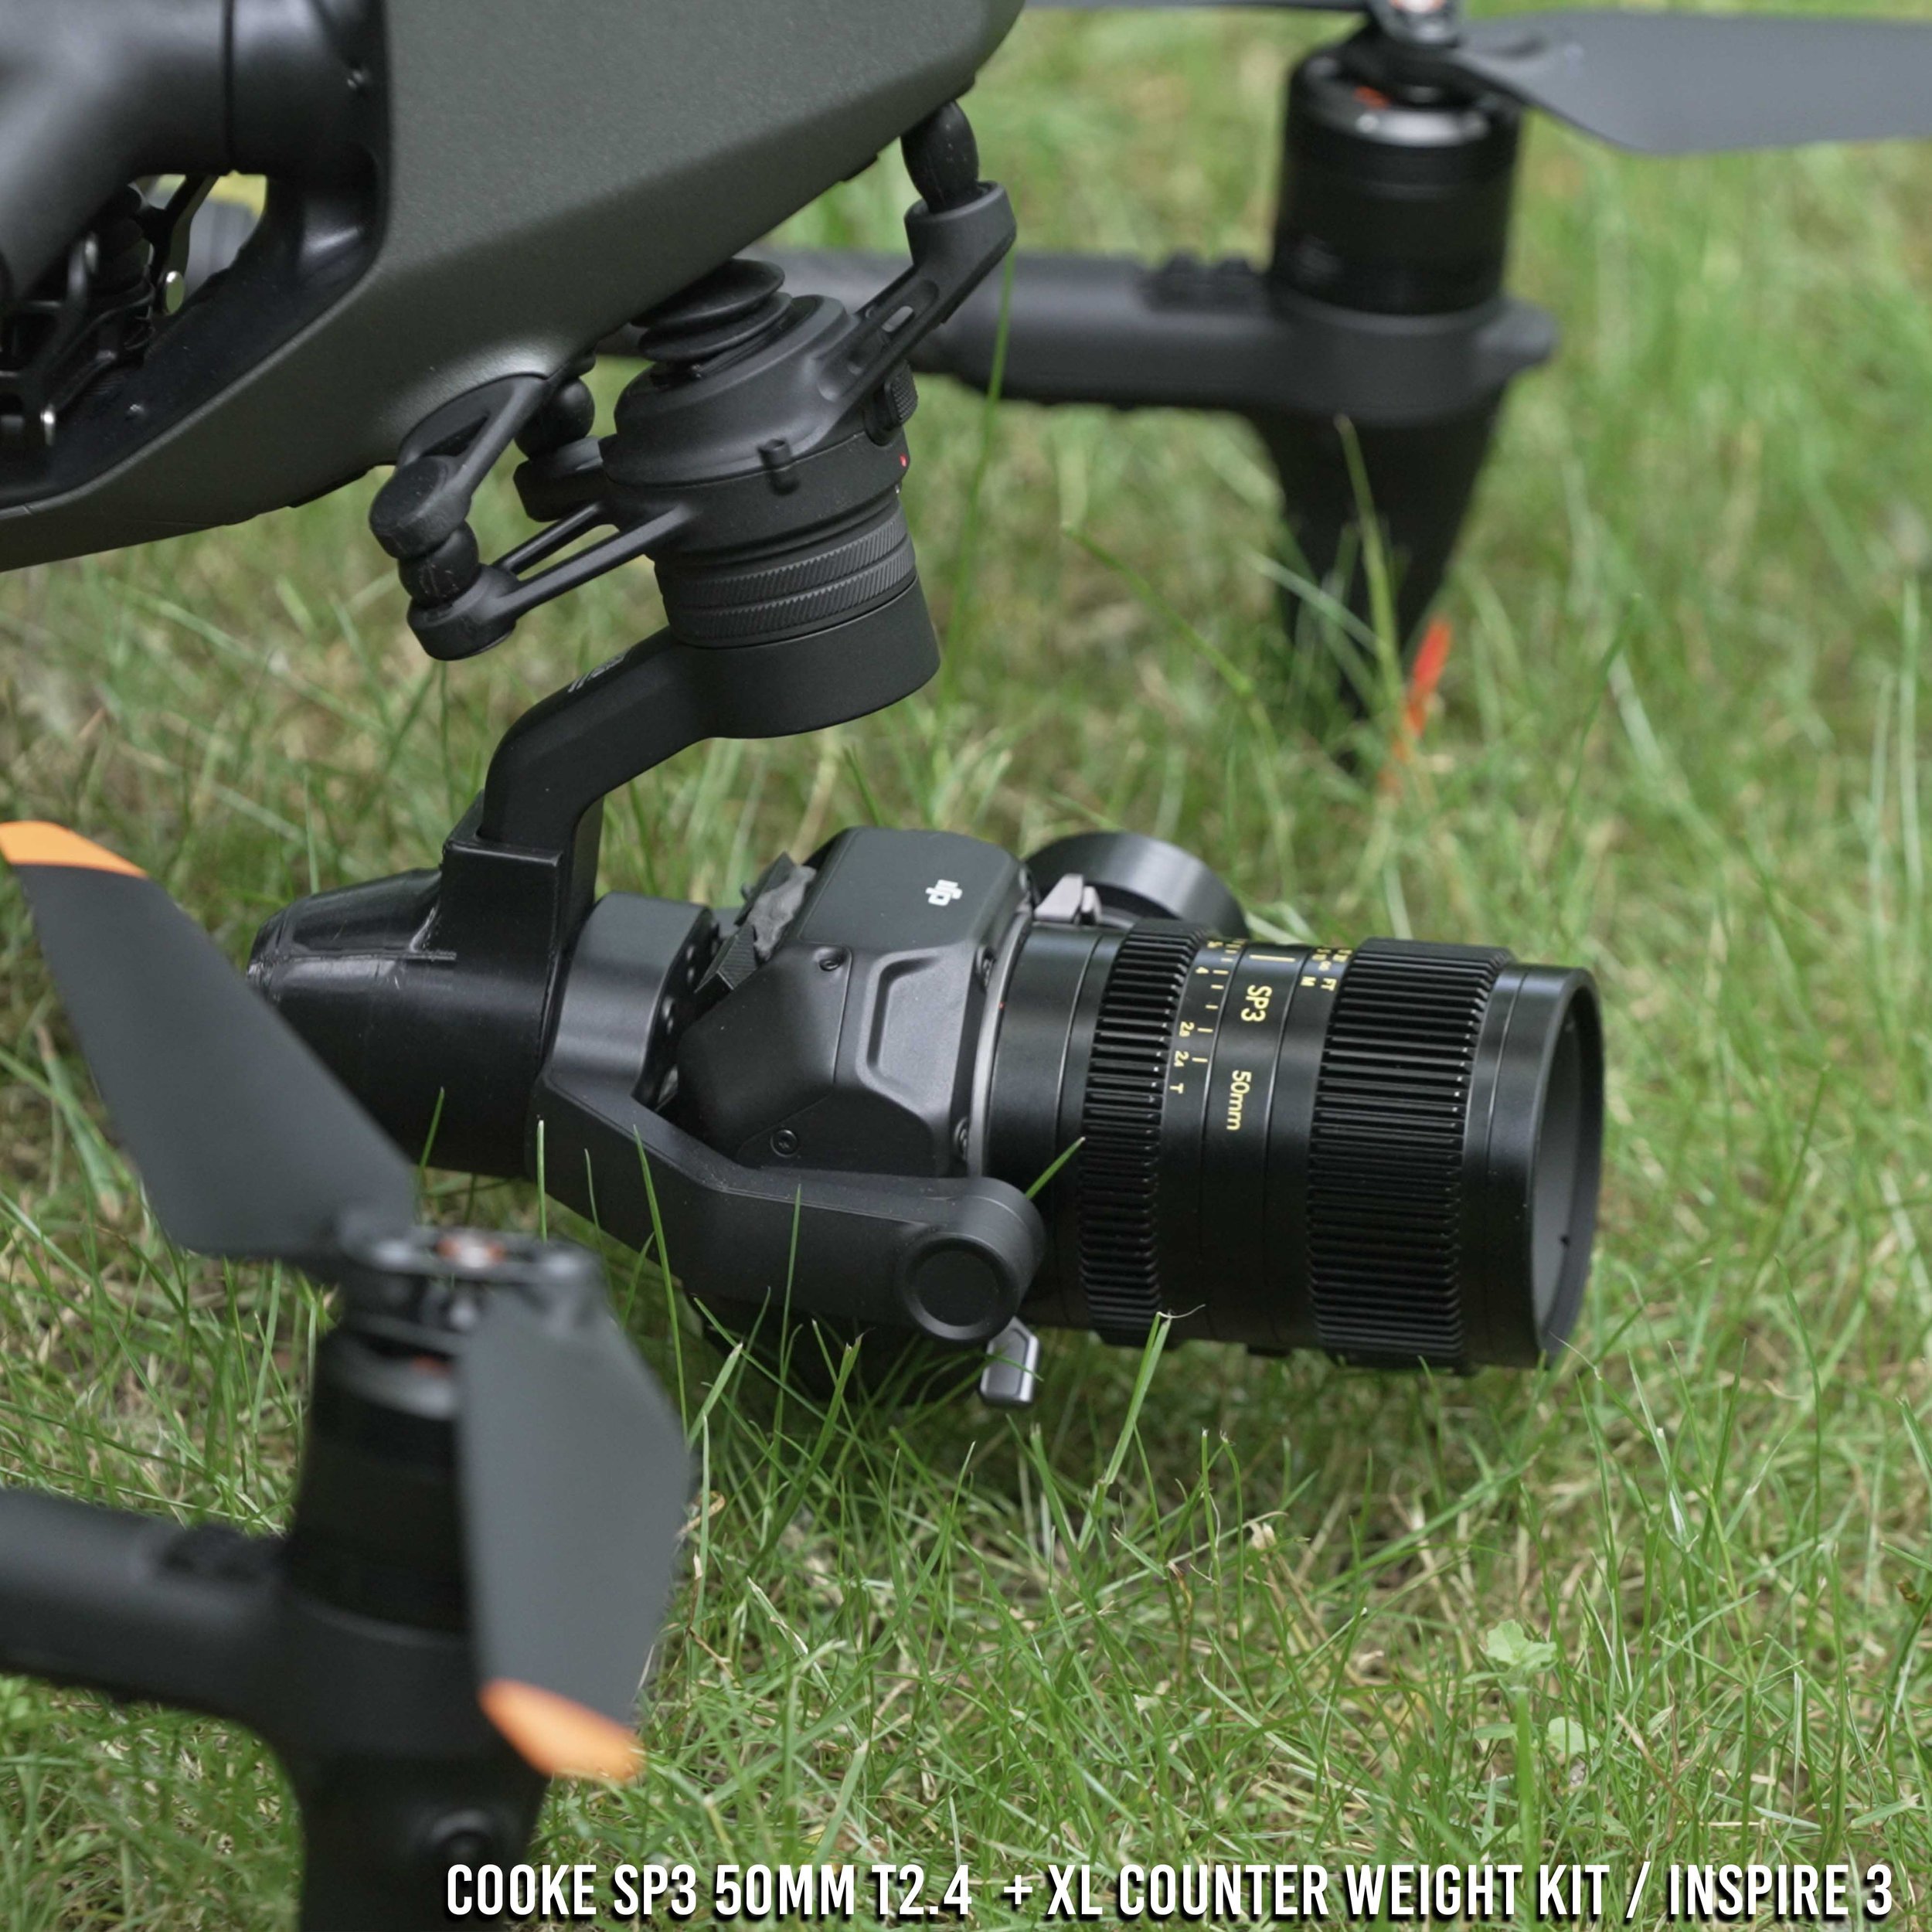
This is a DJI DL Mount lens bayonet to replace the stock Sony E-mount bayonet for Cooke Sp3 lens. This works along with the XL counter weight kit to adapt and use the following lenses on the DJI Inspire 3 (lenses sold separately)
What’s Included
(1) Replacement bayonet for a Cooke Sp3 50mm, 32mm, or 25mm Lens. (Other sizes wont fly and are too heavy)
Flight Characteristics based on weight and size of lens
Cooke SP3 25mm T2.4 Full-Frame Prime Lens (Sony E, Feet/Meters) - Length 3.9" / 98 mm Weight 1.3 lb / 575 g - Hardest of the lenses to fly based on weight and length. Requires full XL counter weight kit plus additional tungsten putty. Not all tilt angles will be vibration free. Realistically slow moving tracking, lateral trucking, vertical elevator shots, or orbit shots are whats possible vibration free. 3/10
Cooke SP3 32mm T2.4 Full-Frame Prime Lens (Sony E, Feet/Meters) - 3.7" / 94 mm Weight 1.1 lb / 520 g - Easiest of the lenses to fly based on weight and length, but still challenging. Requires full XL counter weight kit plus additional tungsten putty . Not all tilt angles will be vibration free. Realistically slow moving tracking, lateral trucking, vertical elevator shots, or orbit shots are whats possible vibration free. 4/10
Cooke SP3 50mm T2.4 Full-Frame Prime Lens (Sony E, Feet/Meters) - 3.7" / 94 mm Weight 1.1 lb / 500 g -Easiest of the lenses to fly based on weight and length. Requires full XL counter weight kit plus additional tungsten putty. Not all tilt angles will be vibration free. Realistically slow moving tracking, lateral trucking, vertical elevator shots, or orbit shots are whats possible vibration free. 5/10
Notes: Flight characteristics are significantly modified with these heavy lenses. These are some of the heaviest lenses that I’ve ever flown on the Inspire 3 and you should fly with extreme caution. Not only are you flying with more lens weight but also more counter weight. Fly very slow and not recommended in windy conditions or high altitudes (above 8,000ft). Some vibrations are to be expected at some gimbal tilt angles or various climate conditions. Warmer, high altitude conditions increase propellor speed, and increase vibration.
How this works
Step 1. Unscrew stock bayonet on lens with a small electronics screw driver
Step 2. Use the same screws and insert the 3d printed bayonet, aligning the bayonet in the correct orientation (Align mark to red dot on lens)
Step 3. Install lens on Inspire 3 along with the Counter Weight kit and appropriate weights.
Step 4. Set focus to infinity on the ground.
Step 5. Lock focus with a small piece of gaffe tape on the lens. You will not get Autofocus with these lenses.
Step 6. Make sure gimbal lens lock has locked in lens correctly.
DISCLAIMER - YOU FLY AT YOUR OWN RISK
The DJI inspire 3 is designed to fly compact lenses that are 169g, and flying heavier and bigger lenses will change flight and gimbal characteristics. By purchasing this adapter you accept the risk of personal injury, death and or destruction of property due to the changes to the flight characteristics. This sale makes no guarantee that the lenses the adapter is intended for will work with full functionality, mobility, and aerodynamics. Be smart, fly slow, make a test flight first, YOU FLY AT YOUR OWN RISK.

Fly This lens on Inspire 3
TT Artisan 50mm f0.95 APS-C (Leica Version) to DL Bayonet
This is to replace the stock bayonet on a Leica L mount version of the TT Artisan 50mm f0.95. This is an APS-C lens, but has close to full frame coverage, and is the brightest and lightest lens to fly. You can film in moonlight only with this lens on the Inspire 3.
This kit requires purchase of this lens. Lens depicted in photos not included.
INSRUCTIONS
Remove stock bayonet with electric screw driver
Use old screws, and push them into the 3d print, then drive them into the old screw holes. Make sure to line up the dot on the side of the print to the red dot on the lens for correct orientation.
Screw in screws evenly making sure no one side is tighter than the other. (think of tightening a wheel on a car)
Set focus on the ground, add gaffe tape to lens barrel to lock focus on subject or infinity.
Notes
This lens requires a standard or XL counter weight kit.
Flying this lens and counter weights will change the aerodynamics of the Inspire 3.
Practice extreme caution when flying, as even breaking will take more time and distance than with normal lenses.
When opened up at f0.95 this lens will show some achromatic abborations and color fringing. This is particularly notiacble when filmign city lights, as they will skew and bloom to one side in magenta or purple. You cand use a Hue VS Saturation curve in Davinci resolve to get rid of this in post, or stop down to f1.4 - f 2.0.
This lens has very soft edges and light vignette when filming full frame. Super 35 yields much better results.
Made from High Quality PETG (Wont deform in a hot car )
2 year warranty on all 3d Prints
Free shipping USA only
International shipping $10

High Quality PETG 3D Printed Lens Adapter
This is a DJI DL Mount lens bayonet to replace the stock bayonet.
What’s Included
(1) Replacement bayonet for a Laowa 4mm f2.8 - L mount version (does not include lens)
Only works with L mount version.
Lenses this Adapts:
Laowa 4mm f2.8 - L mount version (this is a APS-C lens and will not provide full sensor coverage)
Provides greater than 180 degree coverage (210 degree).
Flight Characteristics
Flight characteristics are significantly modified with heavy lenses. Fly with extreme caution with this lens. Not only are you flying with more lens weight but also more counter weight. Fly very slow and avoid windy conditions or high altitudes (above 8,000ft). Some vibrations are to be expected at certain gimbal tilt angles or various climate conditions. Warmer, high altitude conditions increase propellor speed, thus increases wind vibration.
How this works
Step 1. Unscrew stock bayonet on lens with a small electronics screw driver
Step 2. Use the same screws and insert the 3d printed bayonet, aligning the bayonet in the correct orientation (Align mark to red dot on lens)
Step 3. Install lens on Inspire 3 along with the Counter Weight kit and appropriate weights.
Step 4. Set focus to infinity on the ground.
Step 5. Lock focus with a small piece of gaffe tape on the lens. You will not get Autofocus with these lenses.
Step 6. Make sure gimbal lens lock has locked in lens correctly.
Counter weight kit needed to fly
For this lens you do not need a counter weight kit. You do need tungsten putty and add it to the bottom front housing of the lens to add more weight. Tungsten putty can be purchased separately here
DISCLAIMER - YOU FLY AT YOUR OWN RISK
The DJI inspire 3 is designed to fly compact lenses that are 169g, and flying heavier and bigger lenses will change flight and gimbal characteristics. By purchasing this adapter you accept the risk of personal injury, death and or destruction of property due to the changes to the flight characteristics. This sale makes no guarantee that the lenses the adapter is intended for will work with full functionality, mobility, and aerodynamics. Be smart, fly slow, make a test flight first, YOU FLY AT YOUR OWN RISK.
High Quality PETG 3D Printed Lens Adapter
This is a DJI DL Mount lens bayonet to replace the stock bayonet. This works along with an XL counter weight kit to adapt and use the following lenses on the DJI Inspire 3 (lenses sold separately)
What’s Included
(1) Replacement bayonet for a (Sony version Laowa Lens)
Lenses this Adapts:
Laowa Argus 25mm f0.95 APS-C (Sony E-mount version) (weight 575g)
Laowa Argus 28mm f1.2 FF (Sony E-mount version) (weight 562g)
Notes: Flight characteristics are significantly modified with these heavy lenses. These are some of the heaviest lenses that I’ve ever flown on the Inspire 3 and you should fly with extreme caution. Not only are you flying with more lens weight but also more counter weight. Fly very slow and not recommended in windy conditions or high altitudes (above 8,000ft). Some vibrations are to be expected at some gimbal tilt angles or various climate conditions. Warmer, high altitude conditions increase propellor speed, and increase vibration.
How this works
Step 1. Unscrew stock bayonet on lens with a small electronics screw driver
Step 2. Use the same screws and insert the 3d printed bayonet, aligning the bayonet in the correct orientation (Align mark to red dot on lens)
Step 3. Install lens on Inspire 3 along with the Counter Weight kit and appropriate weights.
Step 4. Set focus to infinity on the ground.
Step 5. Lock focus with a small piece of gaffe tape on the lens. You will not get Autofocus with these lenses.
Step 6. Make sure gimbal lens lock has locked in lens correctly.
DISCLAIMER - YOU FLY AT YOUR OWN RISK
The DJI inspire 3 is designed to fly compact lenses that are 169g, and flying heavier and bigger lenses will change flight and gimbal characteristics. By purchasing this adapter you accept the risk of personal injury, death and or destruction of property due to the changes to the flight characteristics. This sale makes no guarantee that the lenses the adapter is intended for will work with full functionality, mobility, and aerodynamics. Be smart, fly slow, make a test flight first, YOU FLY AT YOUR OWN RISK.
- RONIN 4D -
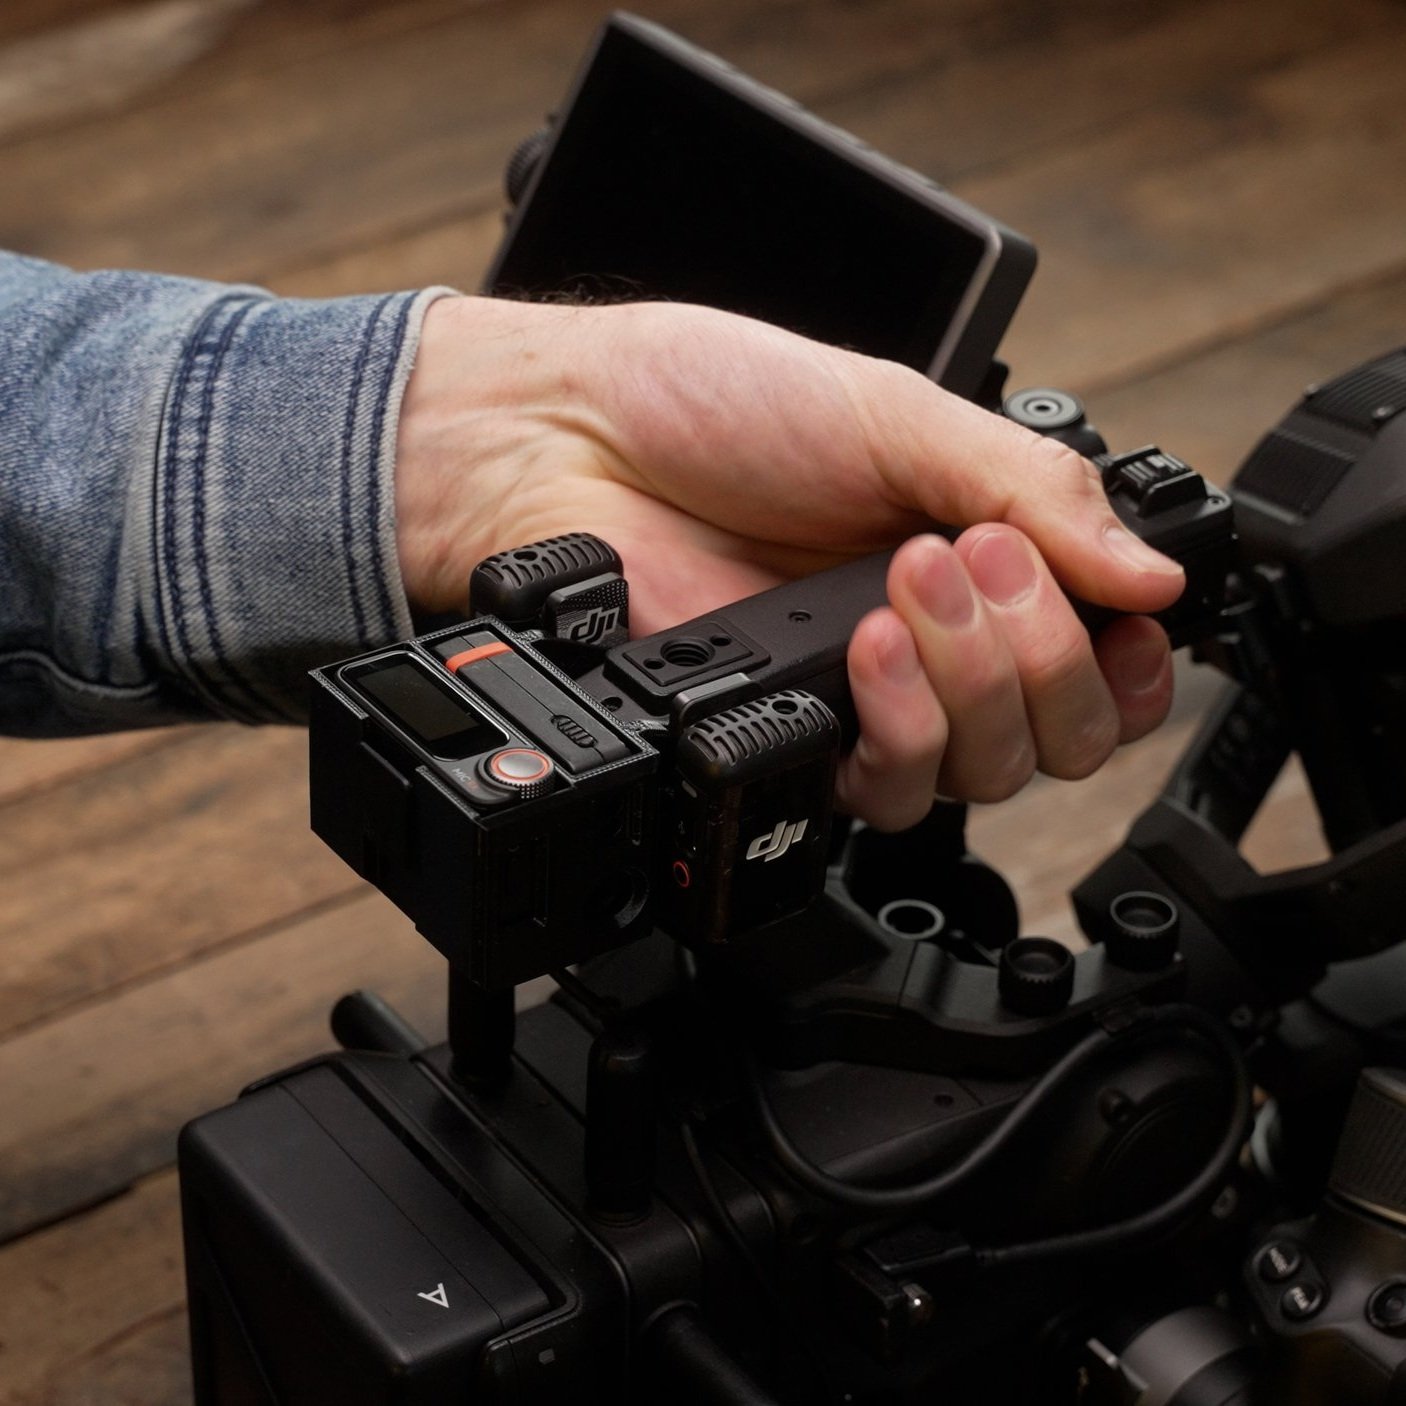
Easy Solution for the Ronin 4D Top Handle
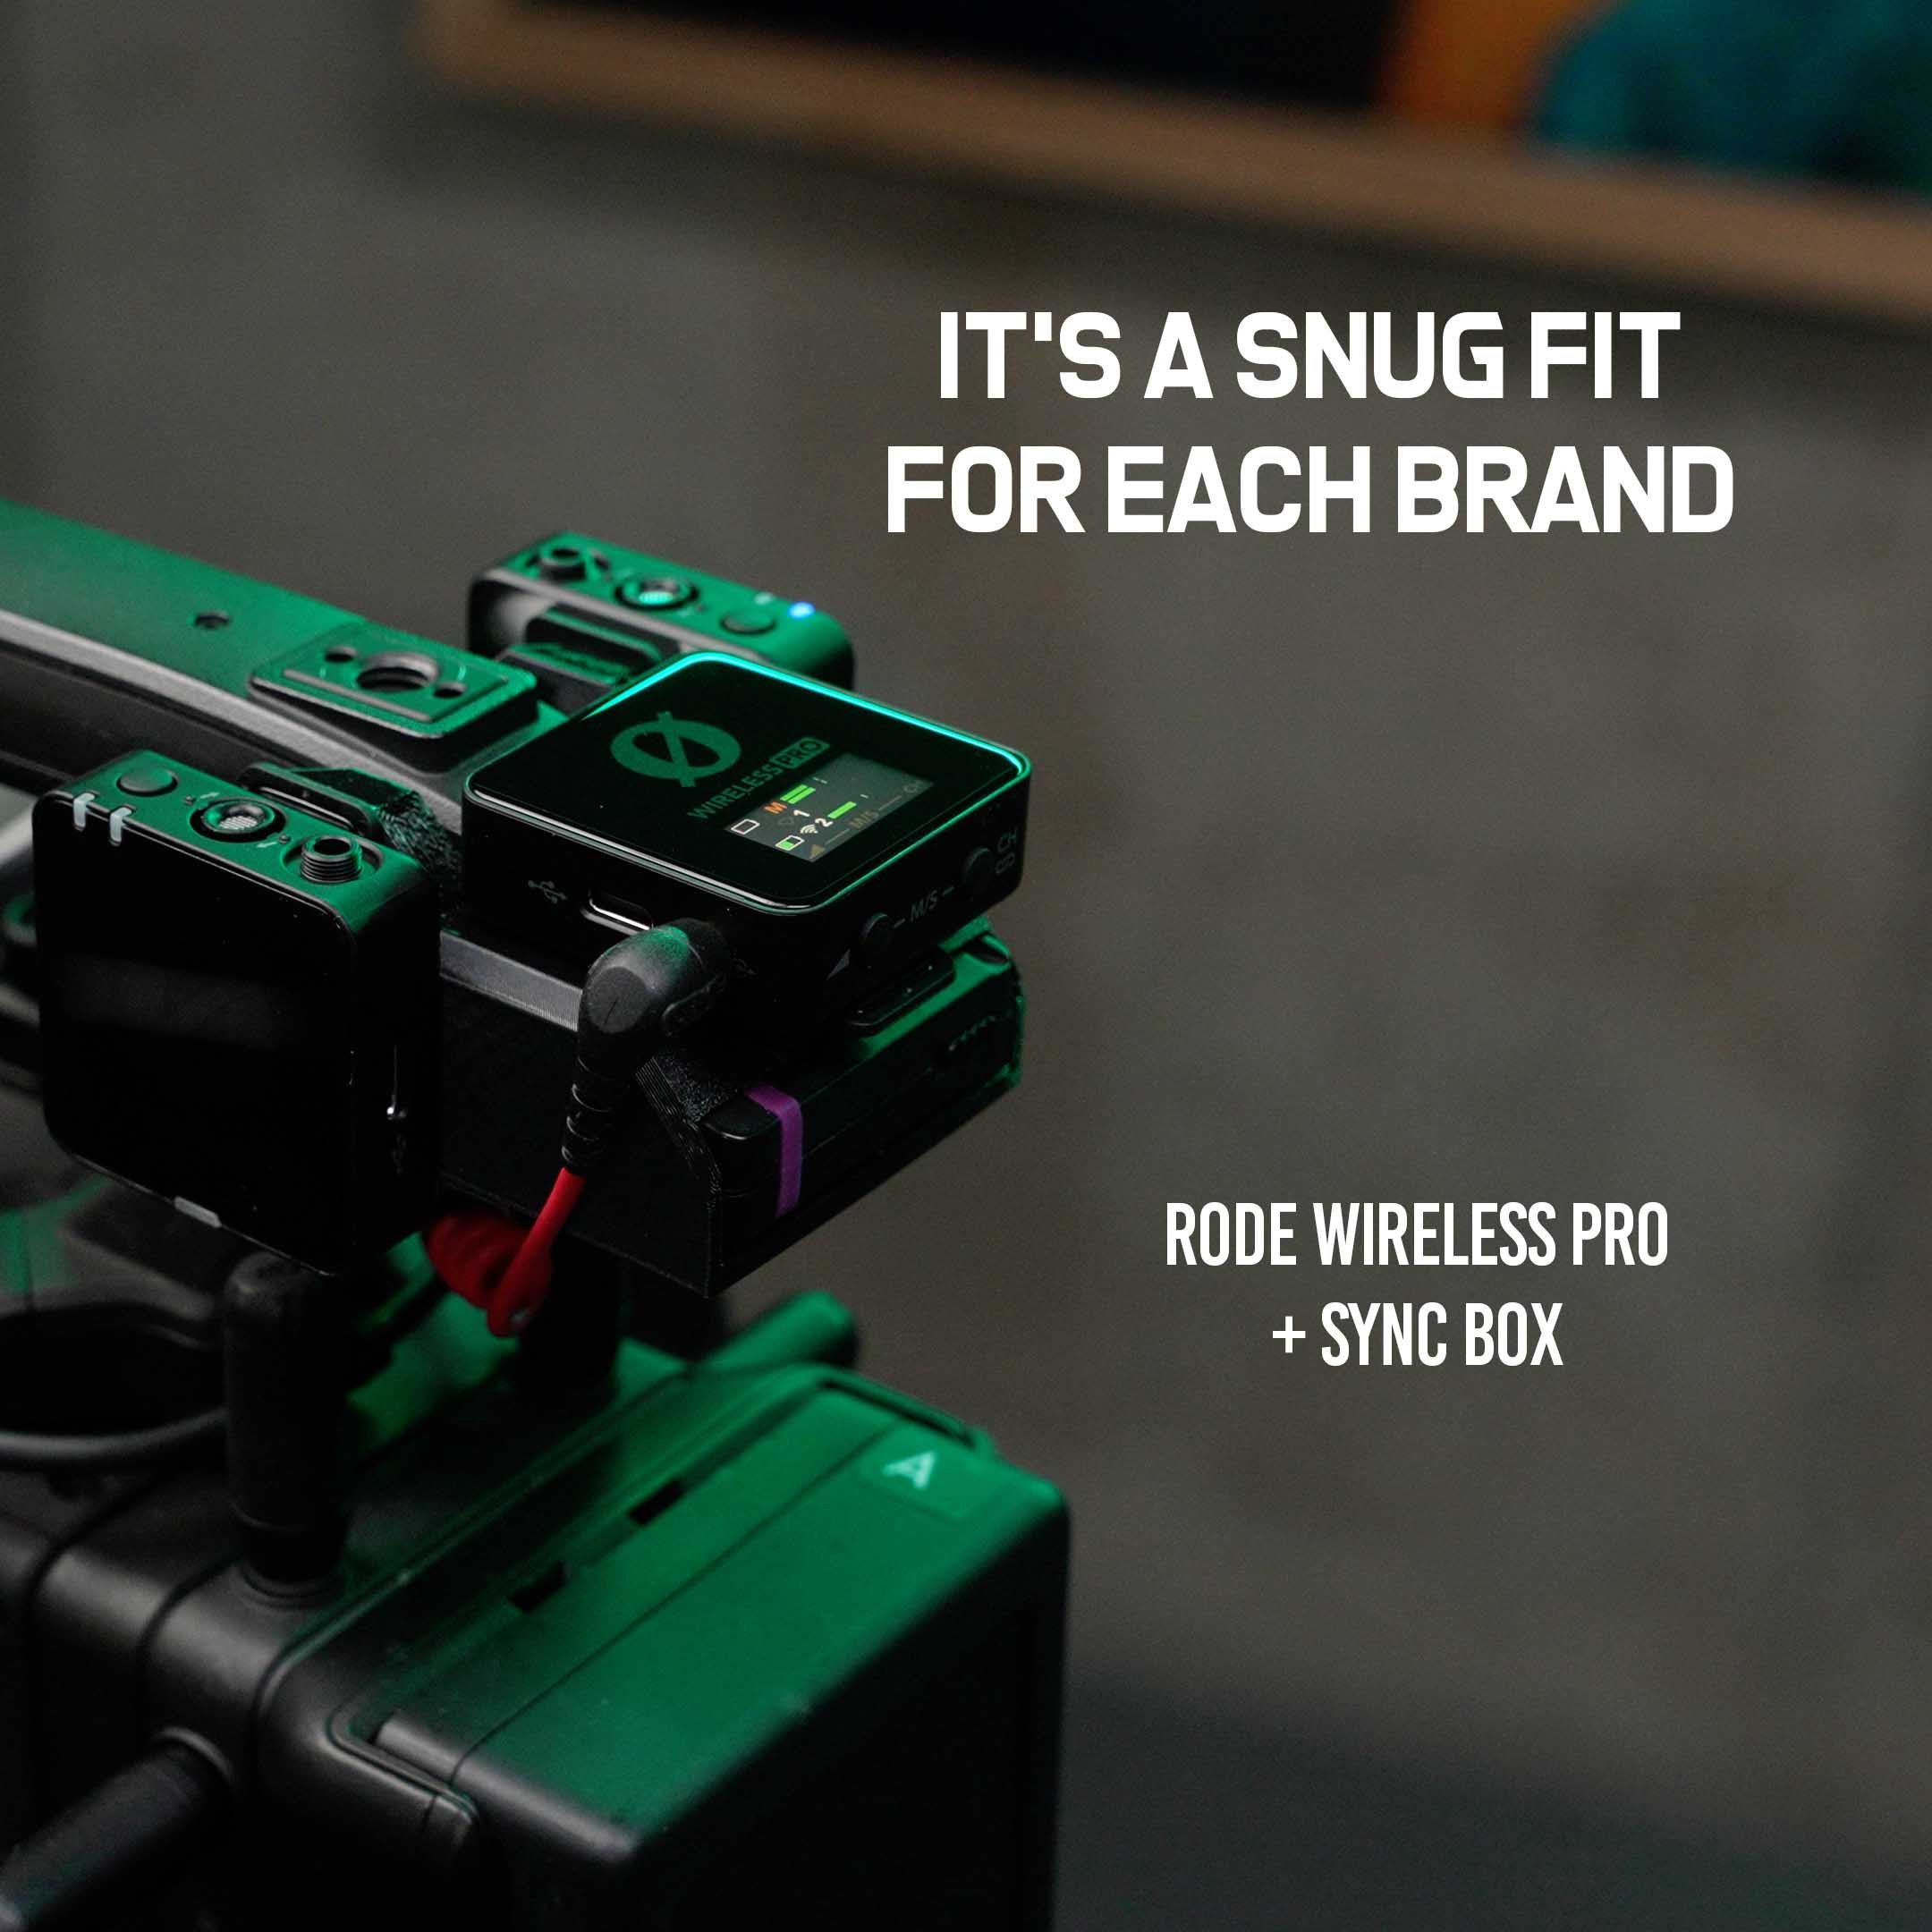
This audio holster fits the Rode wireless Pro kit and mounts on the rear of the Ronin 4d top handle.
Comes with (2) 1/4-20 hex bolts.
Custom snug fit that orients the mic receiver in the correct position to read and use menu.
Holster for the 2 wireless lavs when not on talent.
Keeps cable management clean and to the back of the rig.
2 versions available for Rode Wireless Pro (with Magnets attached, or no magnets attached)
Can hold Timecode box as well (Select option )
All prints come with Two Year Warranty (see terms and conditions below)
Choose Magnet Mount or Cold Shoe Clips for The Rode
Specific for the Rode wireless Pro lavs, they have an accessory magnet mount that has a metal clip that does not fit on normal cold shoe mounts. In this case, the clip on will hold the magnets, but the Lav holster portion must be sized accordingly. Unfortunately, theres no way to make a version that holds it in both modes, so purchaser needs to choose which one come sin most handy, or purchase both versions for discount.
Choose Receiver only or Timecode Sync box
This kit also comes as an optional timecode sync box holder (tentacle sync). Same snug fit, holds both receiver and tentacle box. Best use case is for those who have the DJI Expanded XLR / timecode plate, but it will also work without. Note: for those who don’t have expanded plate, then the sync box only works when used int he 3.5mm mic jack, and you need to change the input setting in menu to timecode in order to jam sync.
Bundle and Save!
Buy 2 versions (Magnet or Cold Shoe) for $35-$40 - Free shipping
Buy all 4 versions (Magnet Receiver only + Cold Shoe Receiver only + Magnet Receiver w/ Tentacle + Cold Shoe Receiver w/ Tentacle ) for $50 - Free shipping
Free Shipping USA
Free shipping USA, $15 international shipping (limited countries)
2 Year Warranty
Terms and Conditions: Our 3d Parts come with a 2-year warranty. If your part is damaged or defective, simply bprovide proof of purchase, and we’ll ship you a replacmetn at no extra cost except for shipping fees.
Made from Quality
Made from high quality 3d printed material : PETG
Does not warp or deform in hot cars ( Holds form well up to 90°C 195°F)
Includes hardware
Update models fast based on feedback and latest wireless lav kits
Tell us which ones you want us to add!
Want this in Aluminum? Message us!
Got any product suggestions or alterations? Want this in Aluminum? We want to hear how we can make more items for the ronin 4d. Message us at Josh@makeartnow.com
Patent Pending - 1-13-2024

Easy Solution for the Ronin 4D Top Handle
This audio holster fits the Hollyland Lark Max 2 (4 channel + Buds) kit and mounts on the rear of the Ronin 4d top handle.
Comes with (2) 1/4-20 hex bolts.
Custom snug fit that orients the mic receiver in the correct position to read and use menu.
Holster for the 4 wireless lavs when not on talent.
Also holds the Wireless ear Buds for monitoring talent - no more messy wires.
Keeps cable management clean and to the back of the rig.
2 versions available one with extra slot for Tentacle Sync lock box (also works with “Testacle Stink” hidden AirPod tracker.
All prints come with Two Year Warranty (see terms and conditions below)
Choose Receiver only or Timecode Sync box / TestIcle Stink Airpod Tracker
This kit also comes as an optional timecode sync box holder (tentacle sync). Same snug fit, holds both receiver and tentacle box. Best use case is for those who have the DJI Expanded XLR / timecode plate, but it will also work without. Note: for those who don’t have expanded plate, then the sync box only works when used int he 3.5mm mic jack, and you need to change the input setting in menu to timecode in order to jam sync.
Bundle and Save!
Buy 2 versions (Magnet or Cold Shoe) for $35-$40 - Free shipping
Buy all 4 versions (Magnet Receiver only + Cold Shoe Receiver only + Magnet Receiver w/ Tentacle + Cold Shoe Receiver w/ Tentacle ) for $50 - Free shipping
Free Shipping USA
Free shipping USA, $15 international shipping (limited countries)
2 Year Warranty
Terms and Conditions: Our 3d Parts come with a 2-year warranty. If your part is damaged or defective, simply provide proof of purchase, and we’ll ship you a replacement at no extra cost except for shipping fees.
Made from Quality
Made from high quality 3d printed material : PETG
Does not warp or deform in hot cars ( Holds form well up to 90°C 195°F)
Includes hardware
Update models fast based on feedback and latest wireless lav kits
Tell us which ones you want us to add!
Want this in Aluminum? Message us!
Got any product suggestions or alterations? Want this in Aluminum? We want to hear how we can make more items for the ronin 4d. Message us at Josh@makeartnow.com
Patent Pending - 7-13-2025
Easy Solution for the Ronin 4D Top Handle
This audio holster fits wireless lavalier kits and mounts on the rear of the Ronin 4d top handle. Choose from one of the following kits in the options menu, DJI mic 1, 2, 3, Hollyland Lark Max, & Rode Wireless Pro . Comes with (2) 1/4-20 hex bolts.
Orients the mic receiver in the correct position to read and use menu.
Also holds the 2 wireless lavs when not on talent.
Keeps cable management clean and to the back of the rig.
Can hold Timecode box as well (Select option )
Works with latest Wireless Lavs ( DJI Mic 2, DJI Mic 1, Hollyland Lark Max and Rode Wireless Pro)
All prints come with Two Year Warranty (see terms and conditions below)
Choose Slim fit or Timecode Sync box
This kit also comes as an optional timecode sync box holder (tentacle sync). Same snug fit, holds both receiver and tentacle box. Best use case is for those who have the DJI Expanded XLR / timecode plate, but it will also work without. Note: for those who don’t have expanded plate, then the sync box only works when used int he 3.5mm mic jack, and you need to change the input setting in menu to timecode in order to jam sync.
Free Shipping USA
Free shipping USA, $15 international shipping (limited countries)
2 Year Warranty
Terms and Conditions: Our 3d Parts come with a 2-year warranty. If your part is damaged or defective, simply bprovide proof of purchase, and we’ll ship you a replacmetn at no extra cost except for shipping fees.
Made from Quality
Made from high quality 3d printed material : PETG
Does not warp or deform in hot cars ( Holds form well up to 90°C 195°F)
Includes hardware
Update models fast based on feedback and latest wireless lav kits
Tell us which ones you want us to add!
Want this in Aluminum? Message us!
Got any product suggestions or alterations? Want this in Aluminum? We want to hear how we can make more items for the ronin 4d. Message us at Josh@makeartnow.com
Patent Pending - 1-13-2024
Easy Solution for the Ronin 4D Top Handle
This audio holster fits the DJI Mic 1 / Mic 2 / Mic 3 wireless lavalier kits and mounts on the rear of the Ronin 4d top handle.
Comes with (2) 1/4-20 hex bolts.
Custom snug fit that orients the mic receiver in the correct position to read and use menu.
Holster for the 2 wireless lavs when not on talent.
Keeps cable management clean and to the back of the rig.
Can hold Tentacle sync Timecode box as well (Select option )
Buy one version or buy both for extra $10.
Works with latest Wireless Lavs ( DJI Mic 2, DJI Mic 1, Hollyland Lark Max and Rode Wireless Pro) - See other listings.
All prints come with Two Year Warranty (see terms and conditions below)
DJI Mic 3 comes with 4 slots for lavs (they are 4 channel optional)
Choose Slim fit or Timecode Sync box
This kit also comes as an optional timecode sync box holder (tentacle sync). Same snug fit, holds both receiver and tentacle box. Best use case is for those who have the DJI Expanded XLR / timecode plate, but it will also work without. Note: for those who don’t have expanded plate, then the sync box only works when used int he 3.5mm mic jack, and you need to change the input setting in menu to timecode in order to jam sync.
Free Shipping USA
Free shipping USA, $15 international shipping (limited countries)
2 Year Warranty
Terms and Conditions: Our 3d Parts come with a 2-year warranty. If your part is damaged or defective, simply bprovide proof of purchase, and we’ll ship you a replacmetn at no extra cost except for shipping fees.
Made from Quality
Made from high quality 3d printed material : PETG
Does not warp or deform in hot cars ( Holds form well up to 90°C 195°F)
Includes hardware
Update models fast based on feedback and latest wireless lav kits
Tell us which ones you want us to add!
Want this in Aluminum? Message us!
Got any product suggestions or alterations? Want this in Aluminum? We want to hear how we can make more items for the ronin 4d. Message us at Josh@makeartnow.com
Patent Pending - 1-13-2024

Mounts on the Ronin 4D Motor
This motor mount fits on the Ronin 4d and is a snug fit for any cold shoe Lavalier, including (DJI Mic 1, DJI Mic 2, Hollyland Lark Max , Rode Wireless Pro )
Snug fit and orients lavalier straight ahead toward talent.
Offered for both left side or right side, (Discounted for both).
Great solution for adding additional ambient audio track for single talent recording.
Works with motors, will not fatigue motors.
Hold other light weight Cold shoe accesories
Free Shipping USA
Free shipping USA, $15 international shipping (limited countries)
2 Year Warranty
Terms and Conditions: Our 3d Parts come with a 2-year warranty. If your part is damaged or defective, simply bprovide proof of purchase, and we’ll ship you a replacmetn at no extra cost except for shipping fees.
Made from Quality
Made from high quality 3d printed material : PETG
Does not warp or deform in hot cars ( Holds form well up to 90°C 195°F)
Includes hardware
Update models fast based on feedback and latest wireless lav kits
Tell us which ones you want us to add!
Want this in Aluminum? Message us!
Got any product suggestions or alterations? Want this in Aluminum? We want to hear how we can make more items for the ronin 4d. Message us at Josh@makeartnow.com
- ACTION CAMERA -
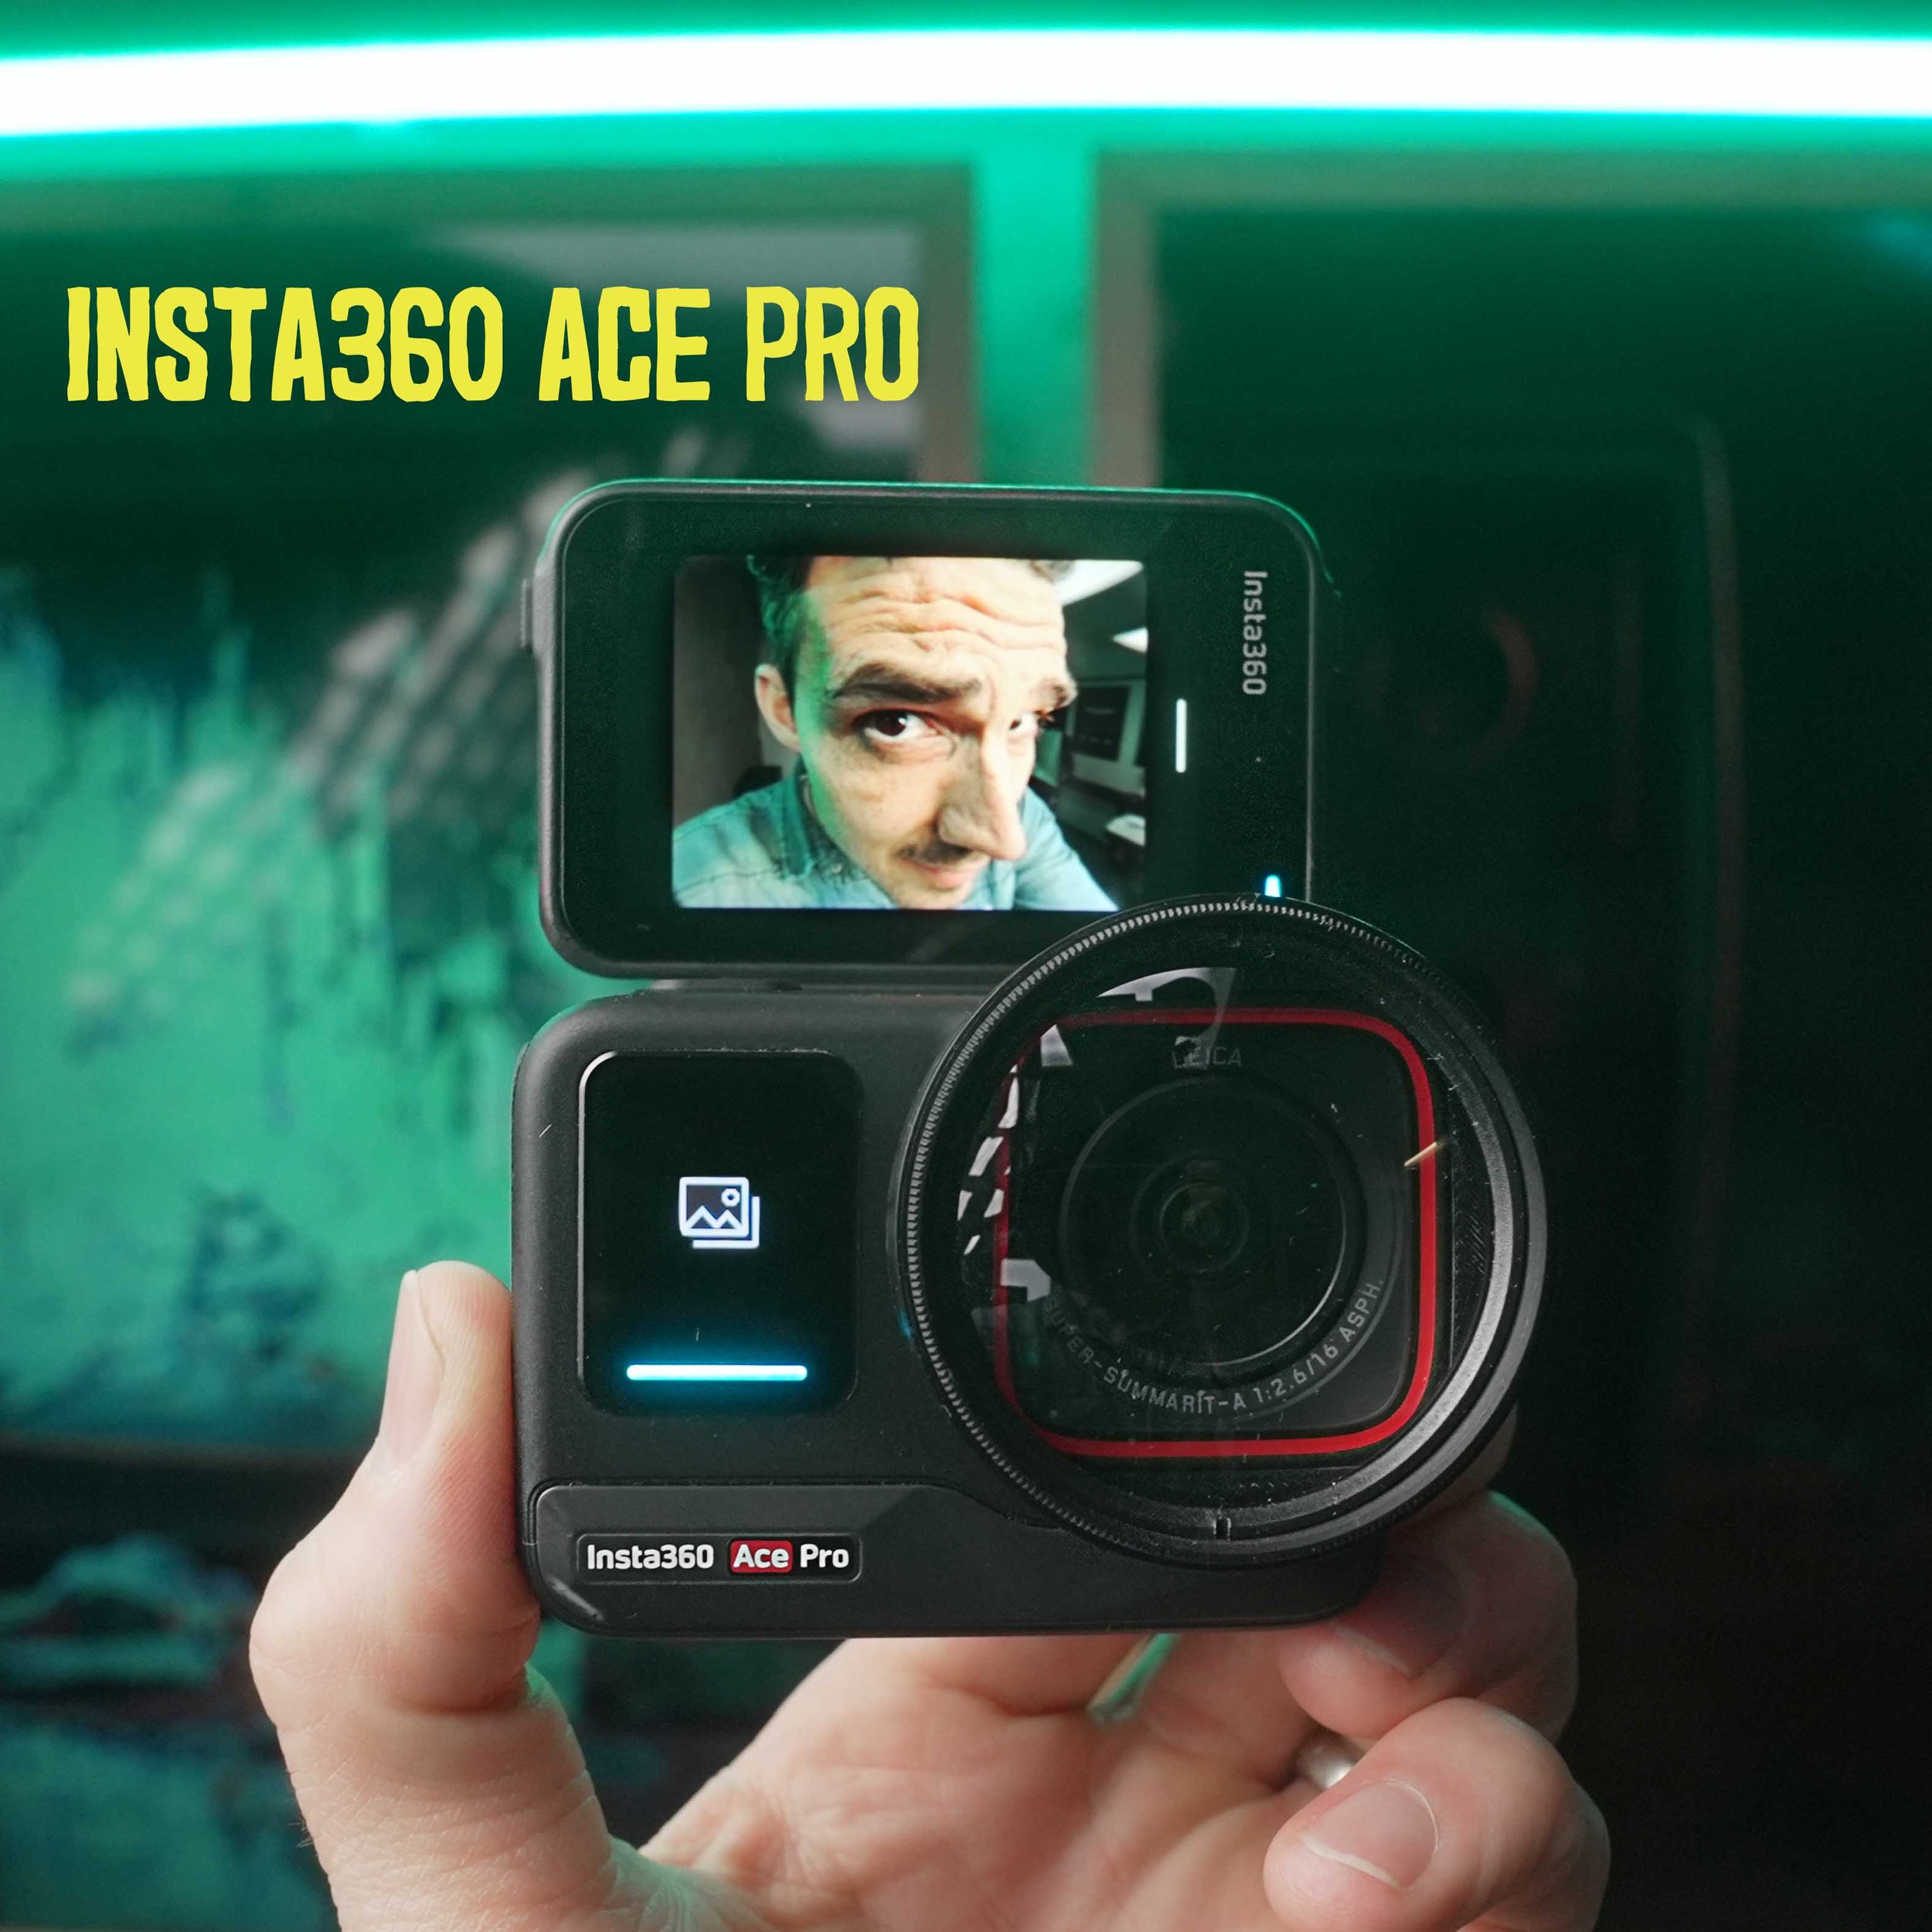
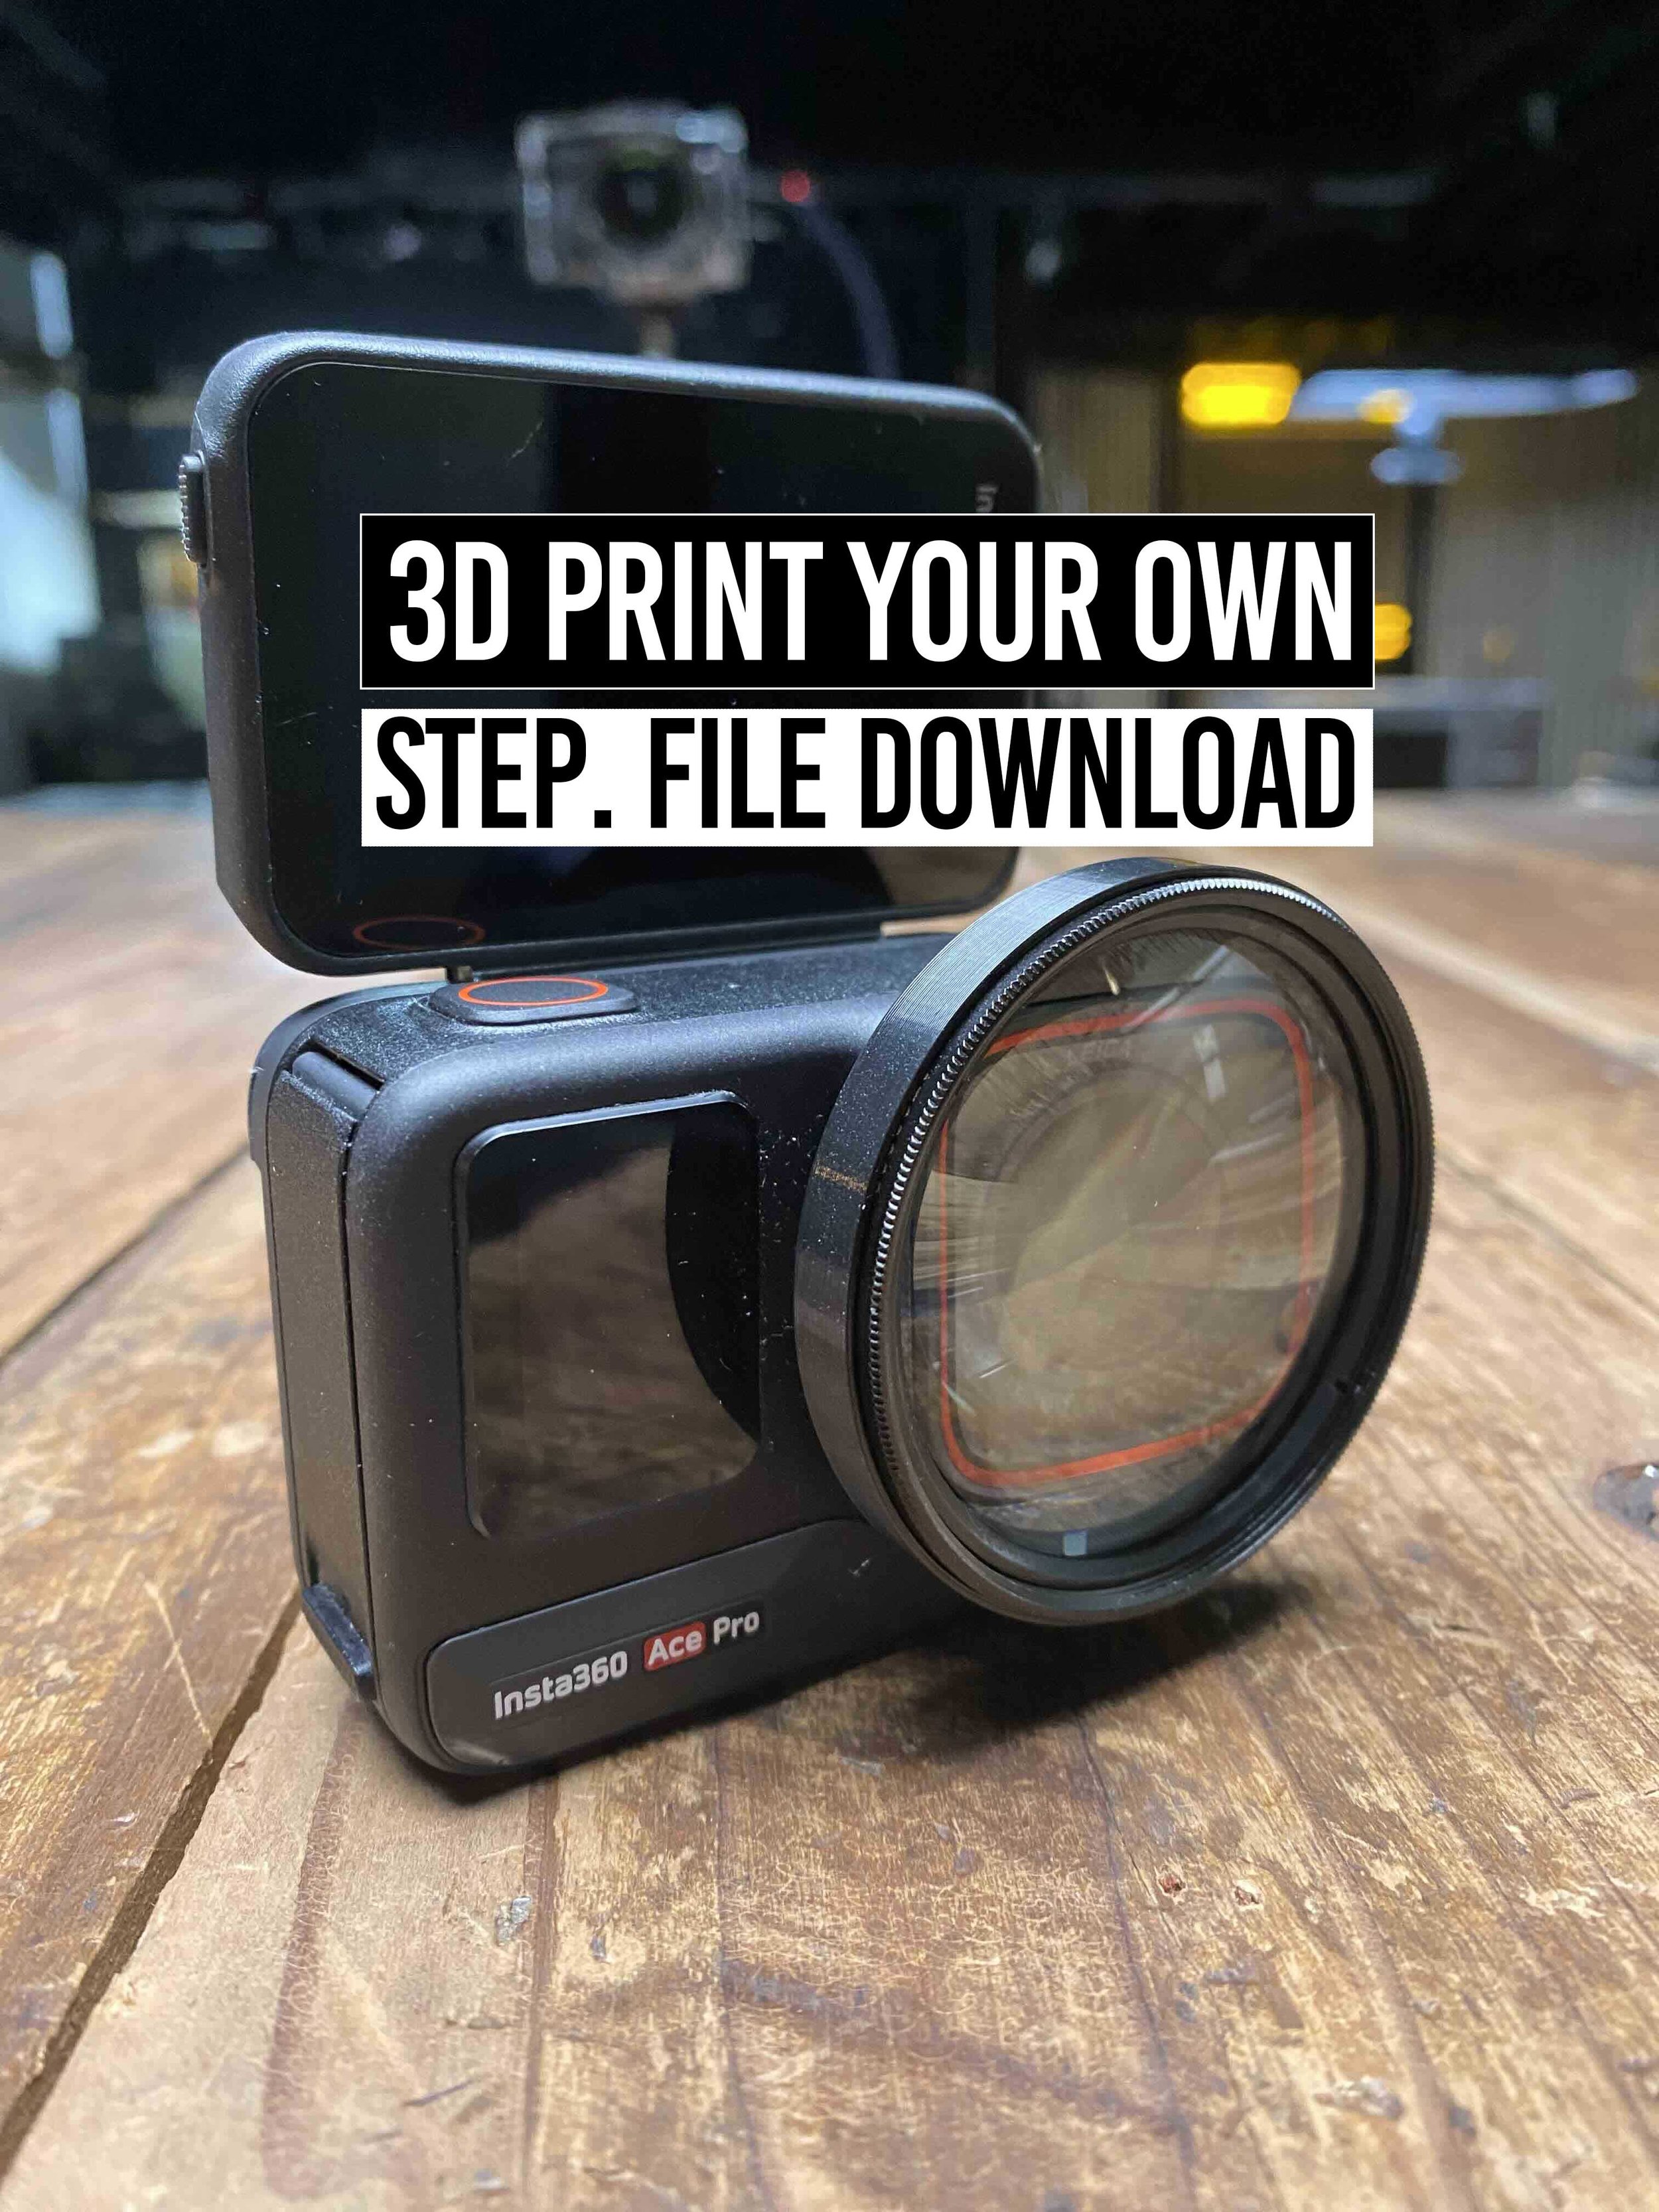
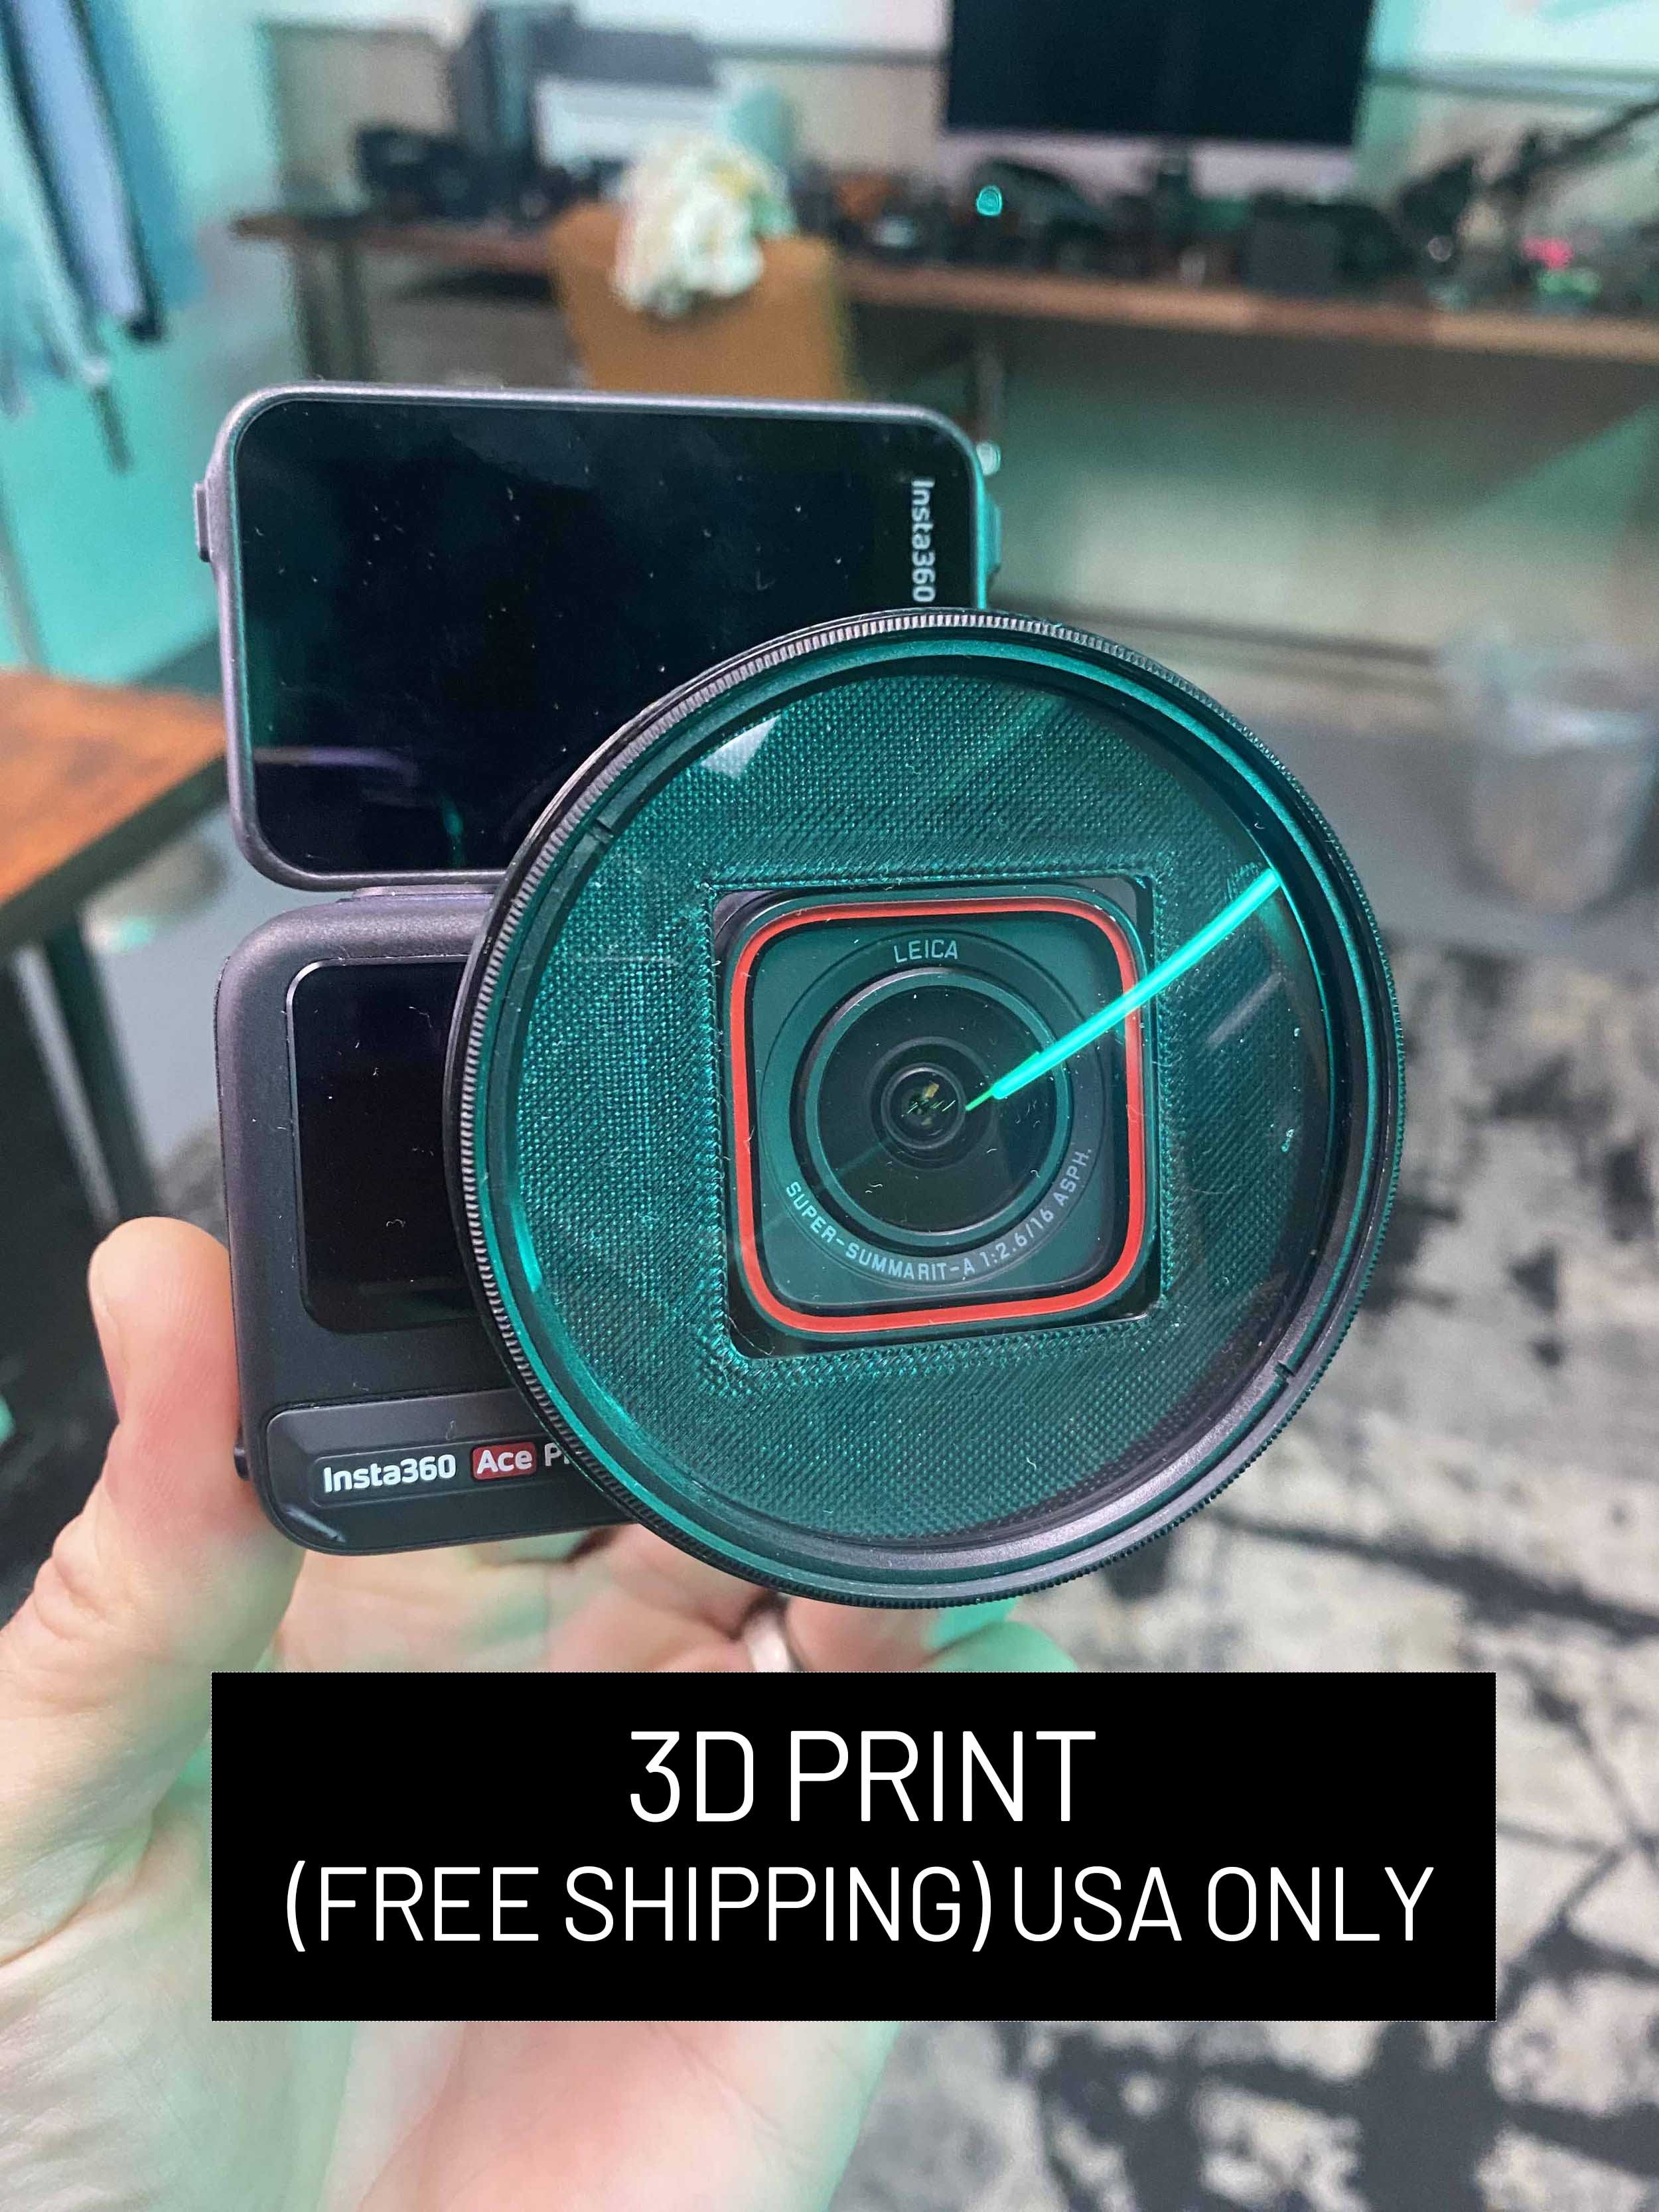
Now you can Vlog with the Insta360 Ace Pro 1 or 2 ( or Ace Pro 2 New Face design) in super sharp focus!
High Quality 3d printed Adapter + Free shipping
This is for a 3d printed adapter to adapt a Vivitar Diopter set to the Insta360 Ace , Ace Pro 1, Ace pro 2.
This comes in the options for 46mm, 52mm, 67mm , 72mm , 82mm, 95mm specifically designed to fit these Vivitar Diopters.
I strongly recommend the 52mm its the perfect size and weight.
Make sure to select the correct face as they are different (see photo below)
-Ace Pro 1 , Ace Pro 2 , Ace Pro 2 (new face style)
WHY YOU NEED A DIOPTER TO VLOG WITH ACTION CAMERA
All action cameras have fixed focus, and normally this is set to 5-6ft away from camera, so this means that anything closer than 5-6ft will be a soft and out of focus. You can change this by adding a front diopter in front of the camera and depending on the strength of the diopter (+1, +2, +4, or +10) you can change that focus plane. This is very powerful feature that can turn your action camera into a vlog camera or even a macro camera.
MULTIPLE SIZE OPTIONS SAVE YOU SPACE OR MONEY
We have several options, you save space and fit it all in your pocket with the compact 46mm, or 52mm, (warning vignette on Osmo Action 4 when in superview mode with the 46mm Adapter). Or you can save some money and use the full size diopters that you would buy for normal camera lenses, such as the 67mm or 72mm.
HOW IT WORKS
This is a high quality PETG print, that will snugly fit on your Ace or Ace Pro, and also holds the diopter of your choosing. We also offer this diopter mount for DJI Osmo Action 4.
BEFORE YOU BUY
This adapter may fit other brand 46mm, 52mm, 67mm, or 72mm diopters and ND filters but it’s not guaranteed. To be sure, buy this Vivitar 4 piece diopter kit here.
See the diopter demonstrated here in this video for the Ace Pro
This listing does not include the Diopter kit, or the Ace Pro- Both sold separately
Have your own 3d Printer? You can download the STEP. file for this item for $15, sold here.
What’s Included in the Kit
• (2) PEGT 3D-printed gimbal locks
• Free U.S. shipping
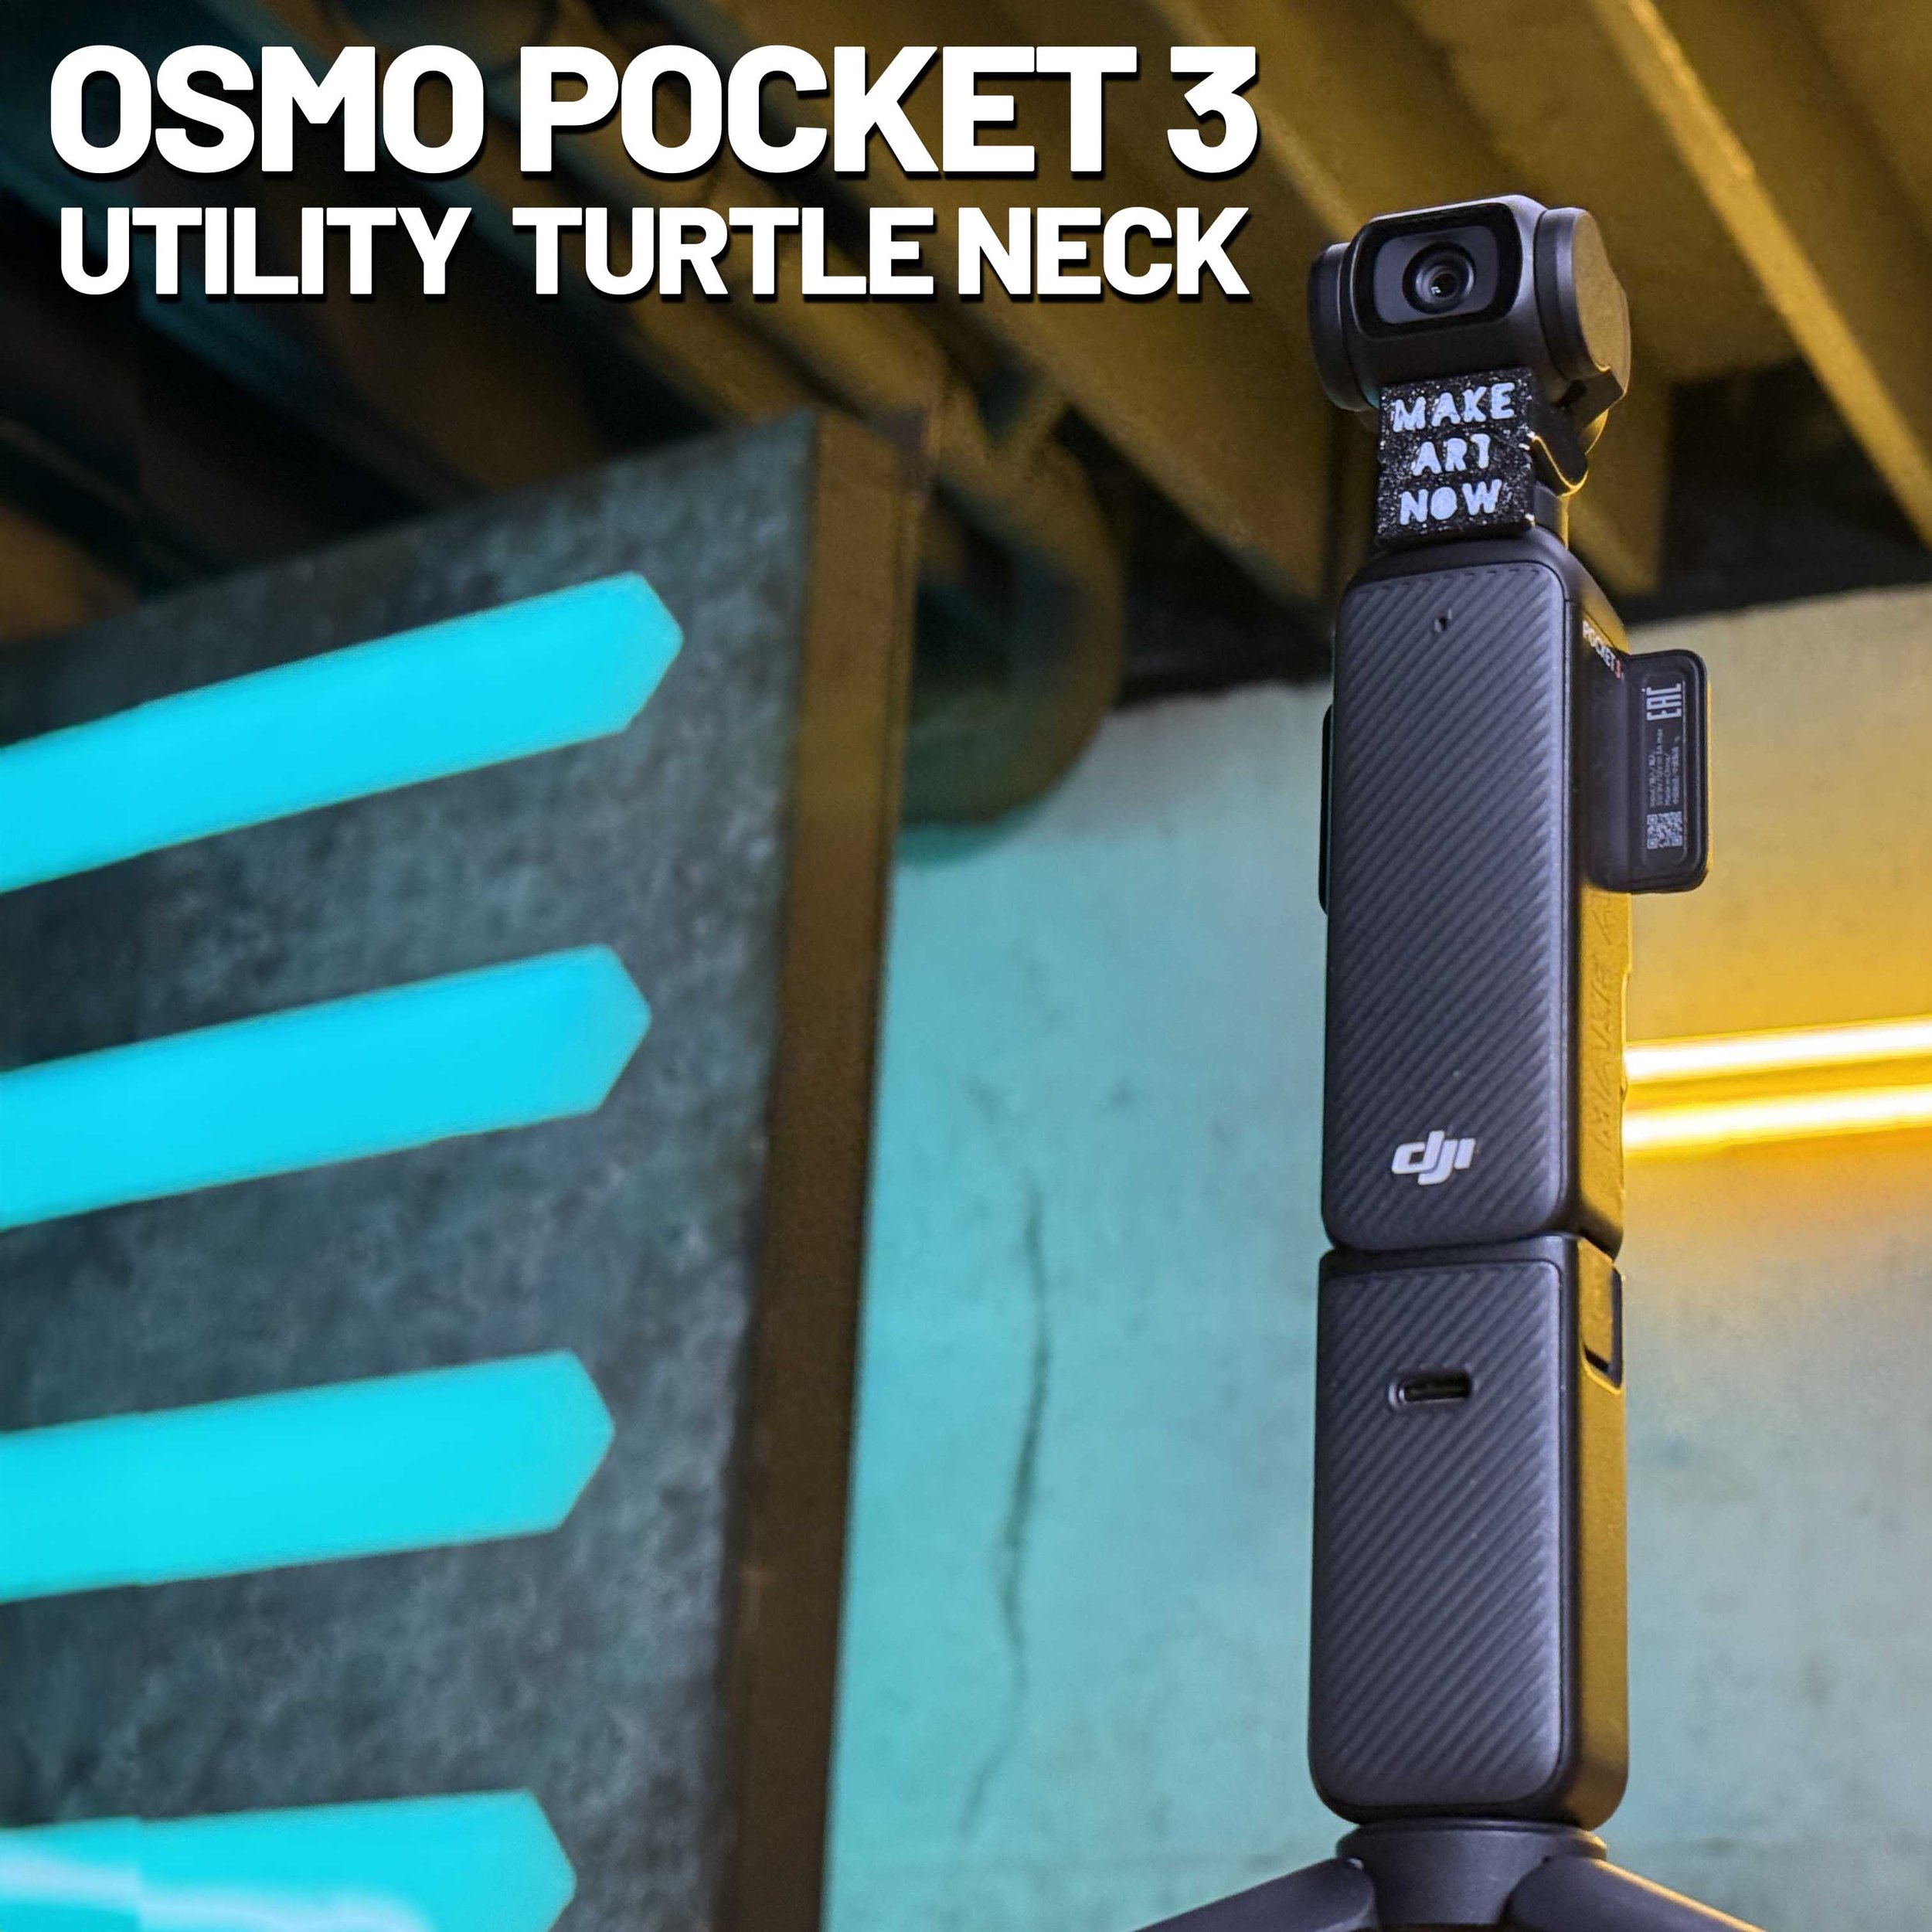
Compatibility
This gimbal lock is custom-designed exclusively for the DJI Osmo Pocket 3. It will not fit any other model.
Why Use a Gimbal Lock?
• Locks all axes — pan, tilt, and roll
• Snorri cam / POV shots — keeps framing locked to your subject
• Interior car shots — prevents gimbal drift while driving
• Everyday convenience — secure the gimbal without using the carrying case
Important Notes
• The Osmo Pocket 3 may display an error message when powered on with the gimbal locked.
• Gimbal motors may warm up during use but appear unaffected in short durations.
• Use at your own risk — prolonged use may damage your gimbal. This tool is intended for specific shots only.
Add-On: 52mm Diopter Combo Lock
• Optional 3D-printed mount + gimbal lock combo
• Locks gimbal just like the standard version
• Holds any 52mm diopter, ND, or specialty filter with friction fit
• Enables super close macro shots, far closer than native Osmo Pocket 3 allows
Note: 52mm glass diopter set is not included. Diopter multi strength kit available [here] for $15.

Now you can Vlog with the Osmo Action 4 & 5 & 6 in super sharp focus!
High Quality 3d printed Adapter + Free shipping
This is for a 3d printed Adapter to adapt a Vivitar Diopter set to the DJI Osmo Action 4.
This comes in the options for 46mm, 52mm, 67mm or 72mm specifically designed to fit these Vivitar Diopters
WHY YOU NEED A DIOPTER TO VLOG WITH ACTION CAMERA
All action cameras have fixed focus, and normally this is set to 5-6ft away from camera, so this means that anythng closer than 5-6ft will be a little soft. You can change this by adding a diopter in front of the camera and depending on the strength of the diopter (+1, +2, +4, or +10) you can change that focus plane. This is very powerful feature and can turn your Action camera into a macro camera.
MULTIPLE SIZE OPTIONS SAVE YOU SPACE OR MONEY
We have several options, you save space and fit it all in your pocket with the compact 46mm, or 52mm, (warning vignette on Osmo Action 4 when in superview mode with the 46mm Adapter). Or you can save some money and use the full size diopters that you would buy for normal camera lenses, such as the 67mm or 72mm.
HOW IT WORKS
This is a high quality PETG print, that will snugly fit on your Osmo Action 4 and also hold the diopter of your choosing. We also offer this diopter mount for Insta360 ACE Pro sold here
BEFORE YOU BUY
This adapter may fit other brand 46mm, 52mm, 67mm, or 72mm diopters and ND filters but it’s not guaranteed. To be sure, buy this Vivitar 4 piece diopter kit here.
See the diopter demonstrated here in this video for the Ace Pro
This listing does not include the Diopter kit, or the Osmo Action 4 - Both sold separately
Have your own 3d Printer? You can download the STEP. file for this item for $15, sold here.
- FREE STUFF -
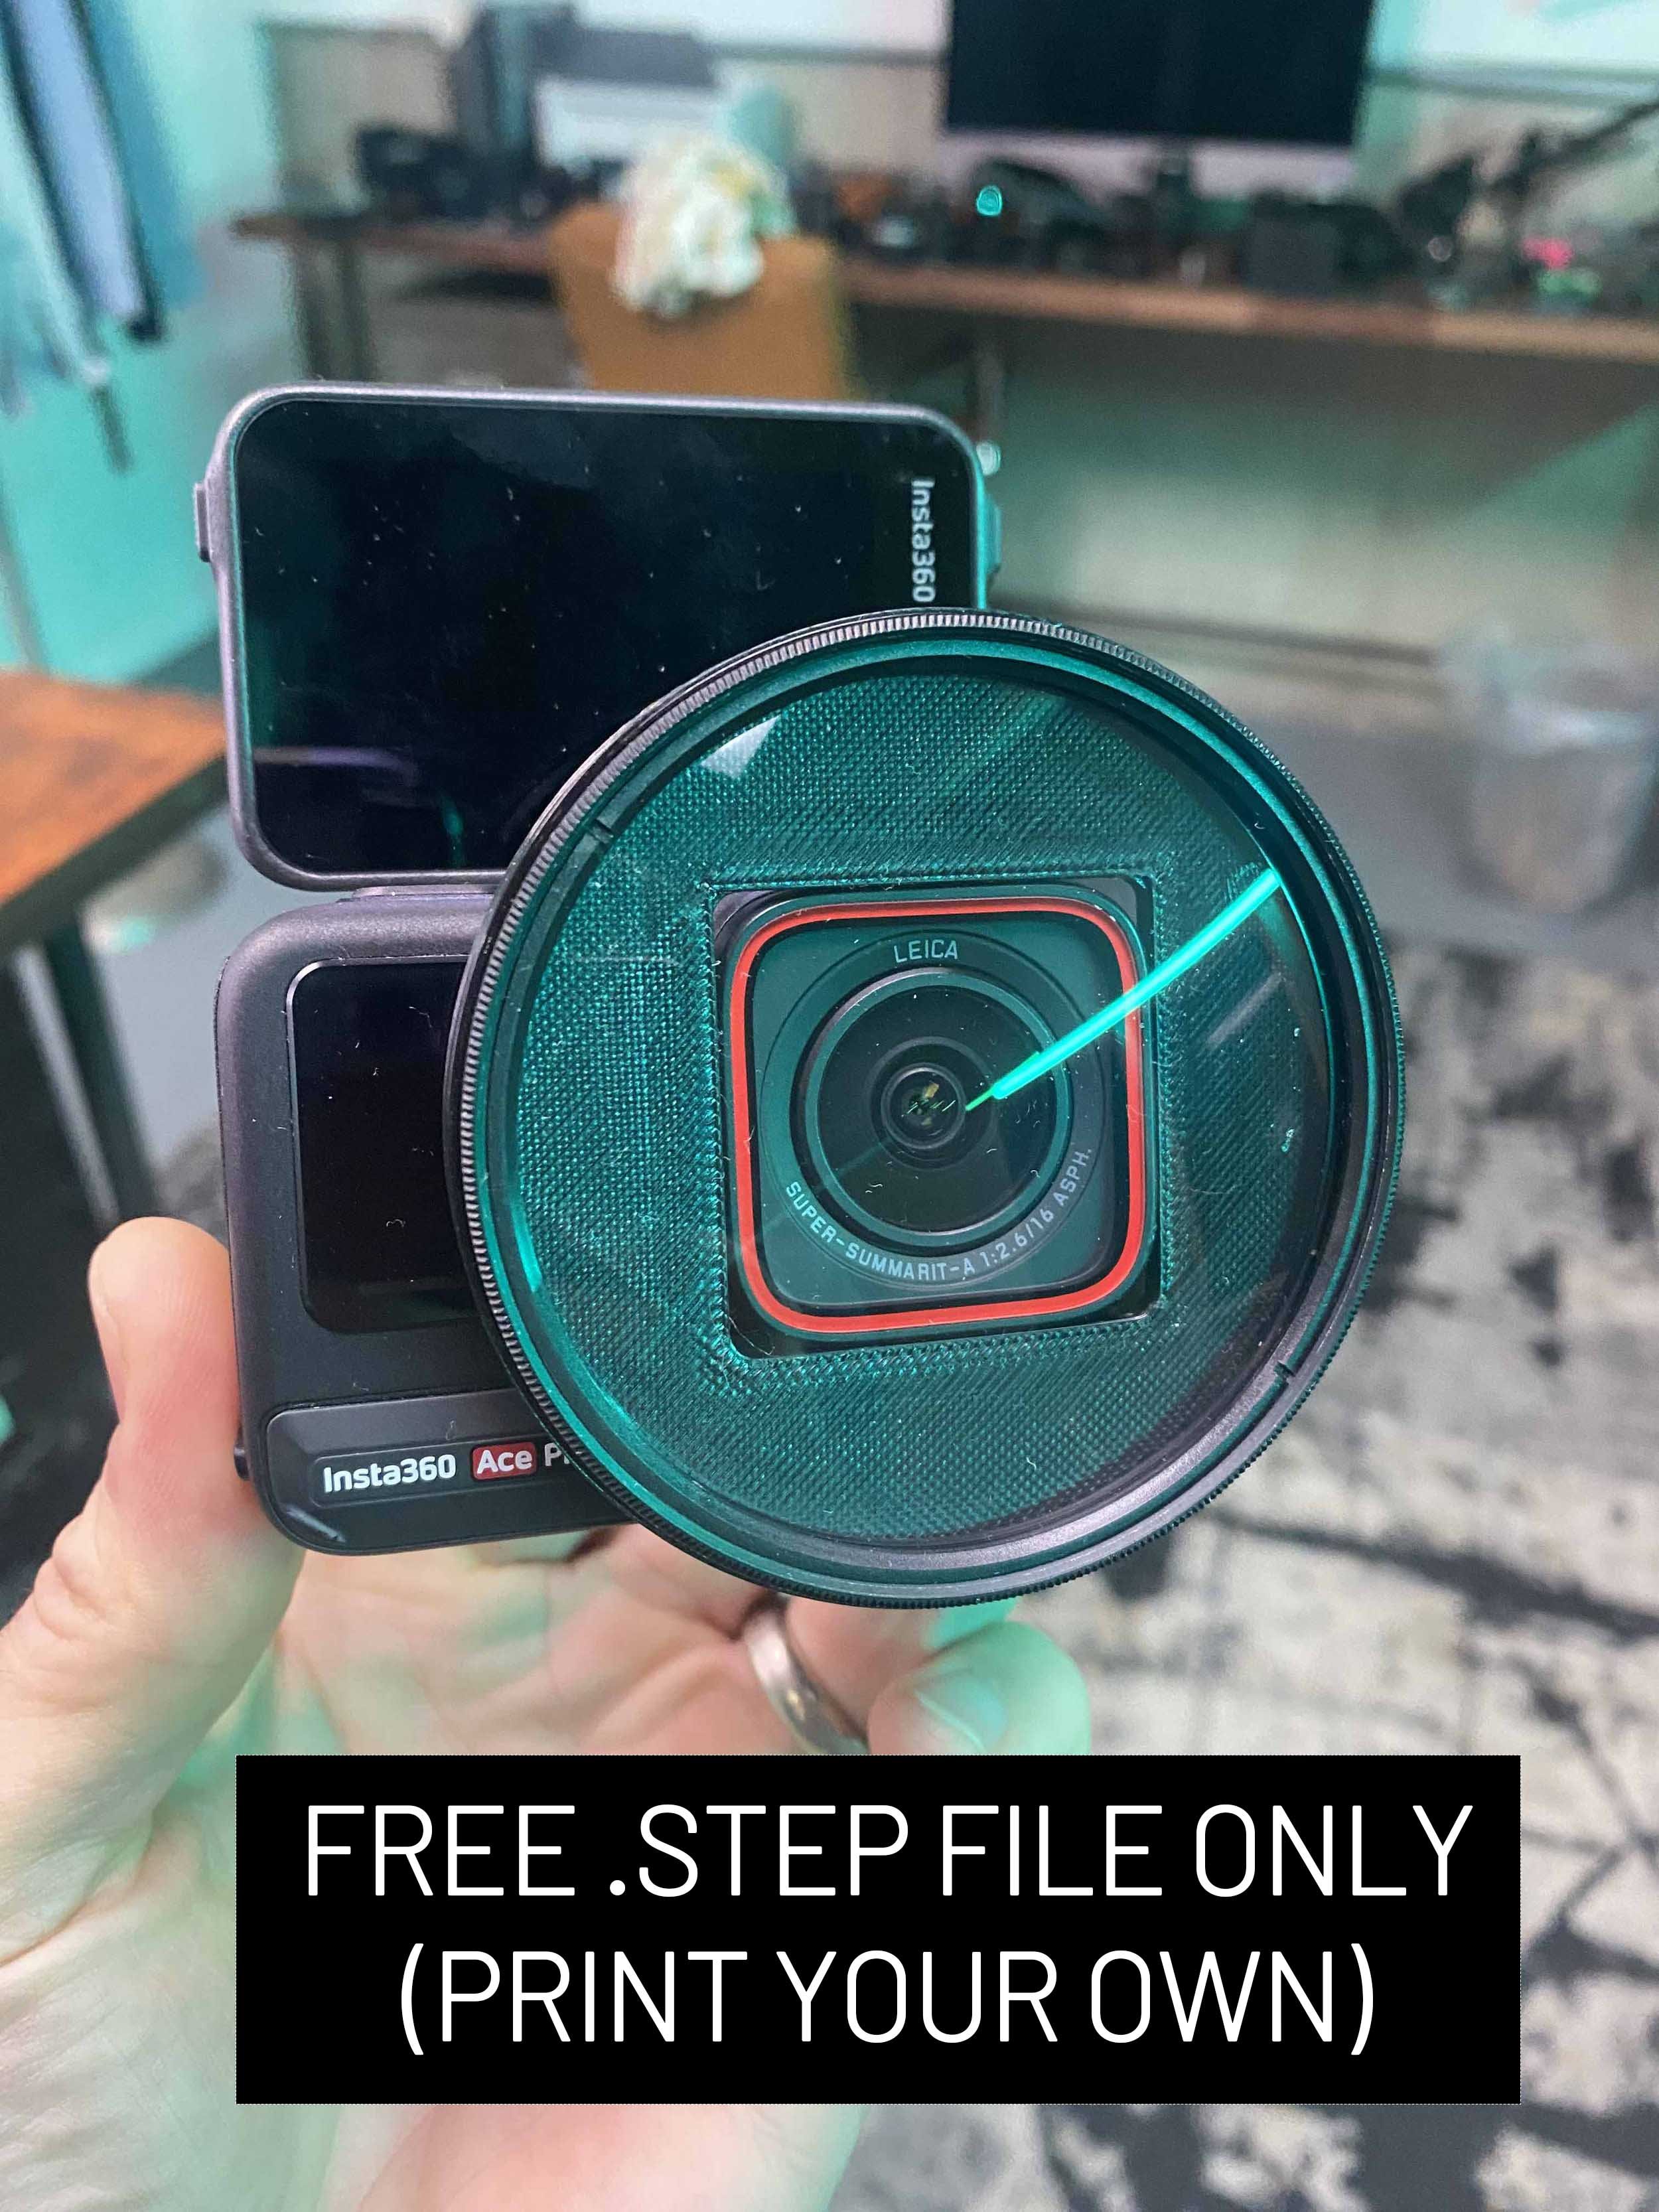
3d Print File - Fits any 72mm close focus diopter (found here. For vlogging I would recommend a +4 diopter, but a +1 or +2 can wrk as well.
This is for a 3d STEP file, for the Ace Pro Adapter 52mm. Adapt a Vivitar 52mm Diopter to the Ace Pro. This will allow you to Vlog in sharp focus, and perform other macro shots depending on the strength of the Diopter used.
(Normal focus on Ace Pro is about 6+ feet past subject, but with a +4 diopter you can get tact sharp focus on the vlogging subject from 6 inches away)
This adapter may fit other brand 52mm diopters and ND filters but to be sure, buy this 4 piece diopter kit here.
Demonstrated here in this video
This Listing does not include the Diopter kit, or the Ace Pro - Both sold separately
Want to buy one printed already? $20 sold here (free shipping USA)
72mm Diopter to Ace Pro 3d Print (does not include glass diopter, must purchase separately) This only works with older face style. Not compatible with newest Ace Pro 2 (11/20/2025 edition)
This is a 3d print made from durable PETG that will fit your 72mm Close up Diopters to the Ace Pro frame. This is ideal for vlogging as it shortens the minimum focusing distance and lets you vlog with crispy 8k or Low light pure video mode. The recommended Diopter to fit snug is this one here . It’s possible other 72mm will fit, but its not guaranteed.
Recommended diopter strength is +4 for very close vlogging and +2 for relaxed longer arm vlogging. (Try diopter +10 for extreme eye ball shots!)
- DIGITAL ASSETS -

BLADE RUN’N GUN 7 PACK
This (7) pack are featured in
"TURN your SONY LOWLIGHT footage into BLADE RUNNER".
https://youtu.be/vHDXYXSOopg
WILL WORK WITH ANY CAMERA FOOTAGE SHOT IN REC 709 WITH A BALANCED CONTRAST CURVE (NON LOG PROFILE)
IF USING WITH LOG FOOTAGE, YOU WILL NEED TO ADD CONTRAST CURVE FIRST AND BALANCE THE IMAGE VIA WHITE BALANCE AND TINT .
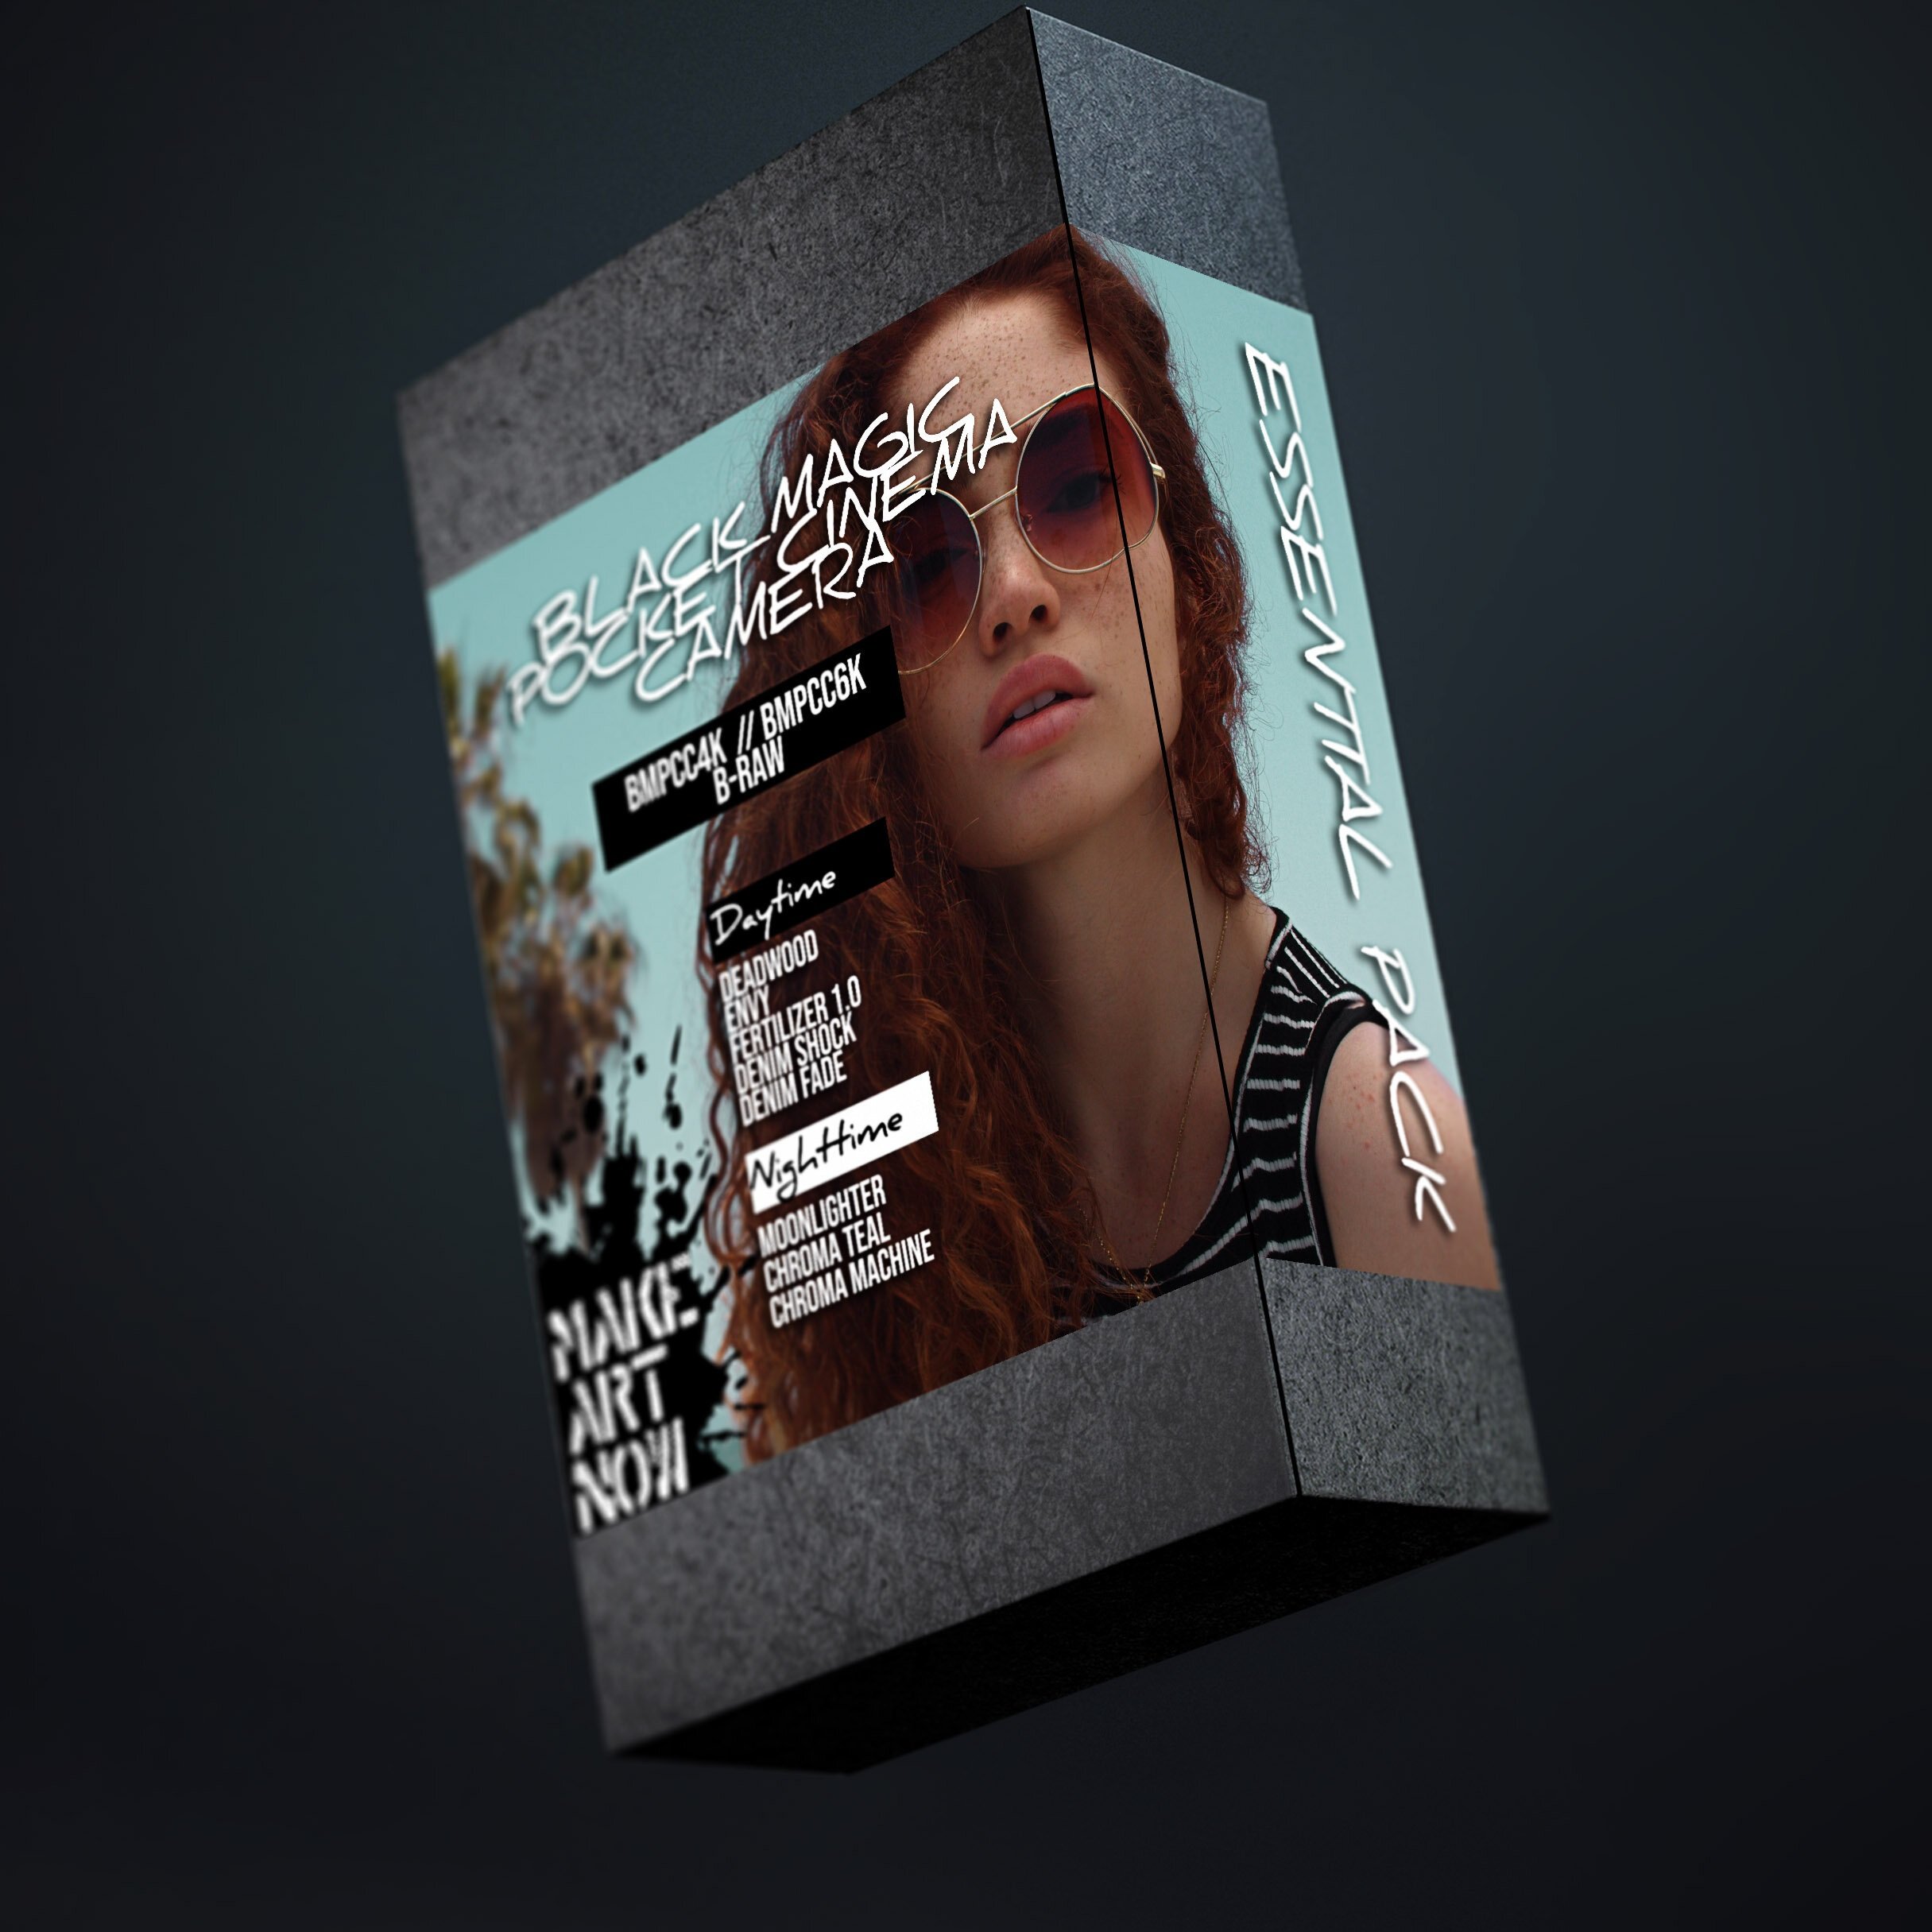
BMPCC4K/ BMPCC6K B-RAW COLOR GRADES
***** FOR FILM GAMMA ****
Featured in https://youtu.be/lYWDolajdZA
This pack includes 5 daytime and 3 nighttime grades.
DAYTIME GRADES (best color temp 5600K)
DEADWOOD - Great for outdoor shots, muted blues with rich orange and magenta-- useful for skin tones on sunny days and creating an otherworldly environment. (skin tones unaffected)
ENVY - Great on skin tones in green environments. This brings out magenta in the skin, while making foliage more vibrant and contrasty. Great for fashion shoots, or whimsical wood environments. Best used in shaded areas away from direct sunlight.
FERTILIZER 1.0 - Taking envy up another level, this color grade uses 3 different methods to renew dead foliage and give more life. Best used on yellowed/ browning leaves to renew deeper greens. This It can be used in combination with other grades. (see notes for the order of layering)
DENIM SHOCK - Great for sunsets, fashion shoots, cloudy days.
DENIM FADE - Great for sunny days, hints of orange and teal and a warm vintage finish to footage.
NIGHT TIME GRADES (Best color temp 2850k, except moonlighter)
MOONLIGHTER- low light LUT for orange and teal skin tones. As seen in Low Light Moonlight video. Suggested use, 5600K
CHROMA MACHINE- great for subways, buildings, side alleys, products in tungsten light.
CHROMA TEAL - For buildings, machinery, products with tungsten light.
*****WILL NOT WORK AS DESIRED USING OTHER GAMMA SETTINGS, DESIGNED FOR FILM GAMMA.
******BEST USED FOR DAVINCI RESOLVE BUT CAN BE USED IN PREMIER OR FINAL CUT.
MAKE.ART.NOW.
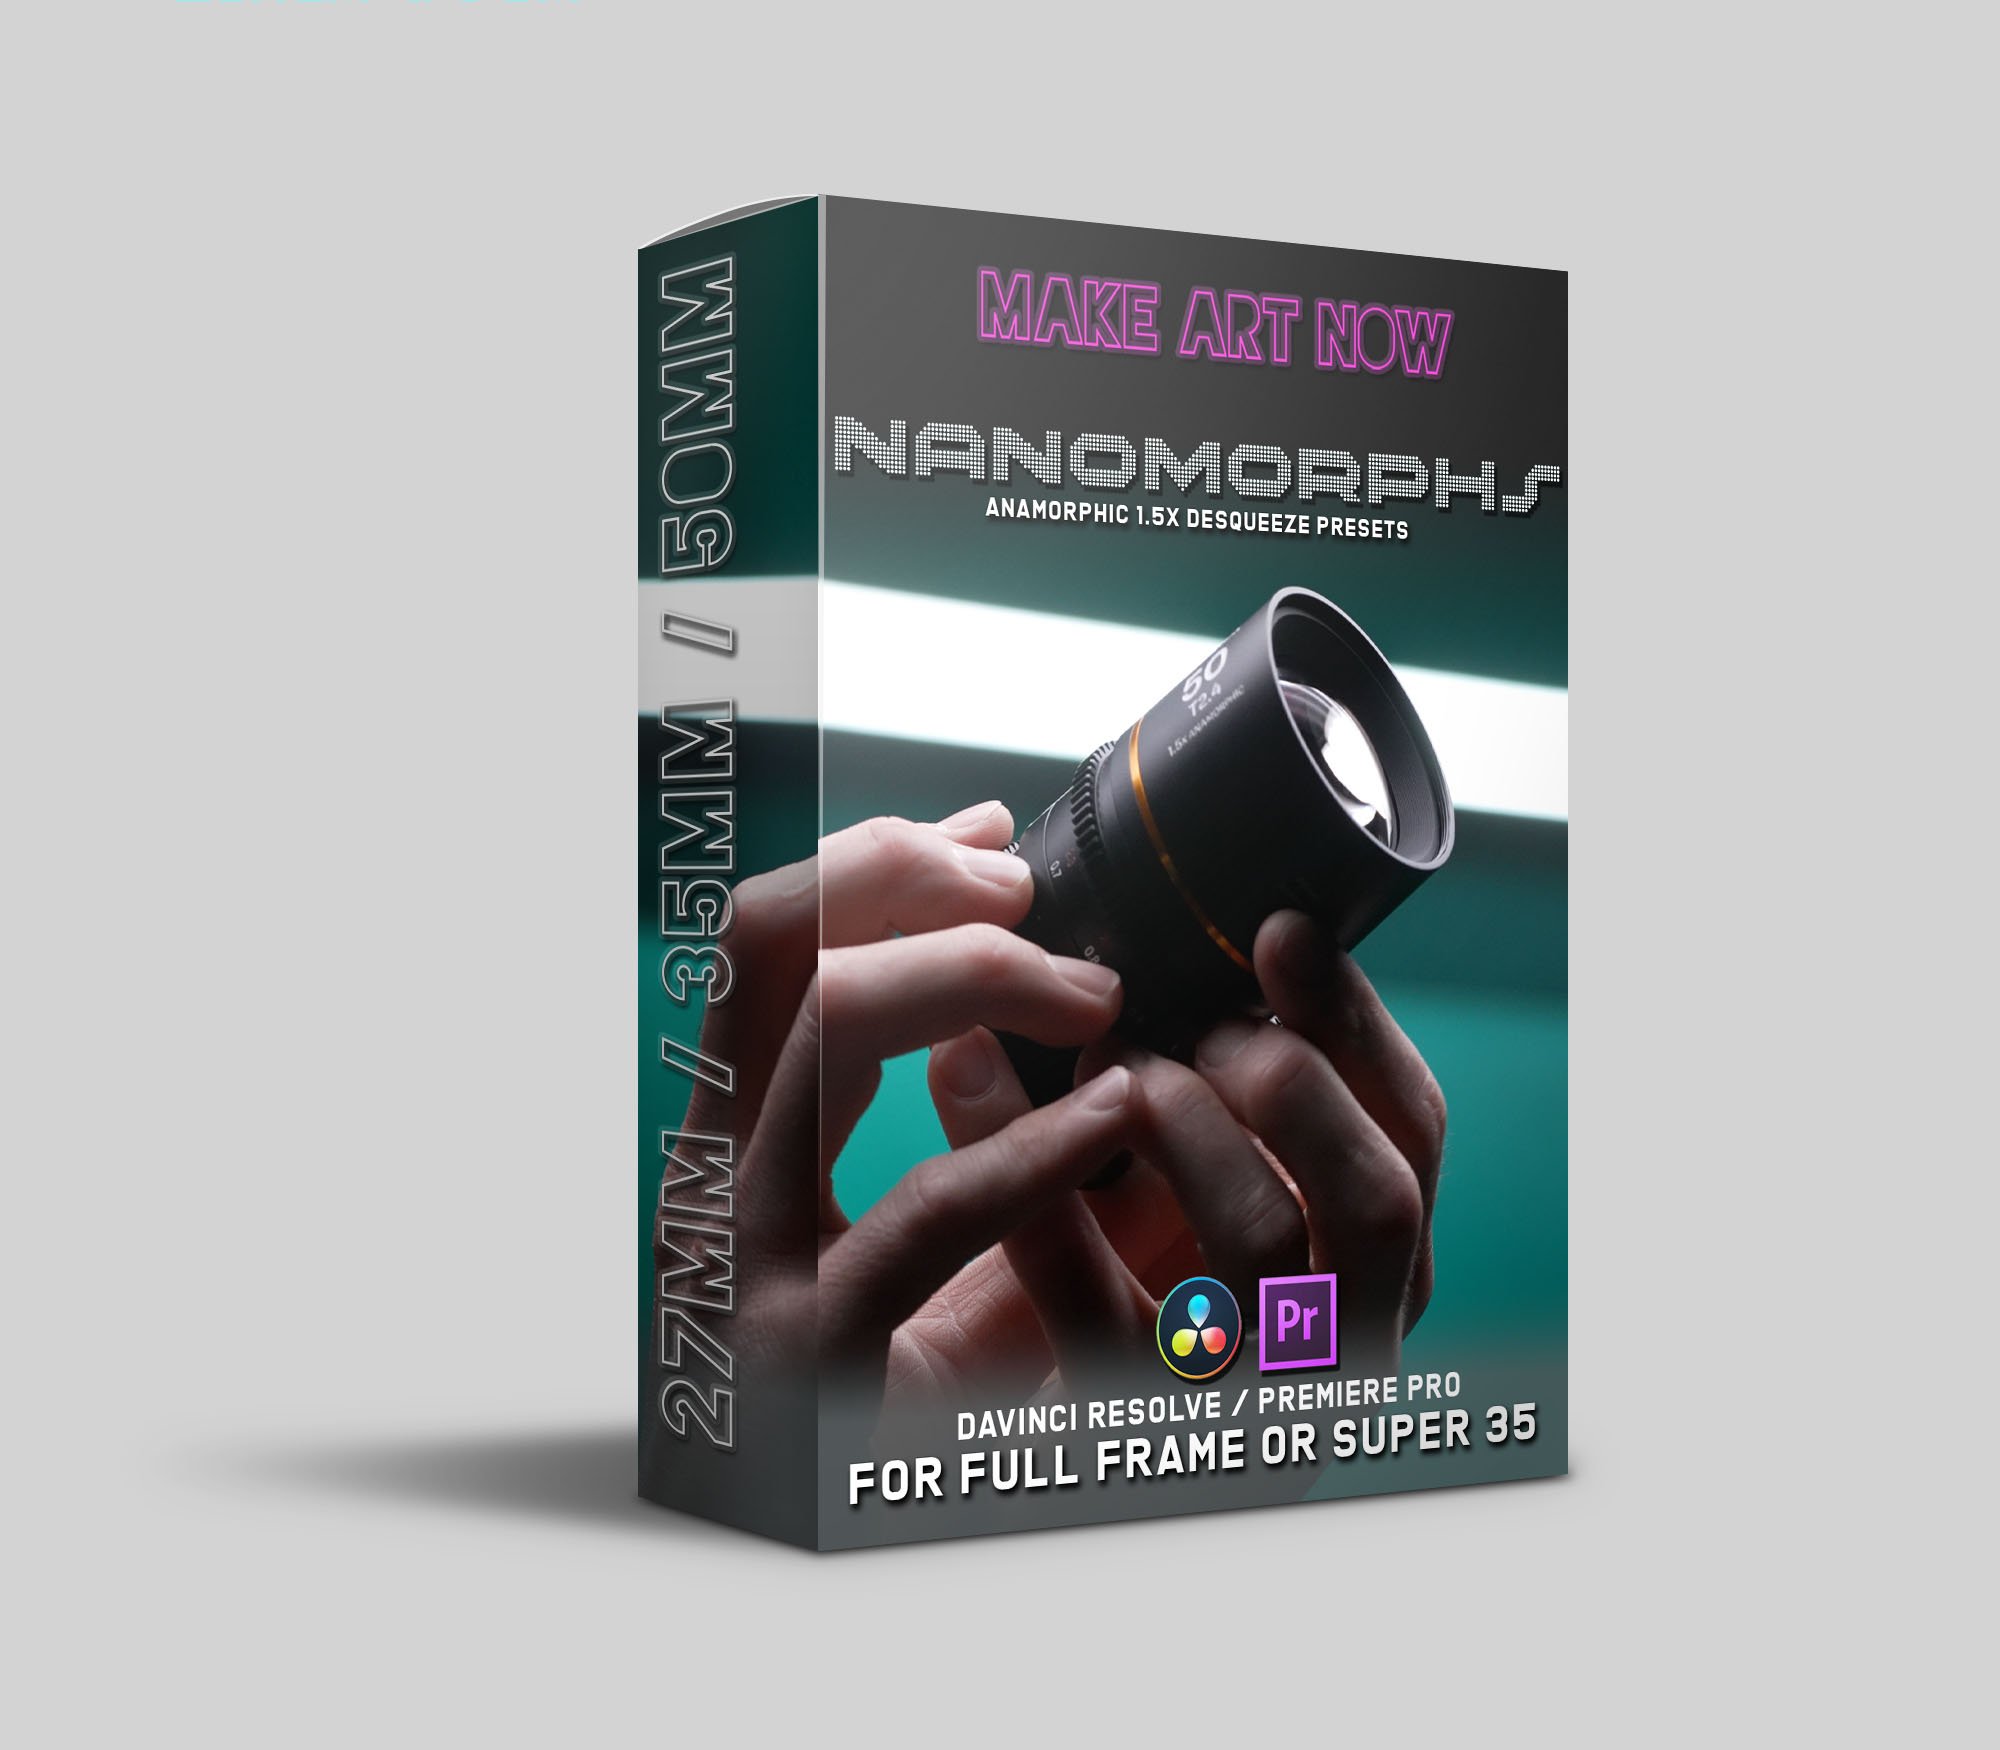
These are Davinci Resolve Power grades (Presets) for the Laowa Nanomorph lens collection. (27,35,50.65,80 & 1.33x Adapter)
Convert to 1.5x or 2x.
Fixes pincushion distortion, converts to barrel distortion.
Resizes to remove vignette.
Crops to remove barrel distortion artifacts.
Includes some sample footage and 1.5x presets for Adobe Premiere Pro as well.
Instructions how to Import into Davinci Resolve
Locate PowerGrades: Start by finding the PowerGrades you want to import. These are typically .drx files, which contain the color grading information.
Open DaVinci Resolve: Launch DaVinci Resolve on your computer.
Create a New Project (Optional): If you're not already working on a project, you can create a new one by going to the "File" menu and selecting "New Project." Give your project a name and set your project settings as needed.
Access the Color Page: In the workspace at the bottom of the DaVinci Resolve window, click on the "Color" tab to access the Color page.
Open the PowerGrade Gallery: In the Color page, you'll find a panel on the right side called the "PowerGrade Gallery." Click on it to open the gallery.
Import PowerGrades: To import your PowerGrades, simply drag and drop the .drx files from their location on your computer into the PowerGrade Gallery. Alternatively, you can right-click in the gallery and choose "Import."
Organize PowerGrades (Optional): You can create folders in the PowerGrade Gallery to help organize your imported PowerGrades. Right-click within the gallery and select "Add Group" to create folders. Then, drag and drop PowerGrades into these folders as needed.
Apply PowerGrades to Clips: Now that your PowerGrades are imported, you can apply them to your clips in the timeline. Select a clip in the timeline, then click on the PowerGrade in the gallery that you want to apply. You'll see the applied grade in the "Nodes" section of the Color page.
Adjust Parameters (Optional): You can further customize the applied PowerGrade by adjusting its parameters in the "Color" panel. This allows you to fine-tune the grading to suit your specific footage.
Save Your Project: Don't forget to save your project to keep your changes and applied PowerGrades intact. Go to "File" and select "Save Project."