i3 Counter Weight Kit Instructions
Inspire 3 Counter Weight Kit Instructions
For Standard and XL Kits
Buy these items (not included with kits)
Philips head screws for rear Gimbal Plate We recommend replacing the 4 (m2) hex screws with phillips head screws for taking on and off plate multiple times with ease.
Additional Tungsten Derby Weights (3g,7g,14g kit) The kit includes some 7g weights but the XL kits can accept 14g weights on the Roll arm (not included). Also, rear gimbal plate can accept 3g,4g, or 7g weights beyond what was included.
Tungsten Putty This is essential for trimming the weight to perfect, or to sandwich between motor mounts and counter weight adapters if the fit is not snug.
Silicon Putty Holder Tungsten Putty is messy and sticks to everything. You need this to store it. trust me.
Electric screw driver with full torx head kit For multiple quick install and uninstall of the rear gimbal plate you need one of these.
Lead tape. This is to wrap around the adapters for longer focal length, will eliminate vibration. use the entire roll, then add a little bit of scotsch tape aroud afterwards, lead tape is toxic and you dont nwat tot handle it around childred. wash your hands afterwards, cover with tape.
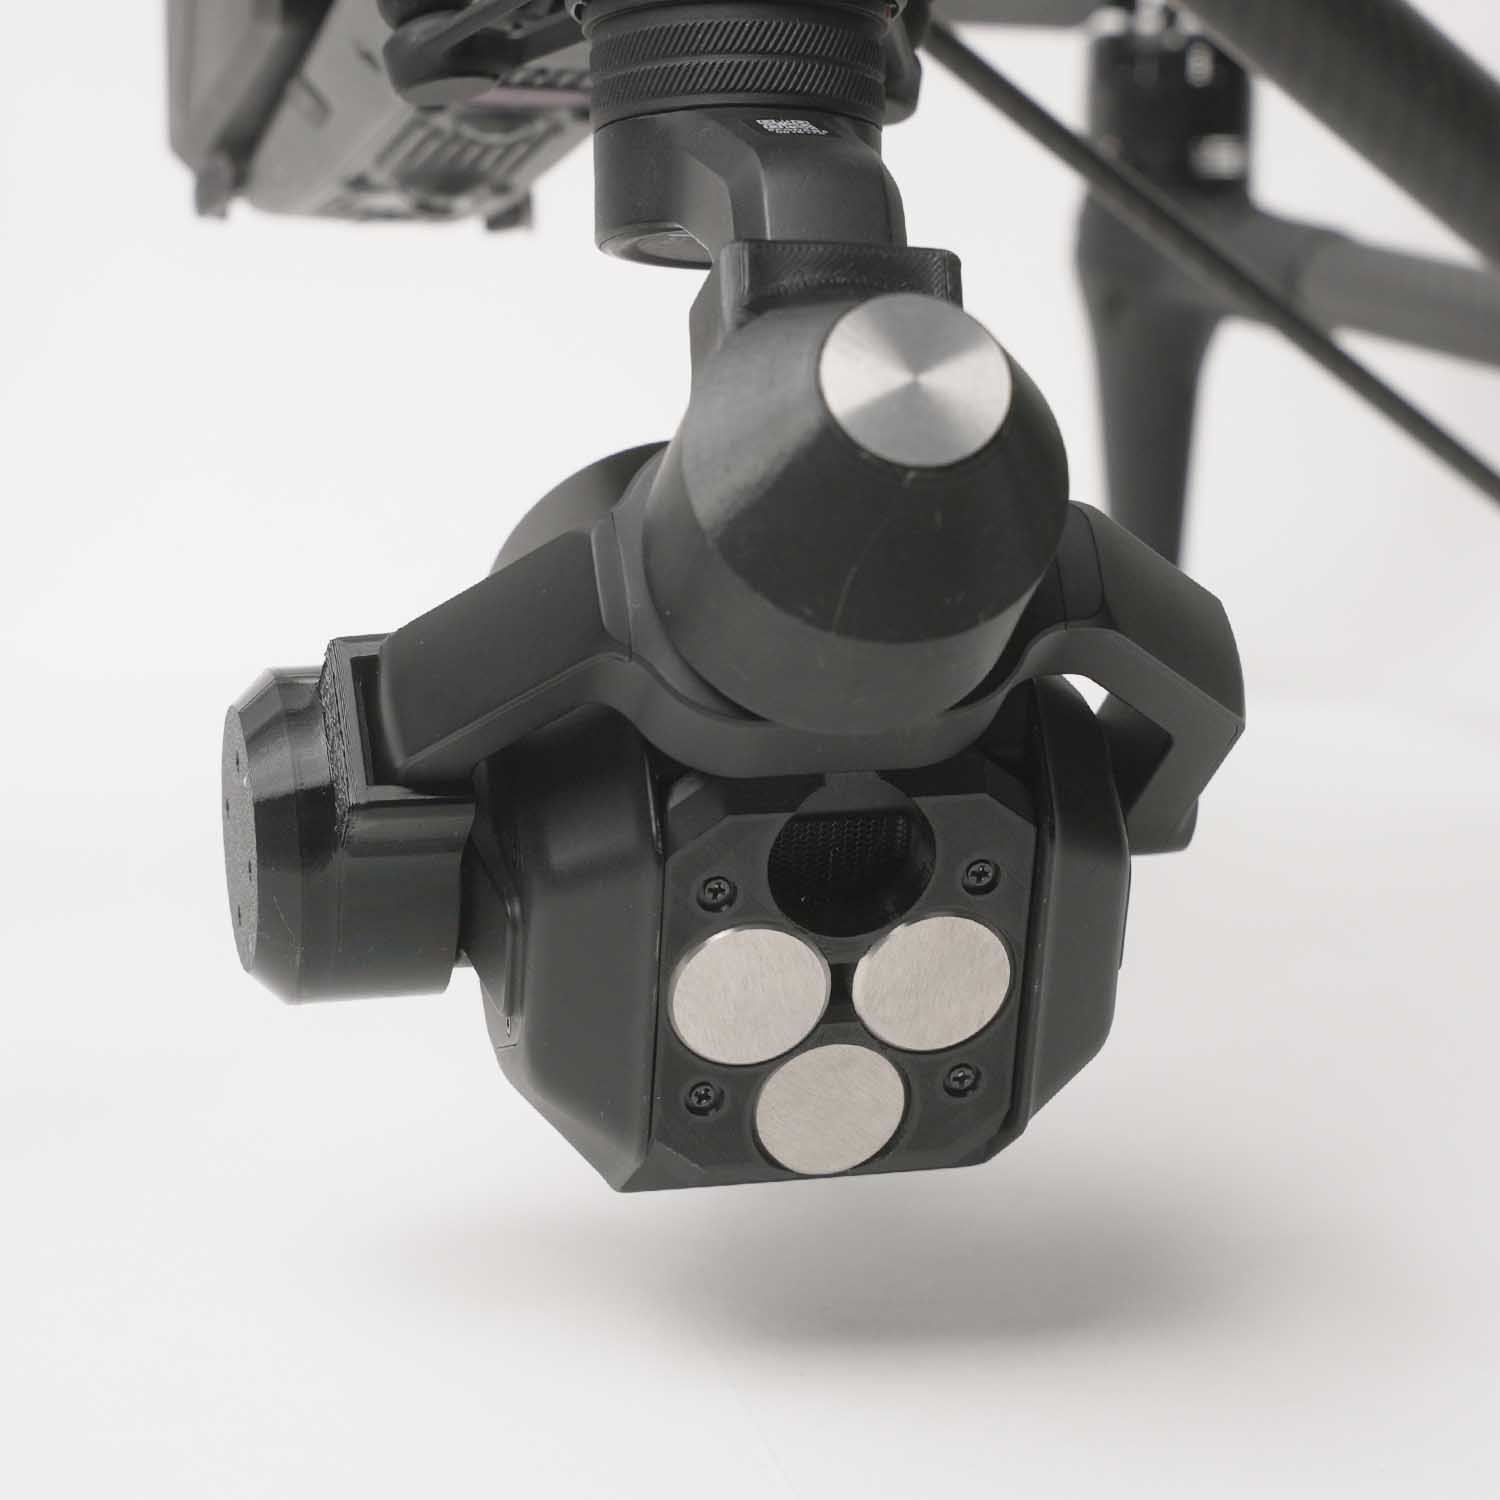
Installing Rear gimbal plate
Remove rear cap
Replace screws with Phillips head m2
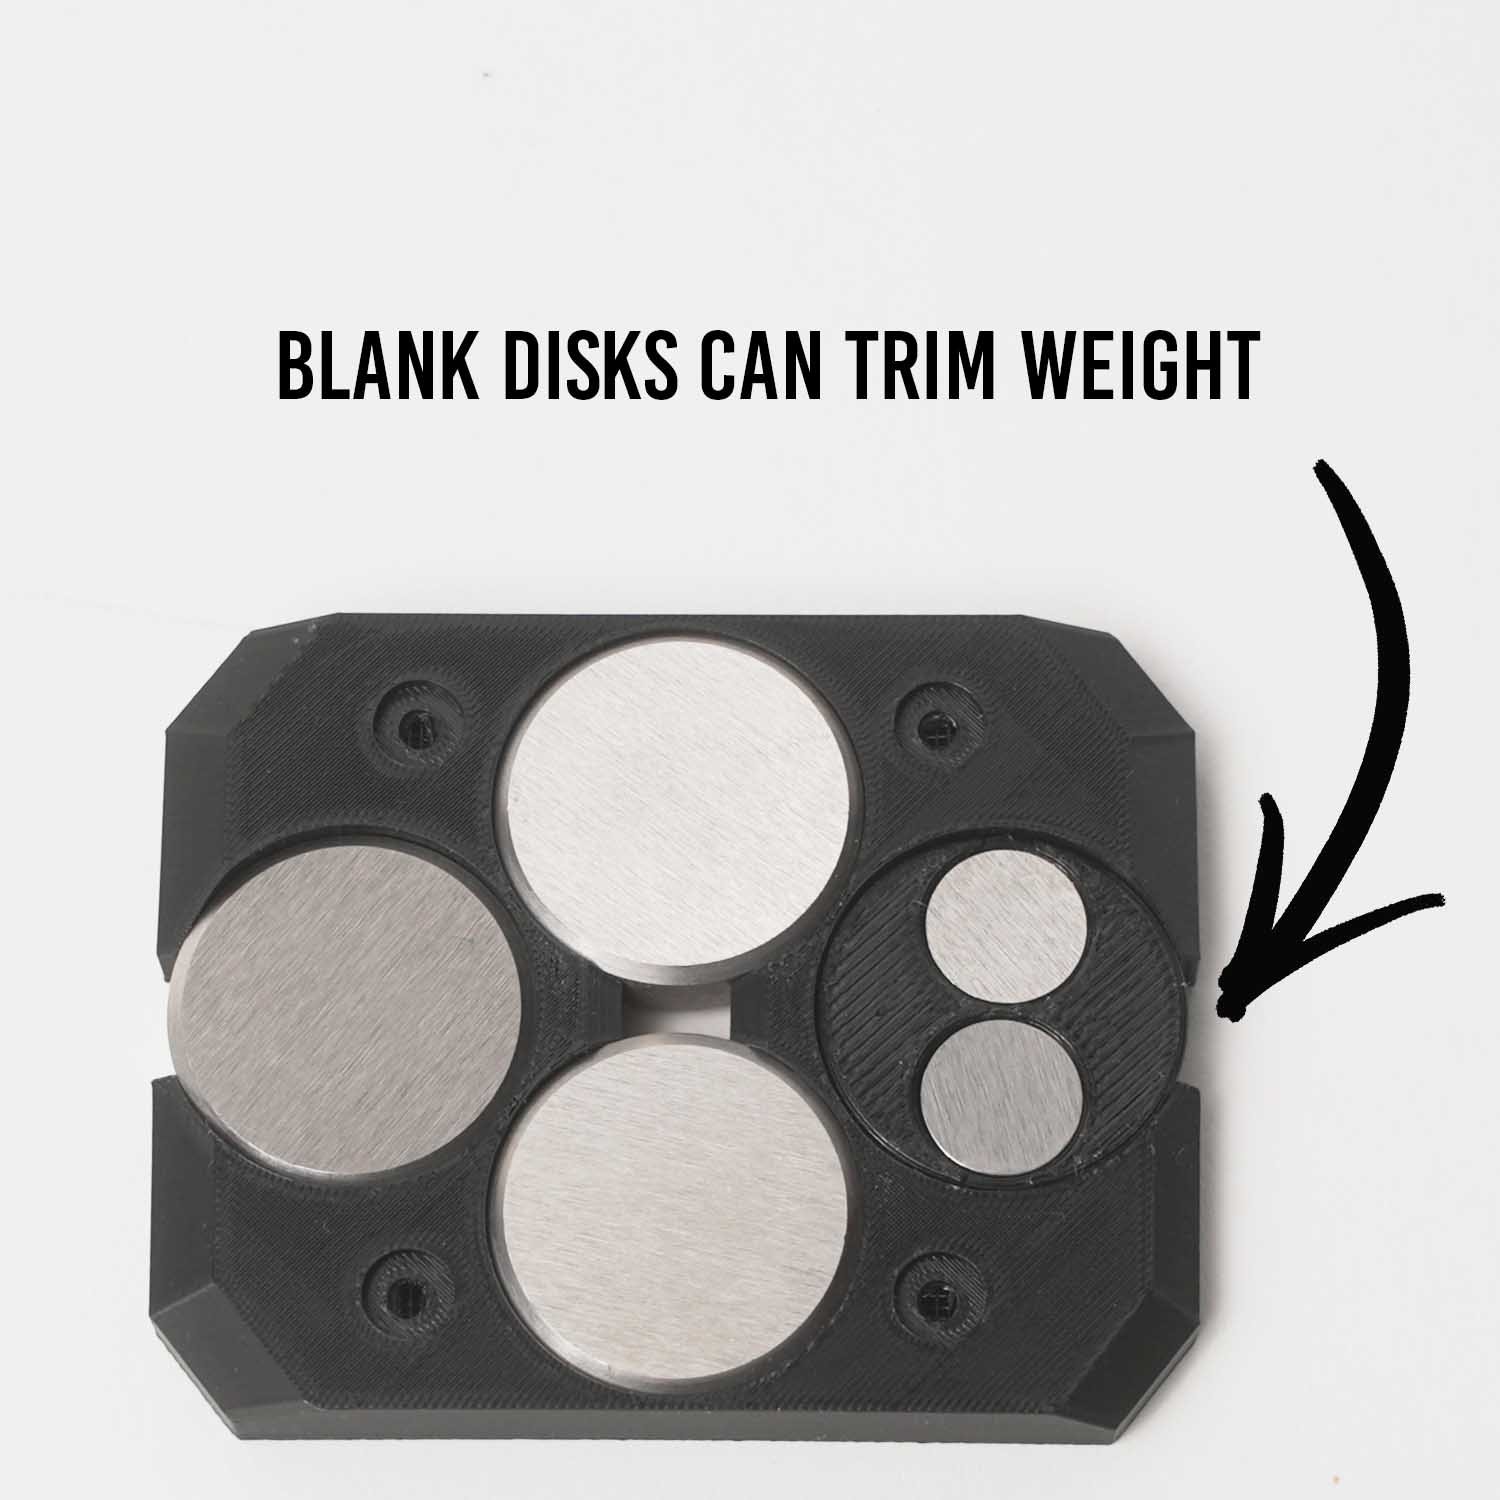
Make sure gimbal counter weight plate is clean of debris and support filament (some stringing is expected with TPU)
Add weights in as needed. You don’t need to fill up entire plate with weight, each lens is different and requires different amounts of weight.


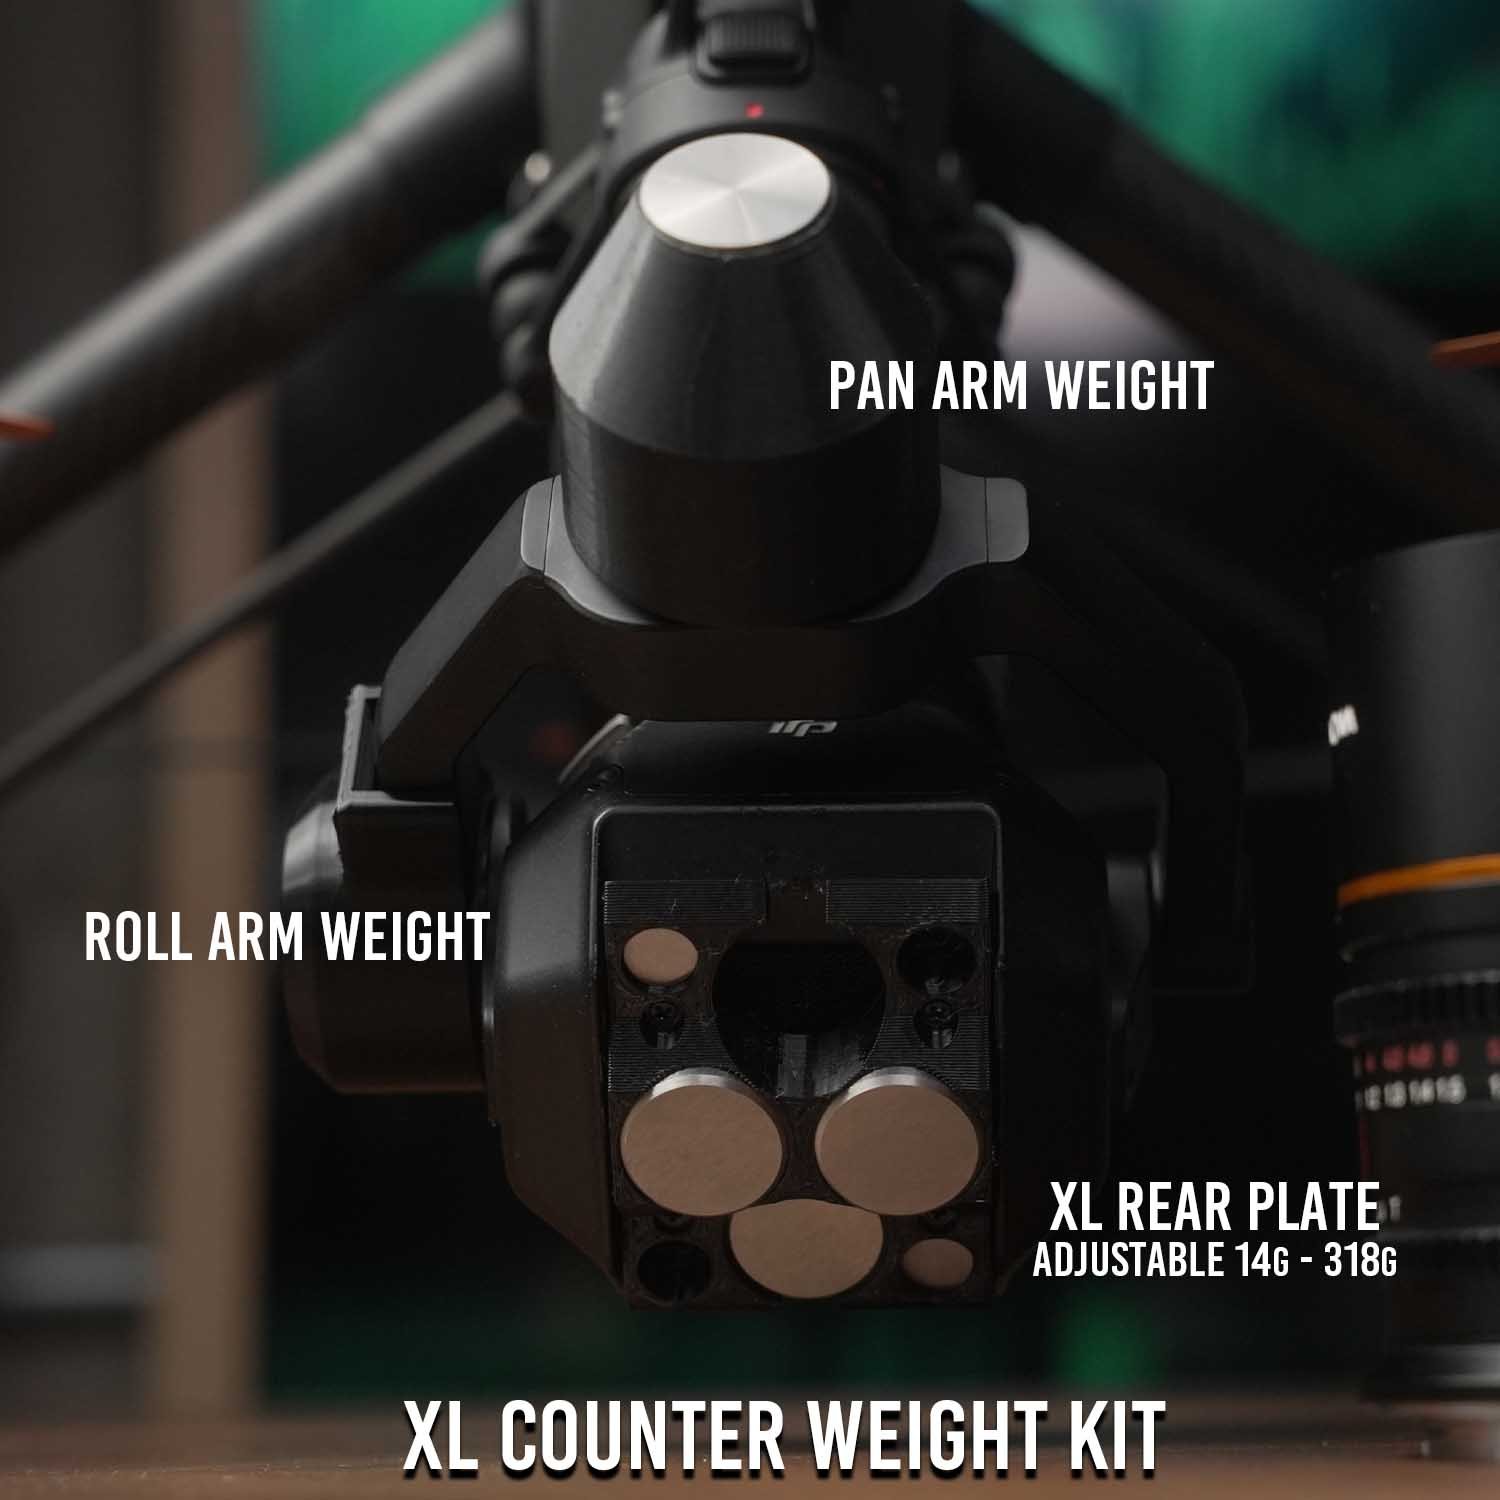
Installing Roll Arm Weight
Roll arm weight has magnet for stick, but if the hold is too lose, be sure to use a tiny piece of tungsten putty and sandwich it between the motor mount and the counter weight plate.
If the fit is too tight, then use a head gun to heat up the Roll arm coutner weight mount and lightly press it into the roll arm motor mount and hold for a few seconds.
Use 7g or 14g derby weights till gimbal horizontal is balanced. Add tungsten putty for the fine trimming. 14g derby weights can be bought here
If weights get stuck use a small pin to push weights thriu the back side. If weights are too loose inside, then use a but of putty to secure.
Installing Pan Arm Weight
The Pan arm counter weight mount can fit 46g weights or 92g weights. The XL kit can fit both or (3) 46g weights. You only need as much as the lens is flying requires.
If the lens pulls the gimbal back and points sideways or backwards, you need more weight. If you turn the lens and gimbal sideways and the pan arm motor pulls the lens and gimbal forward, then you need to take weight off.
If you point the lens sideways and the lens and pan arm motor stay in the position, then its perfect balance. Though, this arm in particular is very forgiving and you can fly a majority of the lenses under or over weight.
Pan arm mount is friction fit, and should be snug fit on the motor mount. If its too tight, use a heat gun to warm up the Pan arm mount and press it onto the Pan arm motor assembly
If the counter weight mount is too loose, use a tiny bit of tungsten putty sandwiched between counter weight mount and motor mount.
If 42g or 96g weights do not release from the mount, use a heat gun to the mount till it releases.
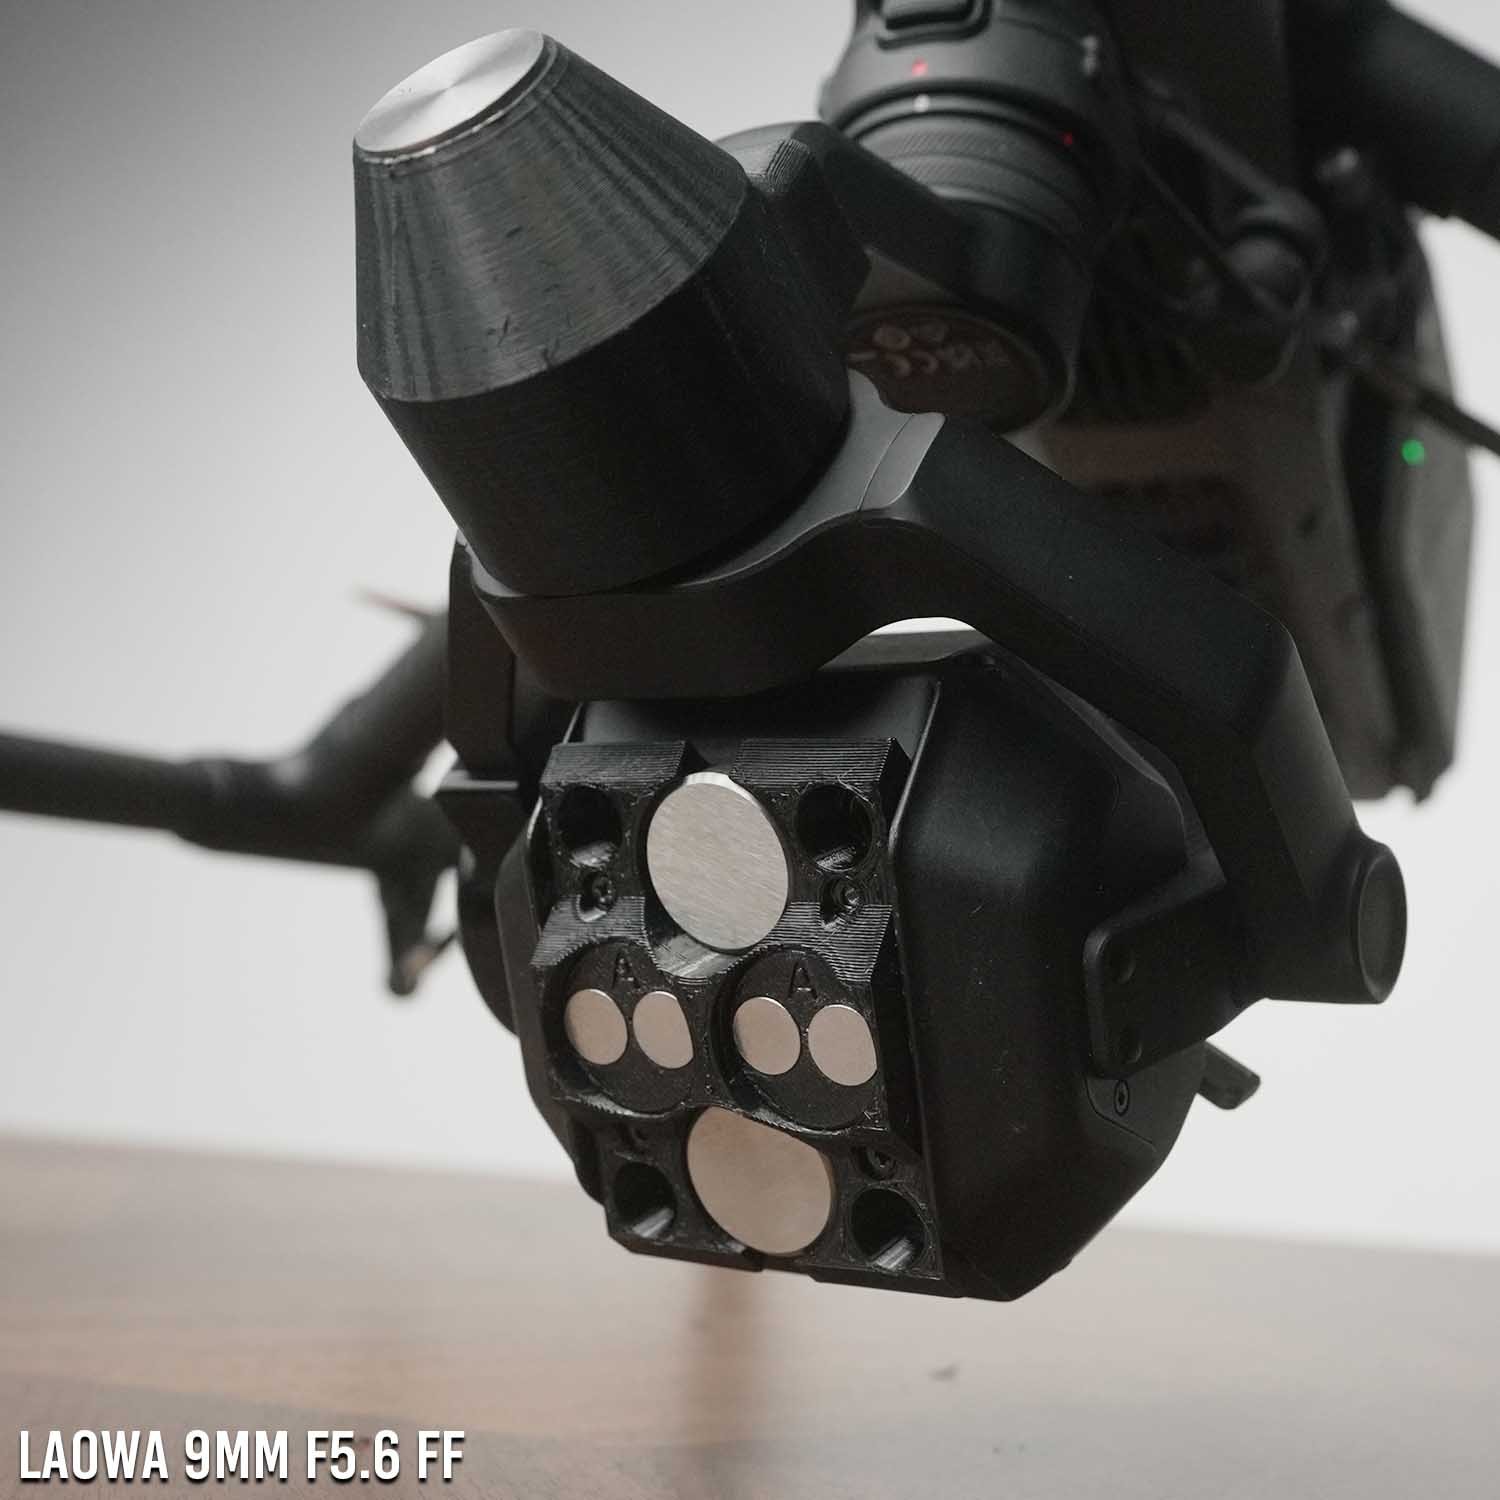
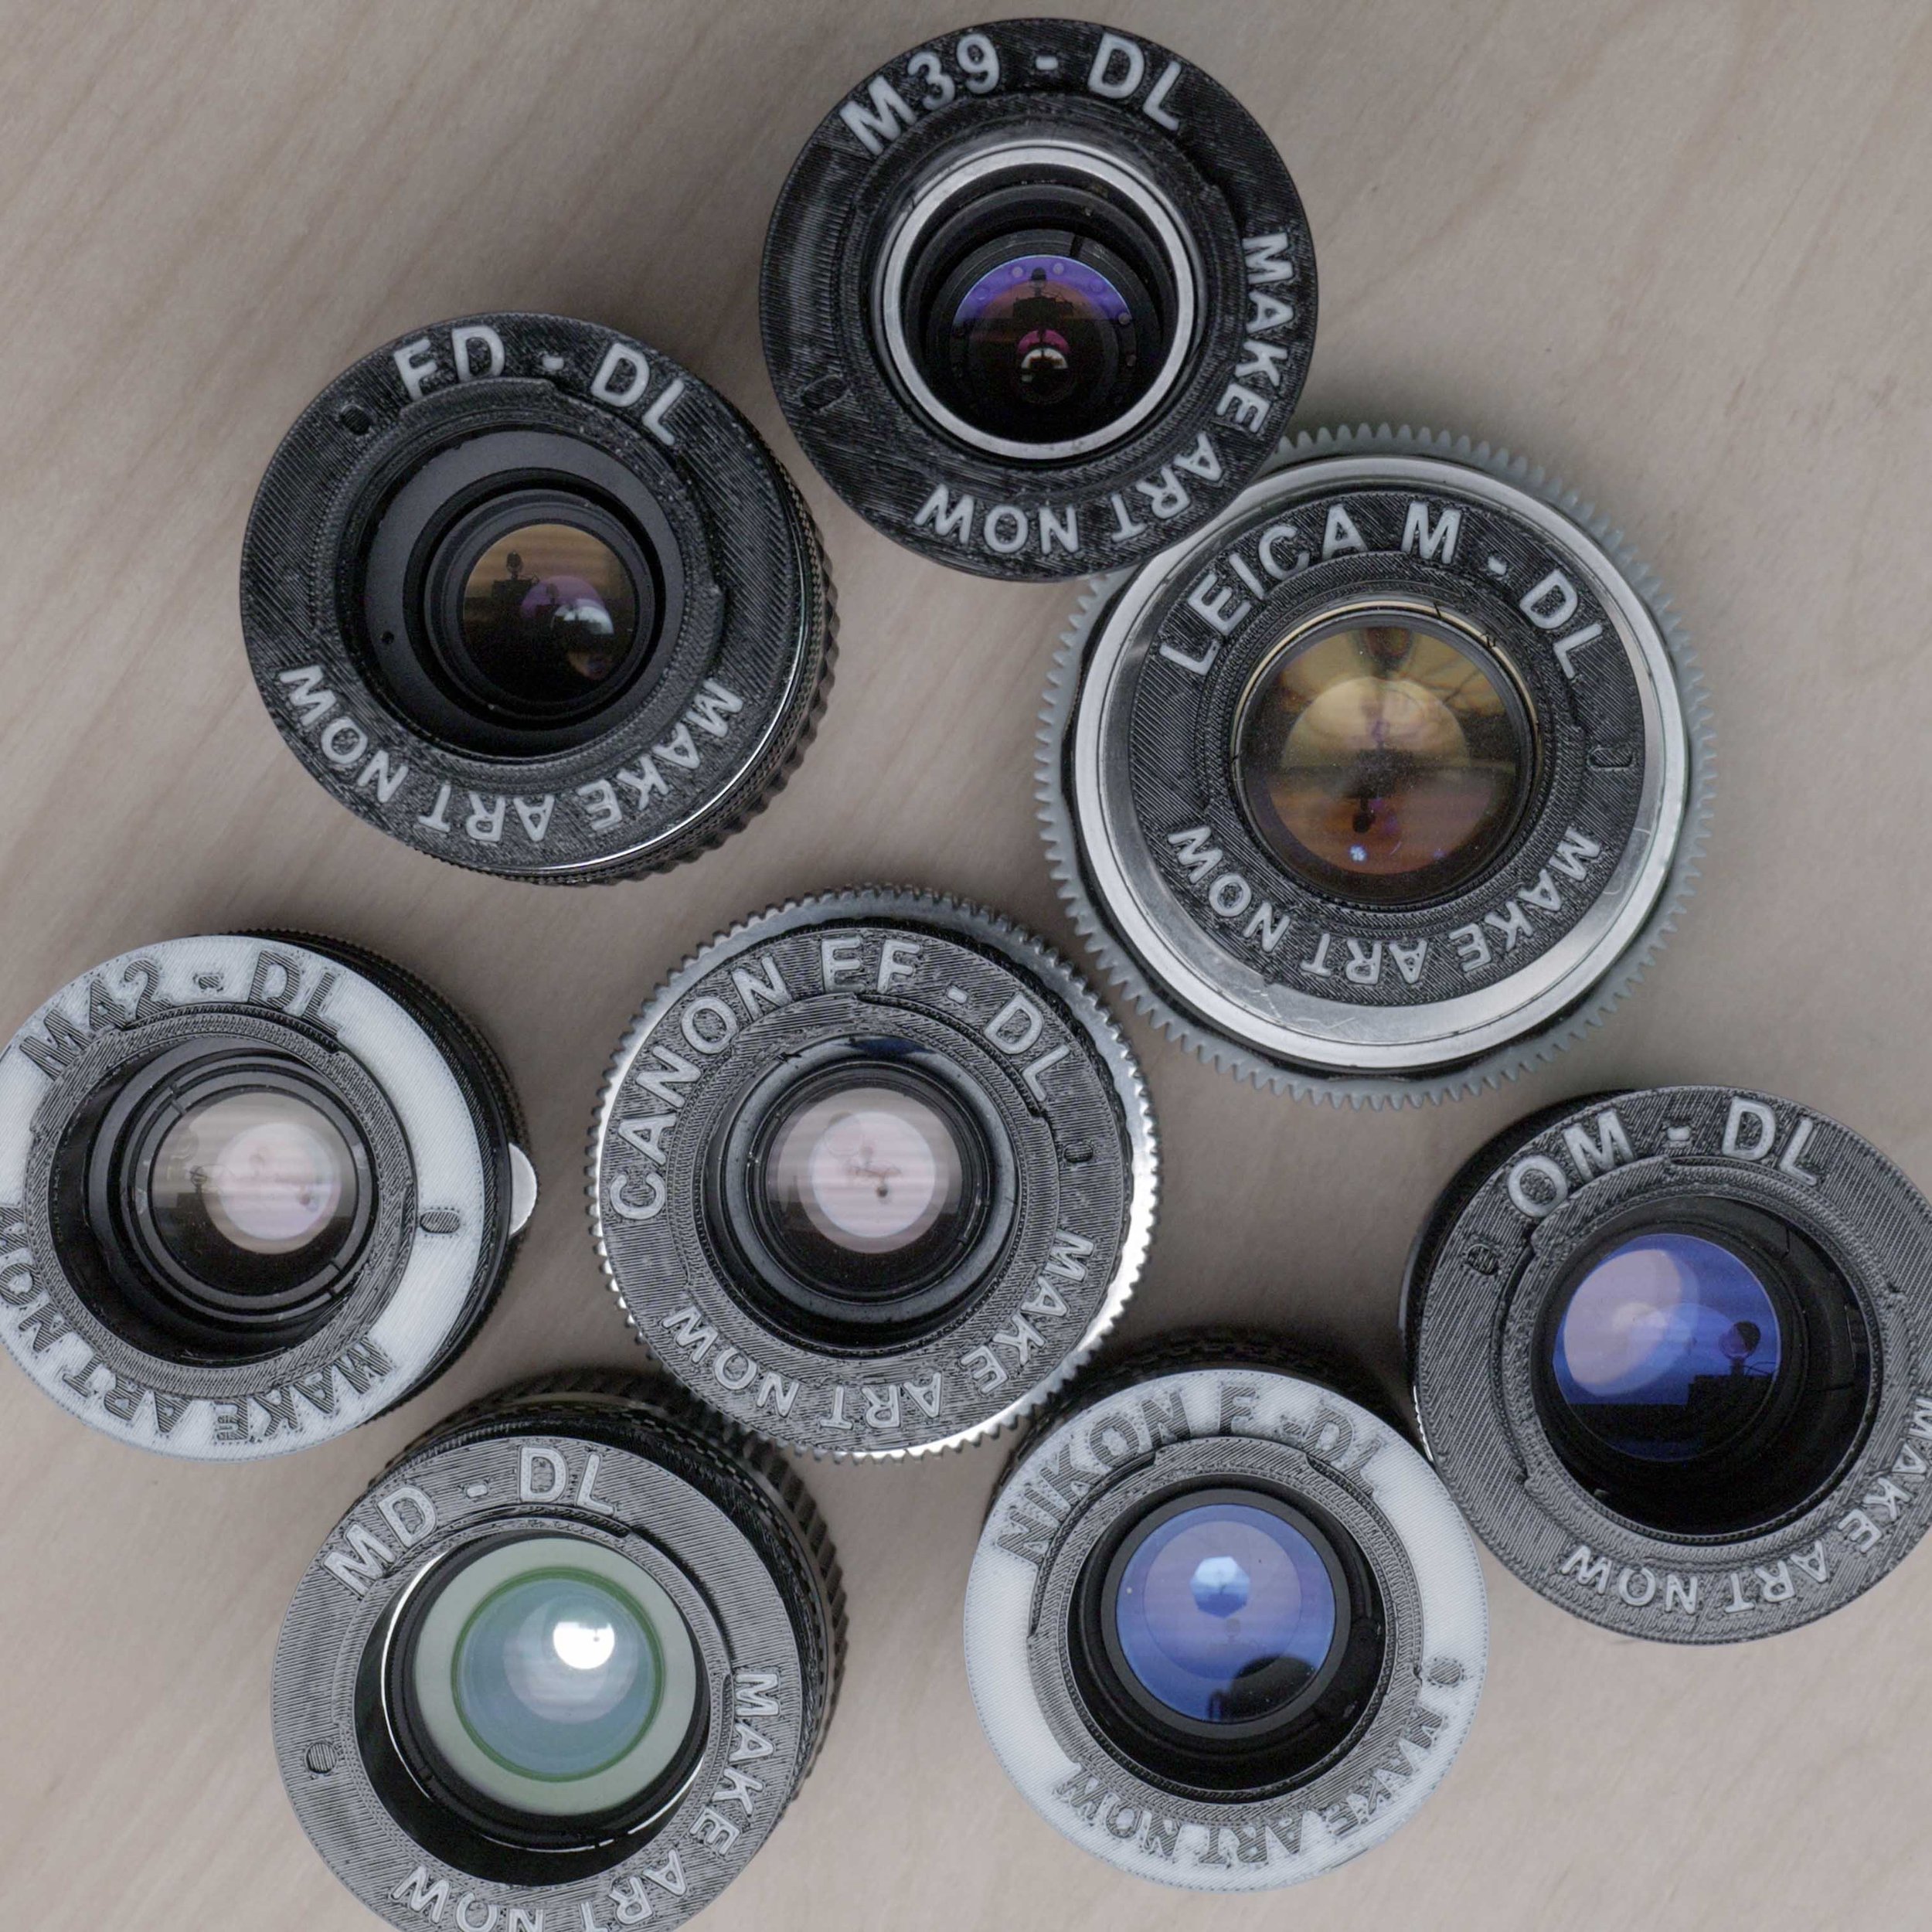
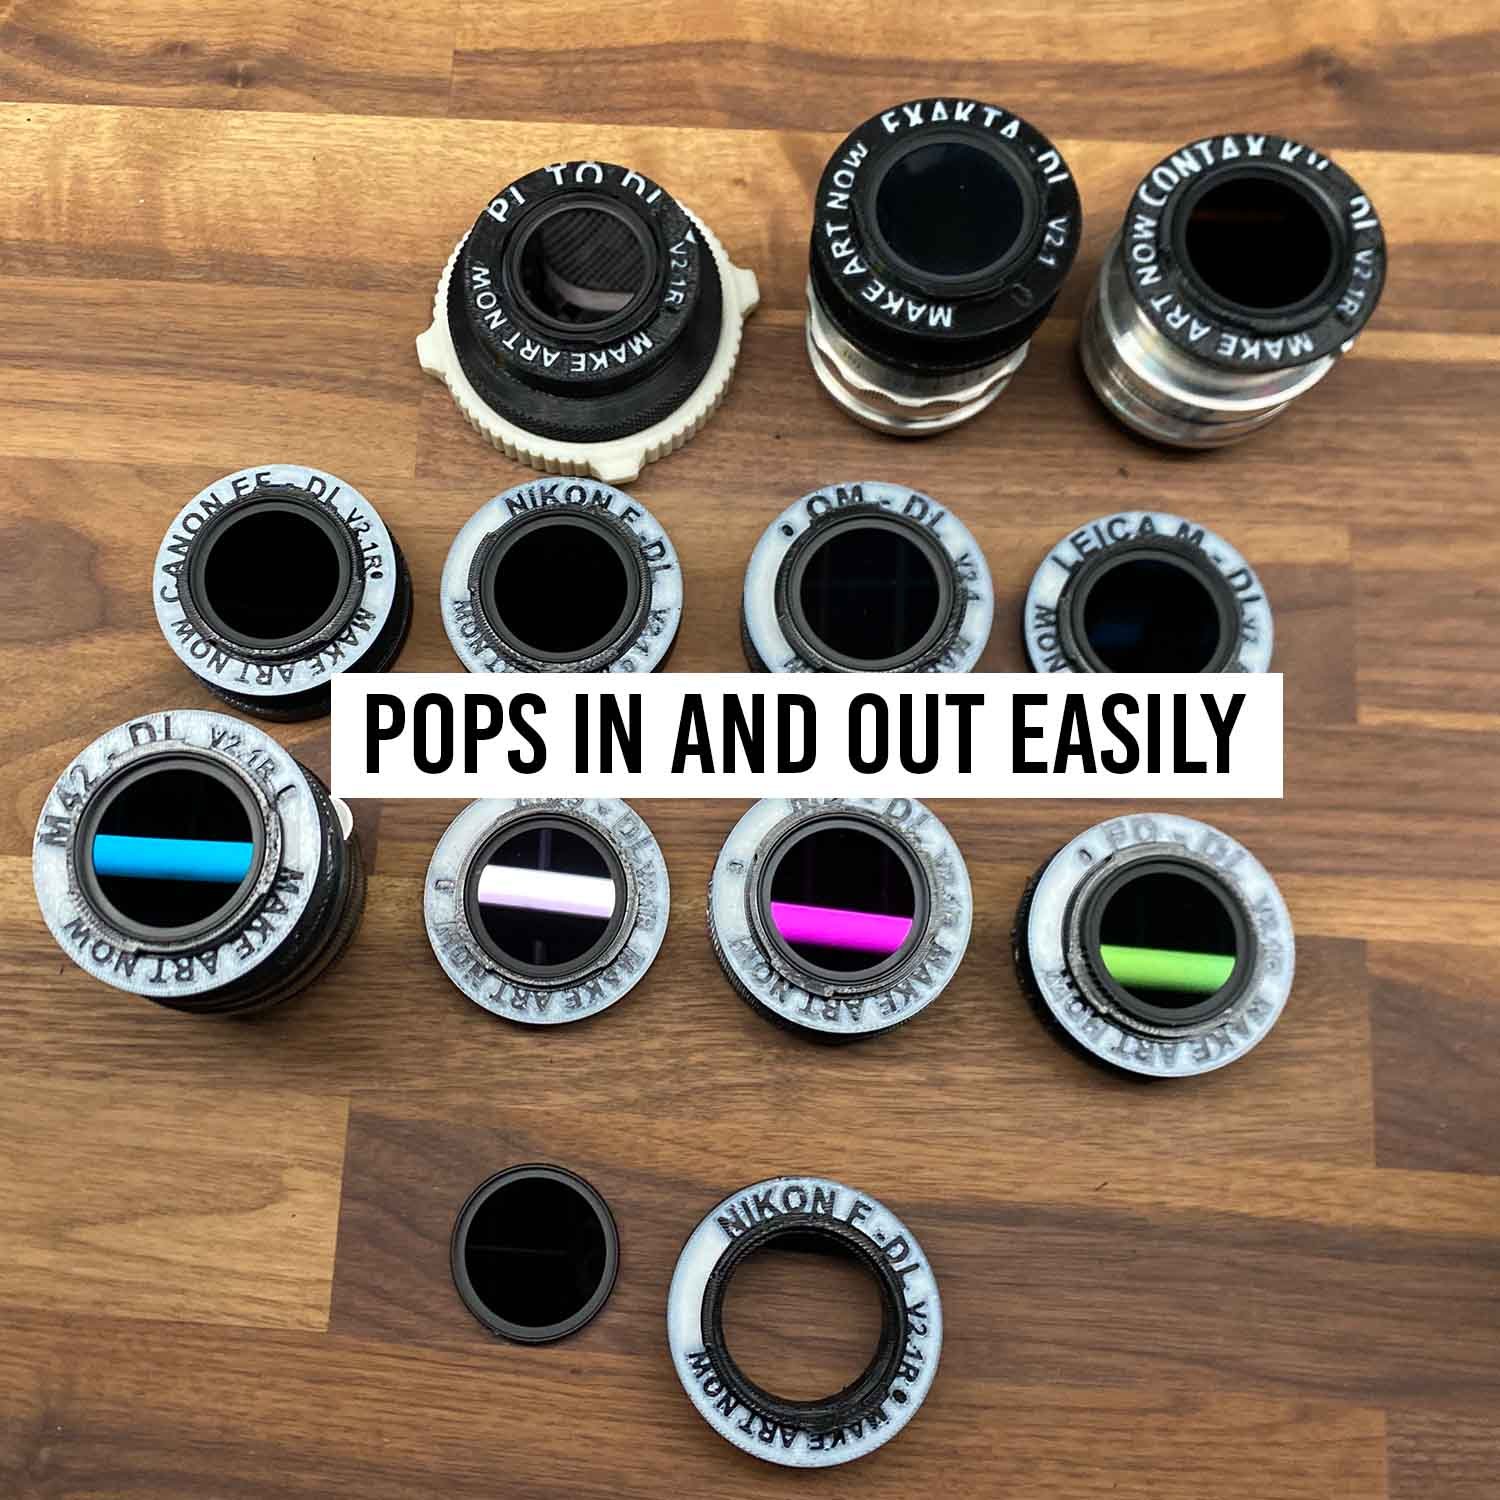
Mounting 3rd Party Lenses
Only intended for i2 or i3, not recommended for Ronin 4D
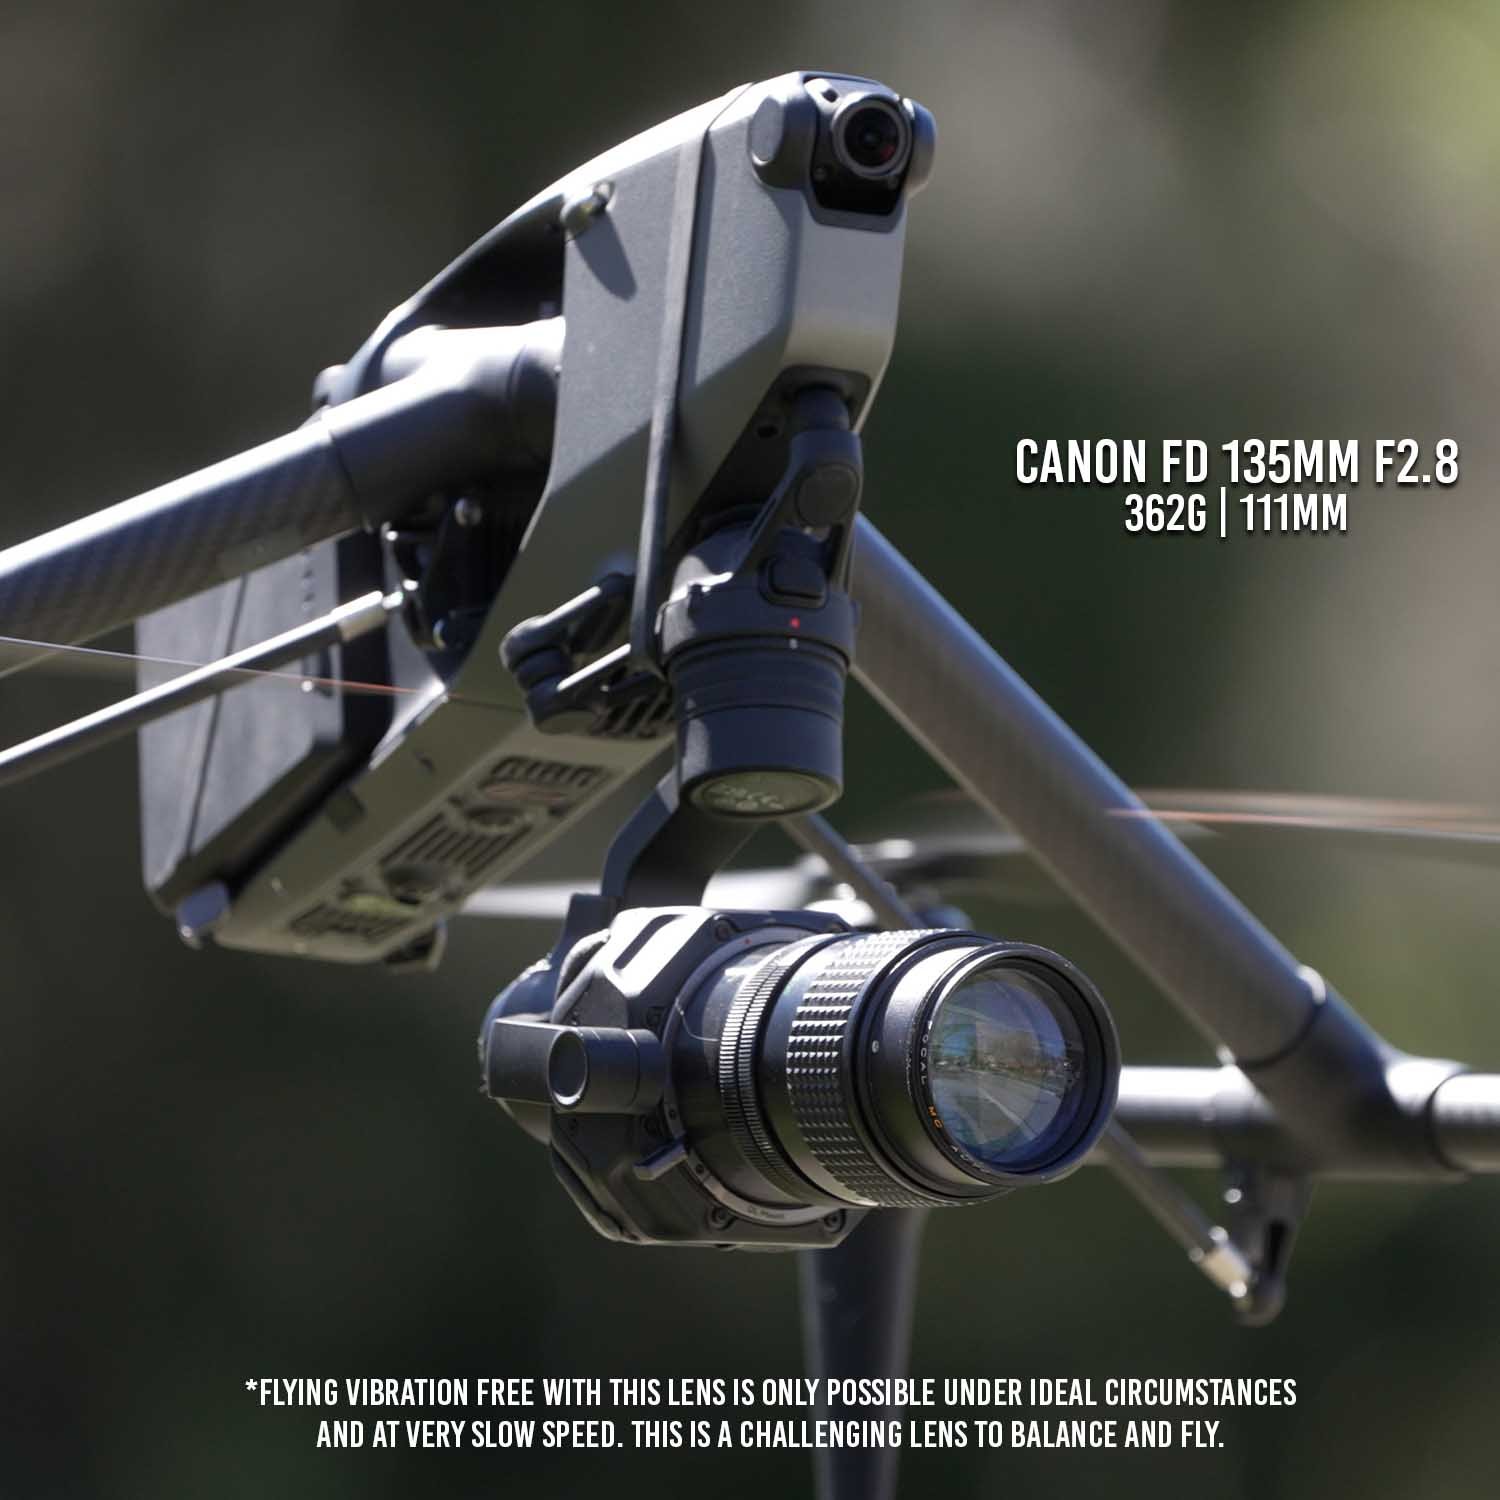
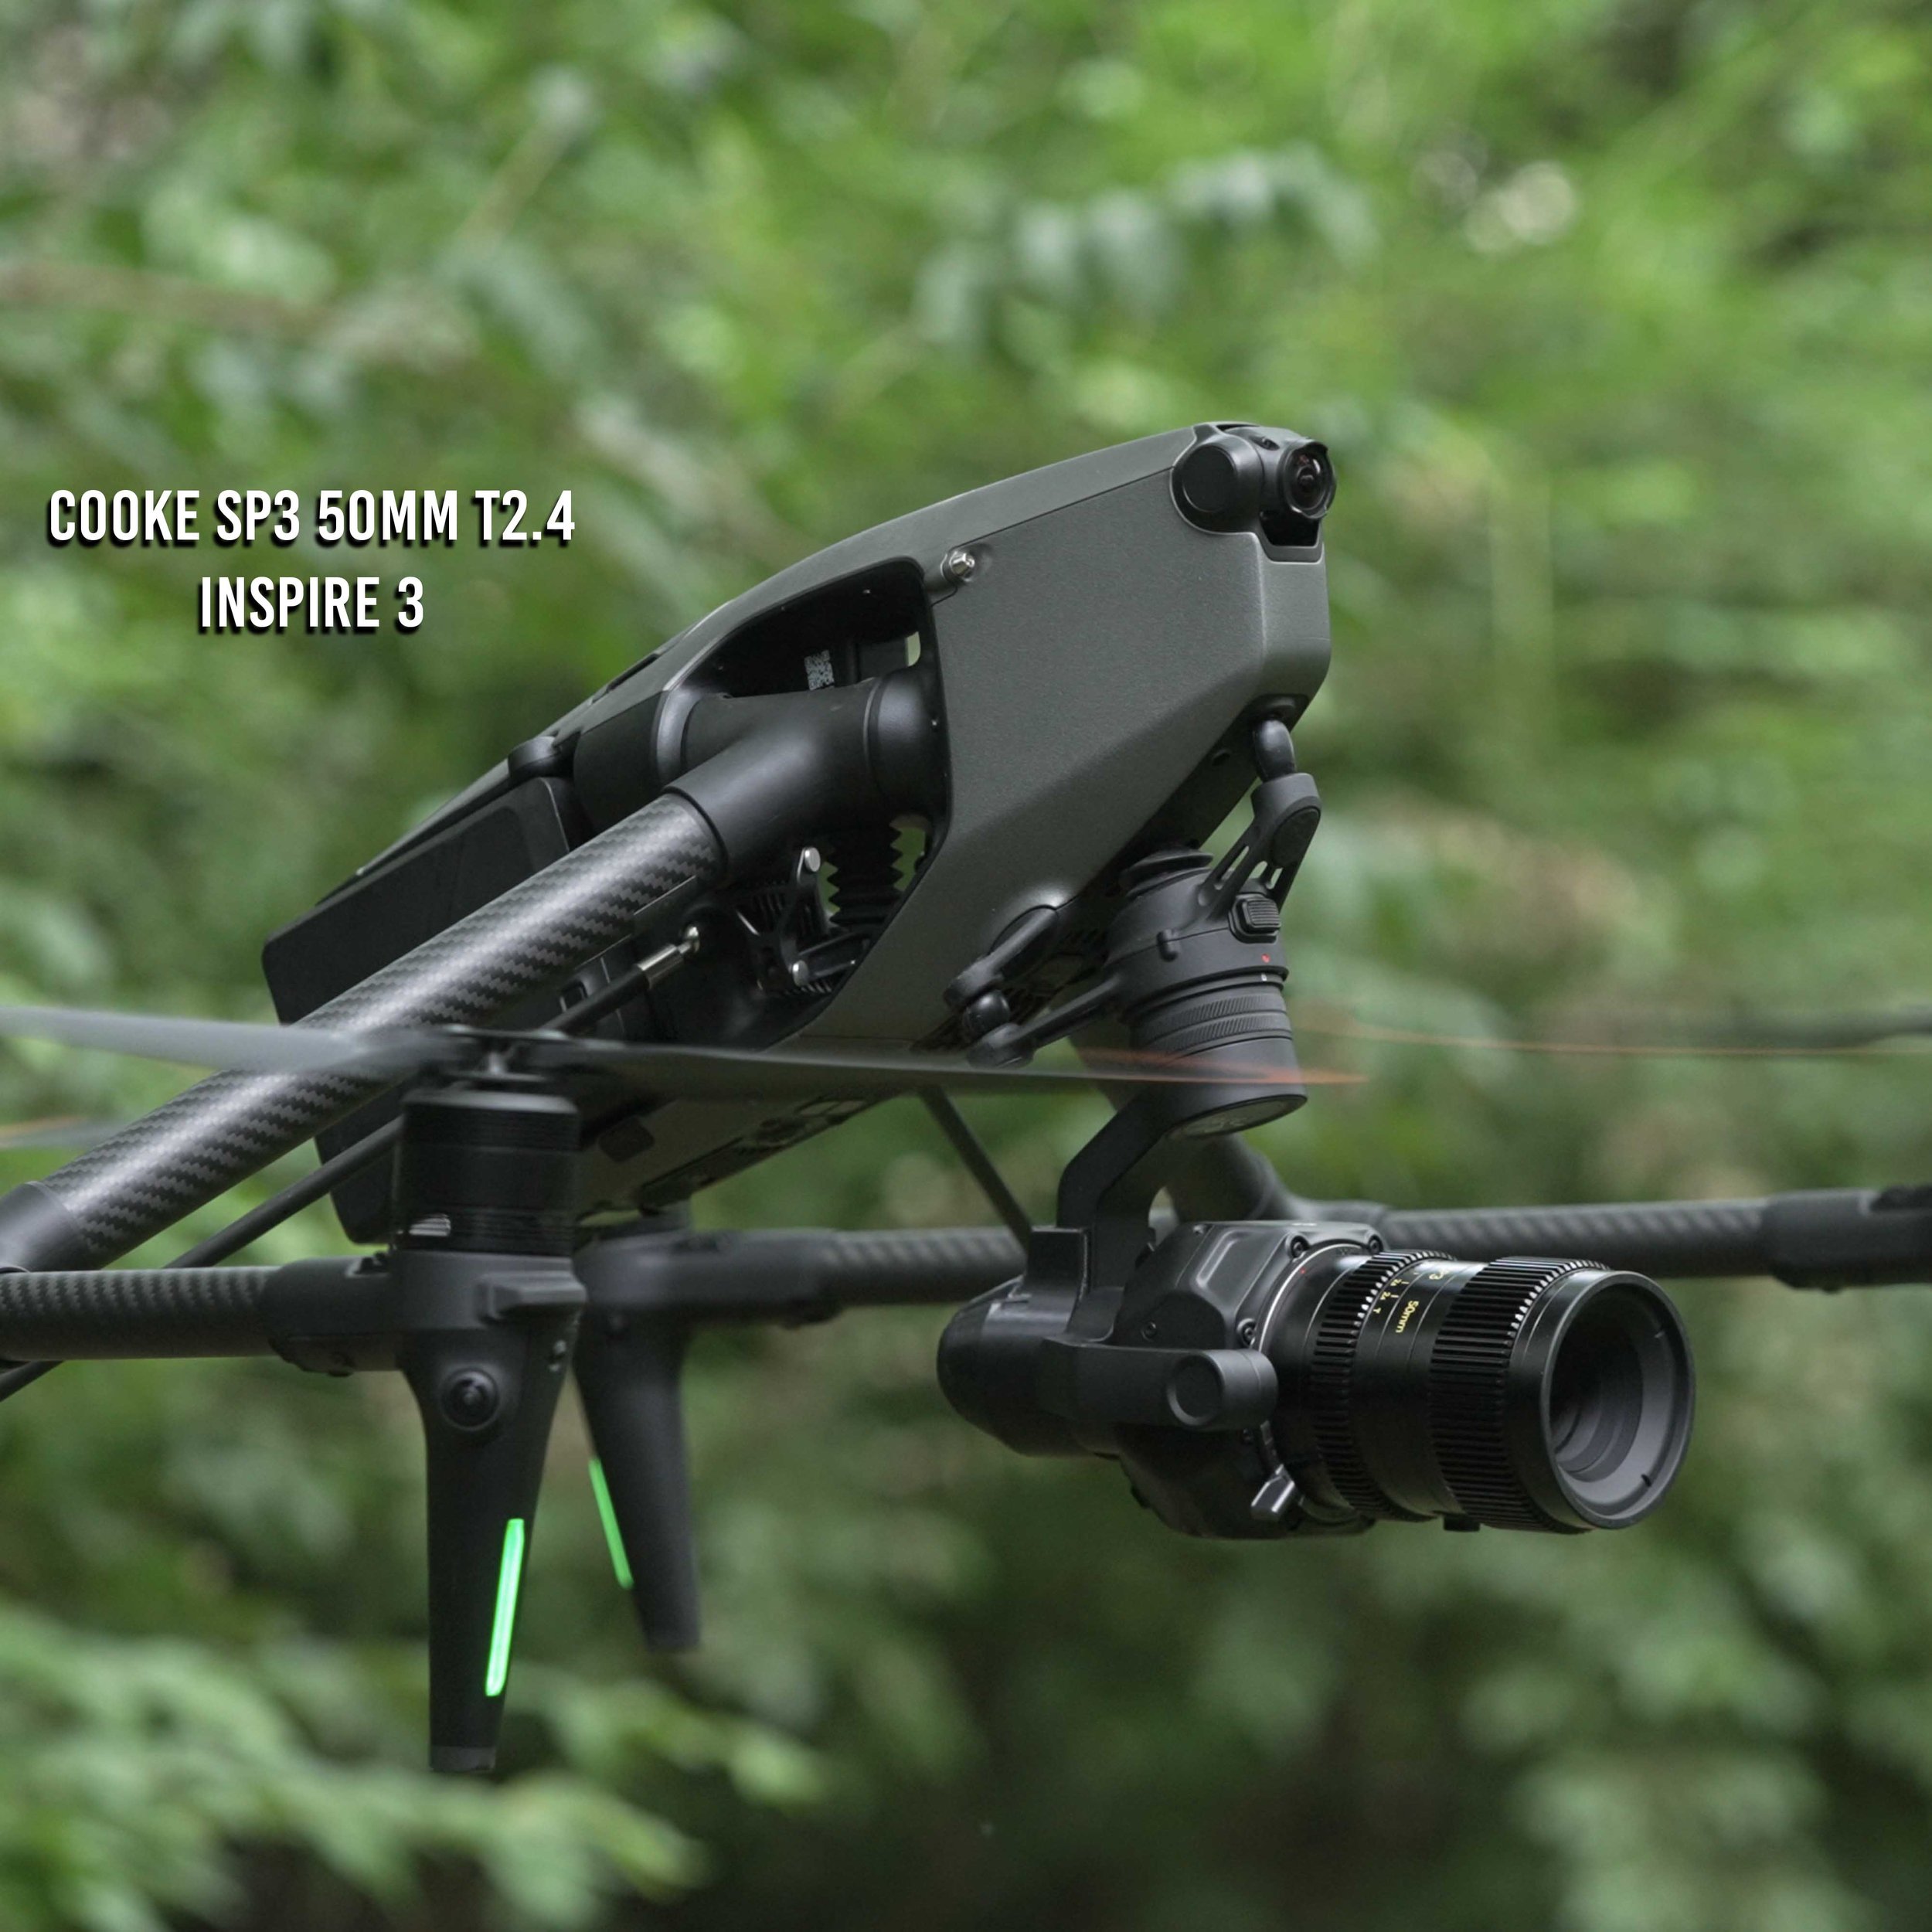
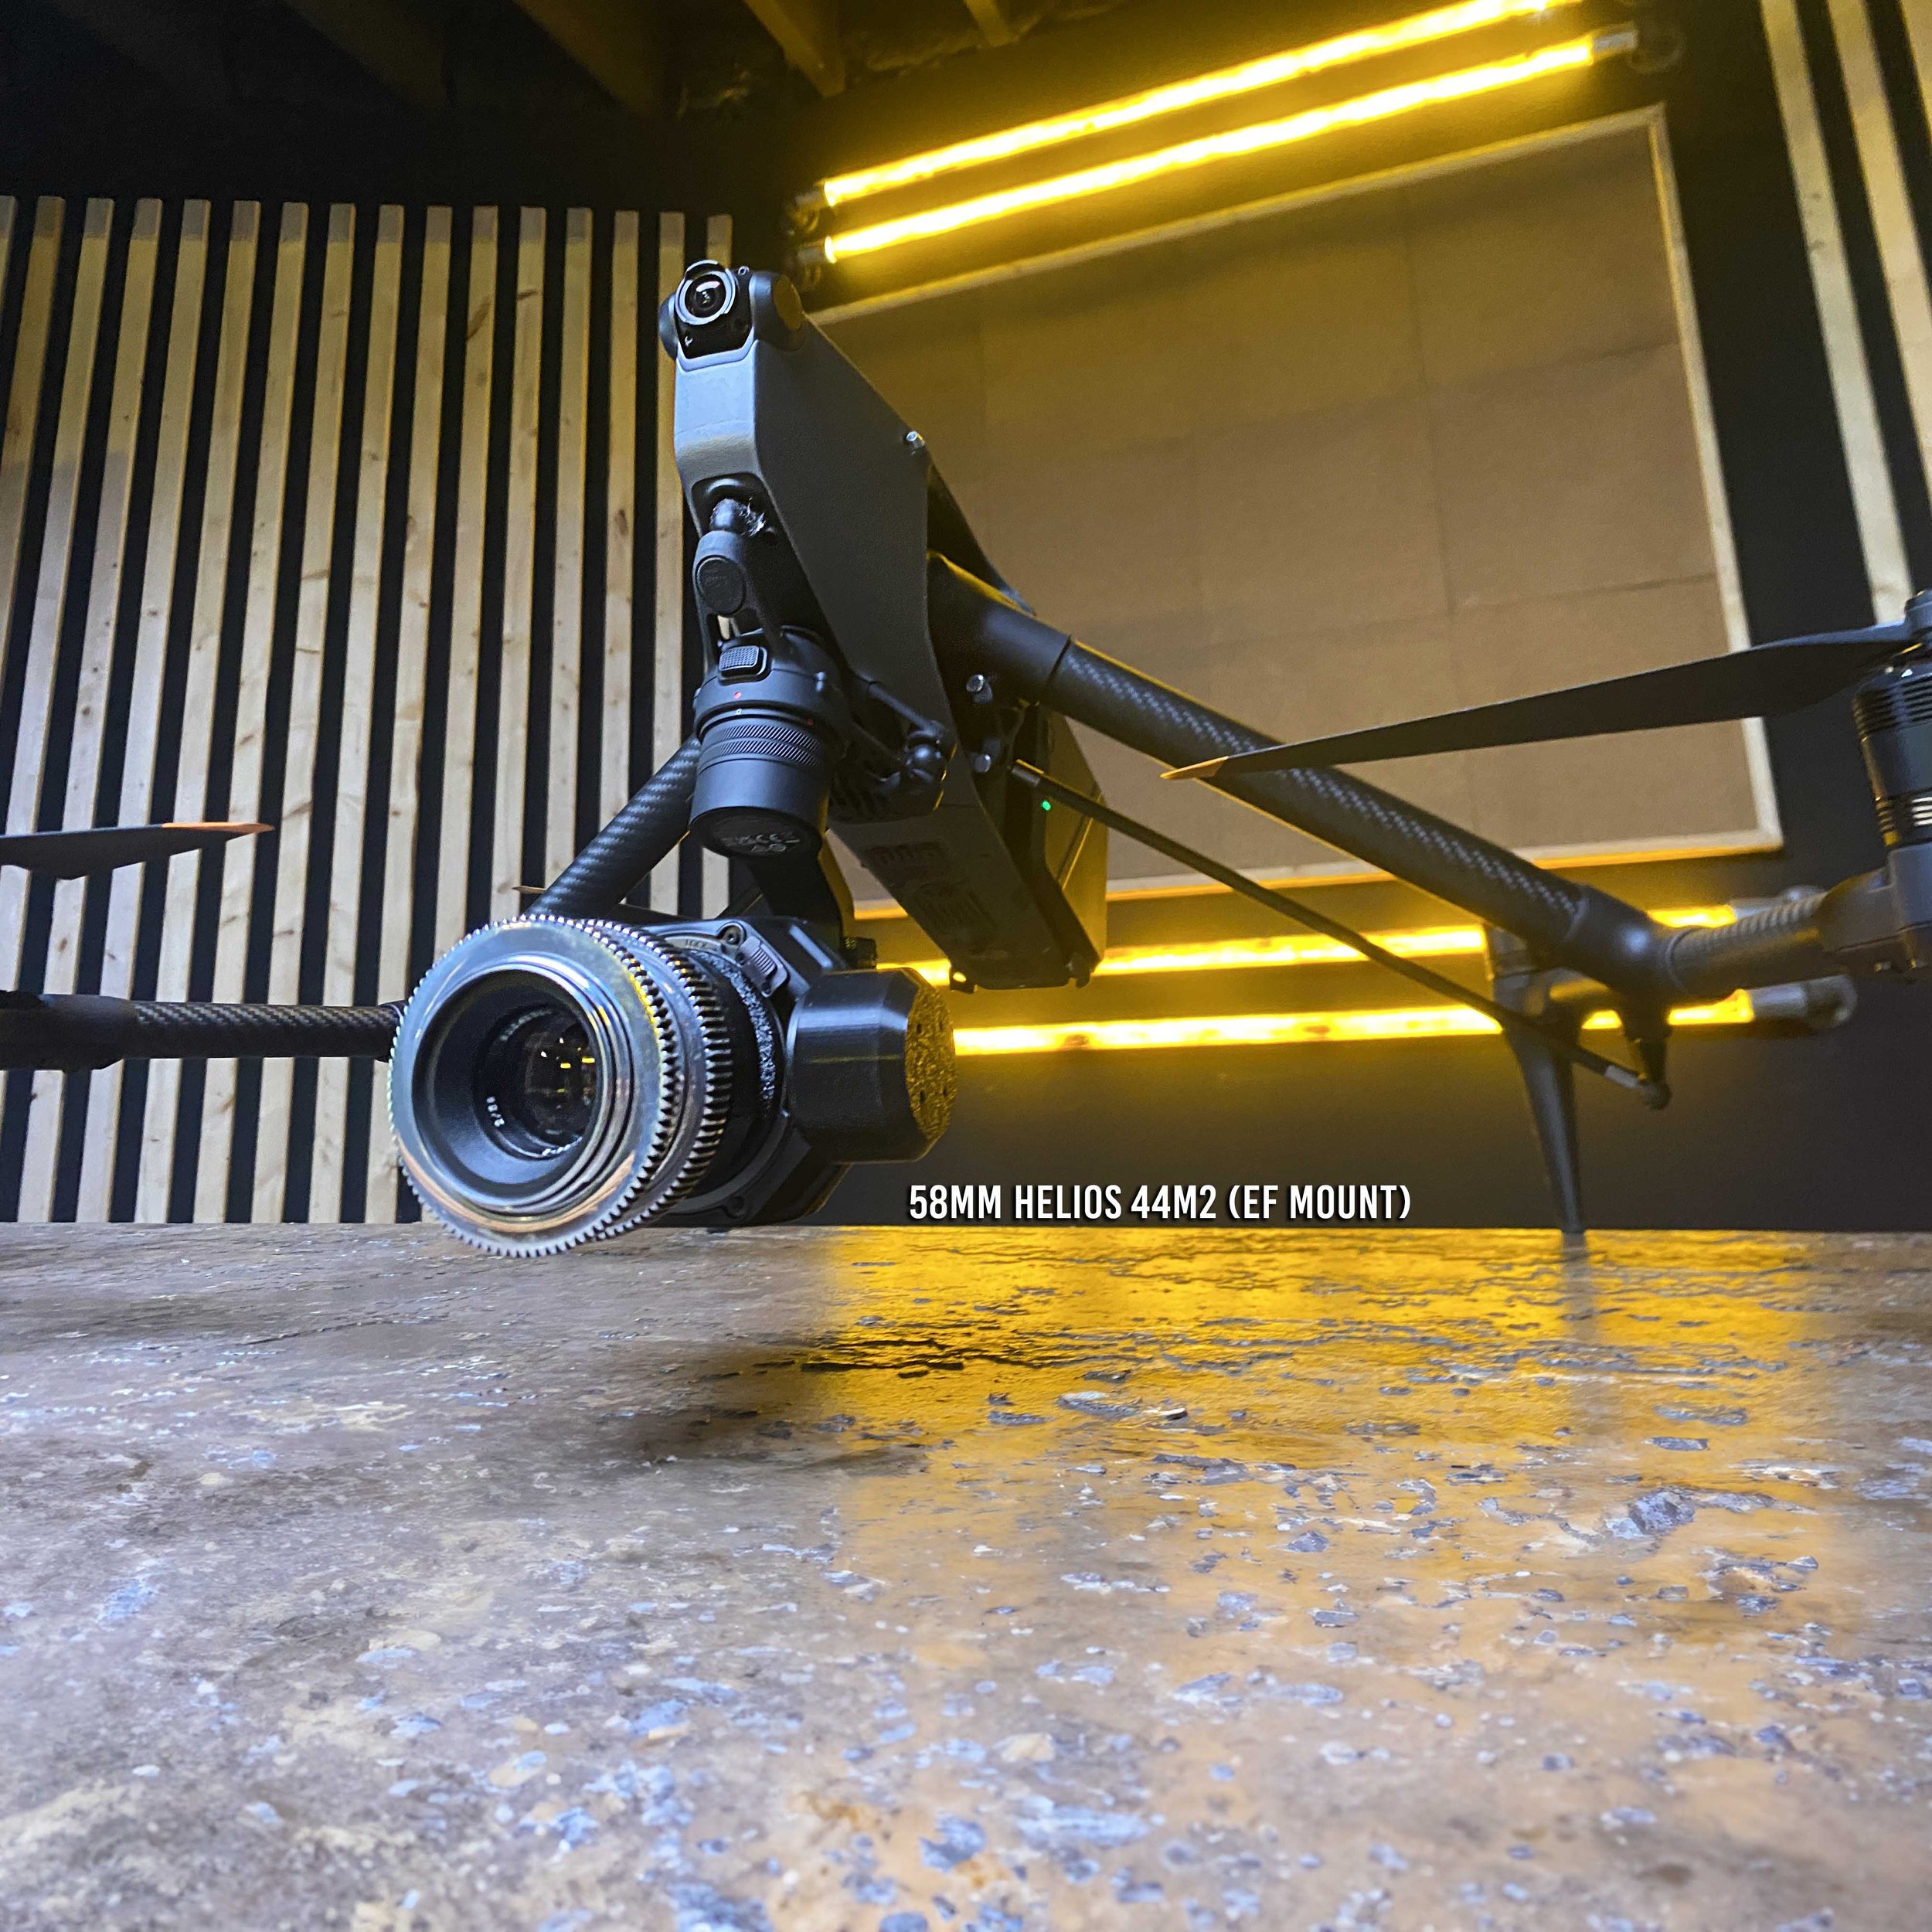
Most lenses under 4-1/4 inches (inclduing mount) and 450g can be flown on the i3. If the lens is heavy and long, then its very challenging.
These are friction fit, and incorrect installation can lead to achromatic aberrations and diffraction.
Line the pin or the circle on the bottom of each lens adapter with the corresponding pin or circle on the lens and twist. Nikon is backwards and requires reverse twist.
HOW TO BALANCE LENSES on the gimbal
1. Gimbal Plate (Tilt)
Add the lens first, then add the 46g weights to the rear gimbal plate. Add enough large weights till you have balance on the up down axis, ignore the roll axis imbalance (hold the gimbal by the roll motor to only focus on tilt for now). Once you have the tilt up / down somewhat balanced, you can fine tune the balance with tungsten putty.
Next, aim the camera lens straight down (ignore the roll imbalance again), and make sure the lens stays pointing straight down. If it tilts up, then move around any tungsten putty or weights that are already on there, to the top of the gimbal. If the lens starts to tilt down and back, then do the opposite, and move the weight towards to bottom. Do this until the lens stays pointed straight down.
NOTE: each lens is different and this step is different for all lenses.
PRO TIP. Take a photo of the back of each weight set up, for quick reference in the future.
2. Roll Arm (ROLL)
Add weight till lens points straight forward and the Left / Right stays motionless.
3. Pan Arm
Attach the gimbal to the drone. Point the lens to one side (all the way to the left or right doesn’t matter). Tip the drones nose forward. If the lens swings around and points forwards, then the lens is too heavy, and we need to add more weight to the Pan Arm. If the lens points backwards, then you’ve added too much weight to the pan arm and take some weight away. This one doesn’t need to be perfect, i’ve noticed very difference from flying with a little heavy or little light, (as long as its in the ballpark, you’re good)
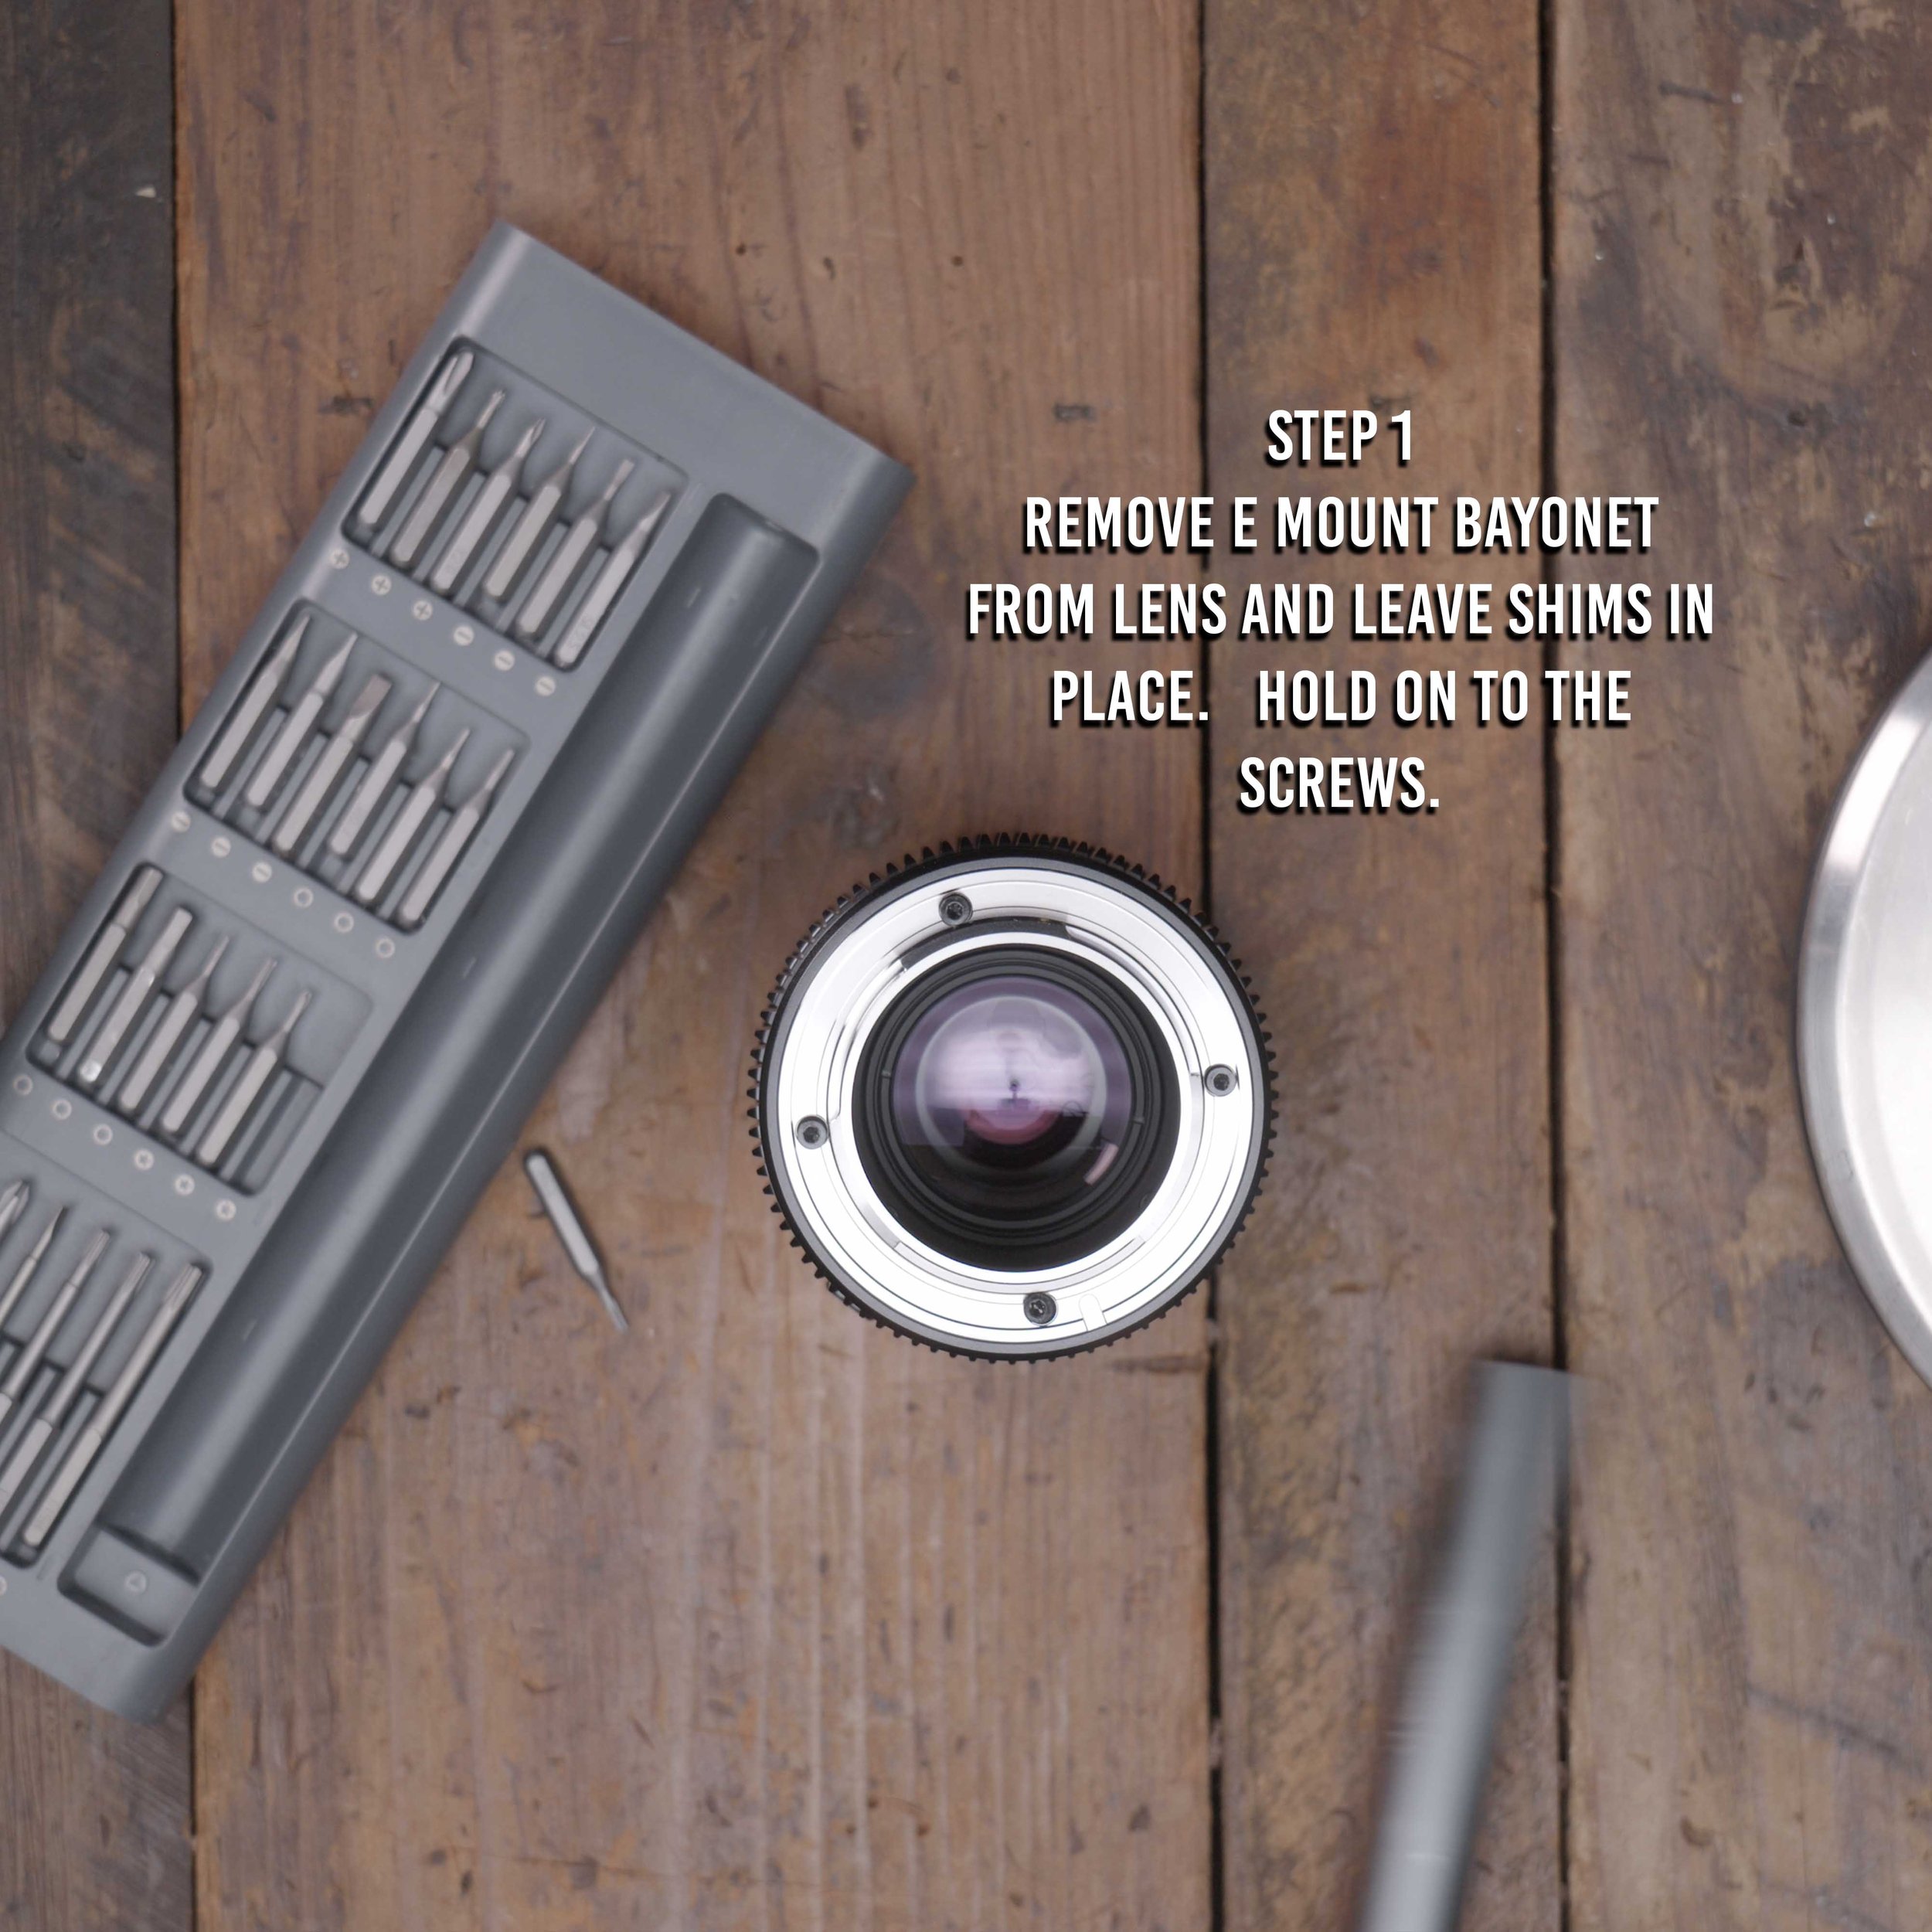
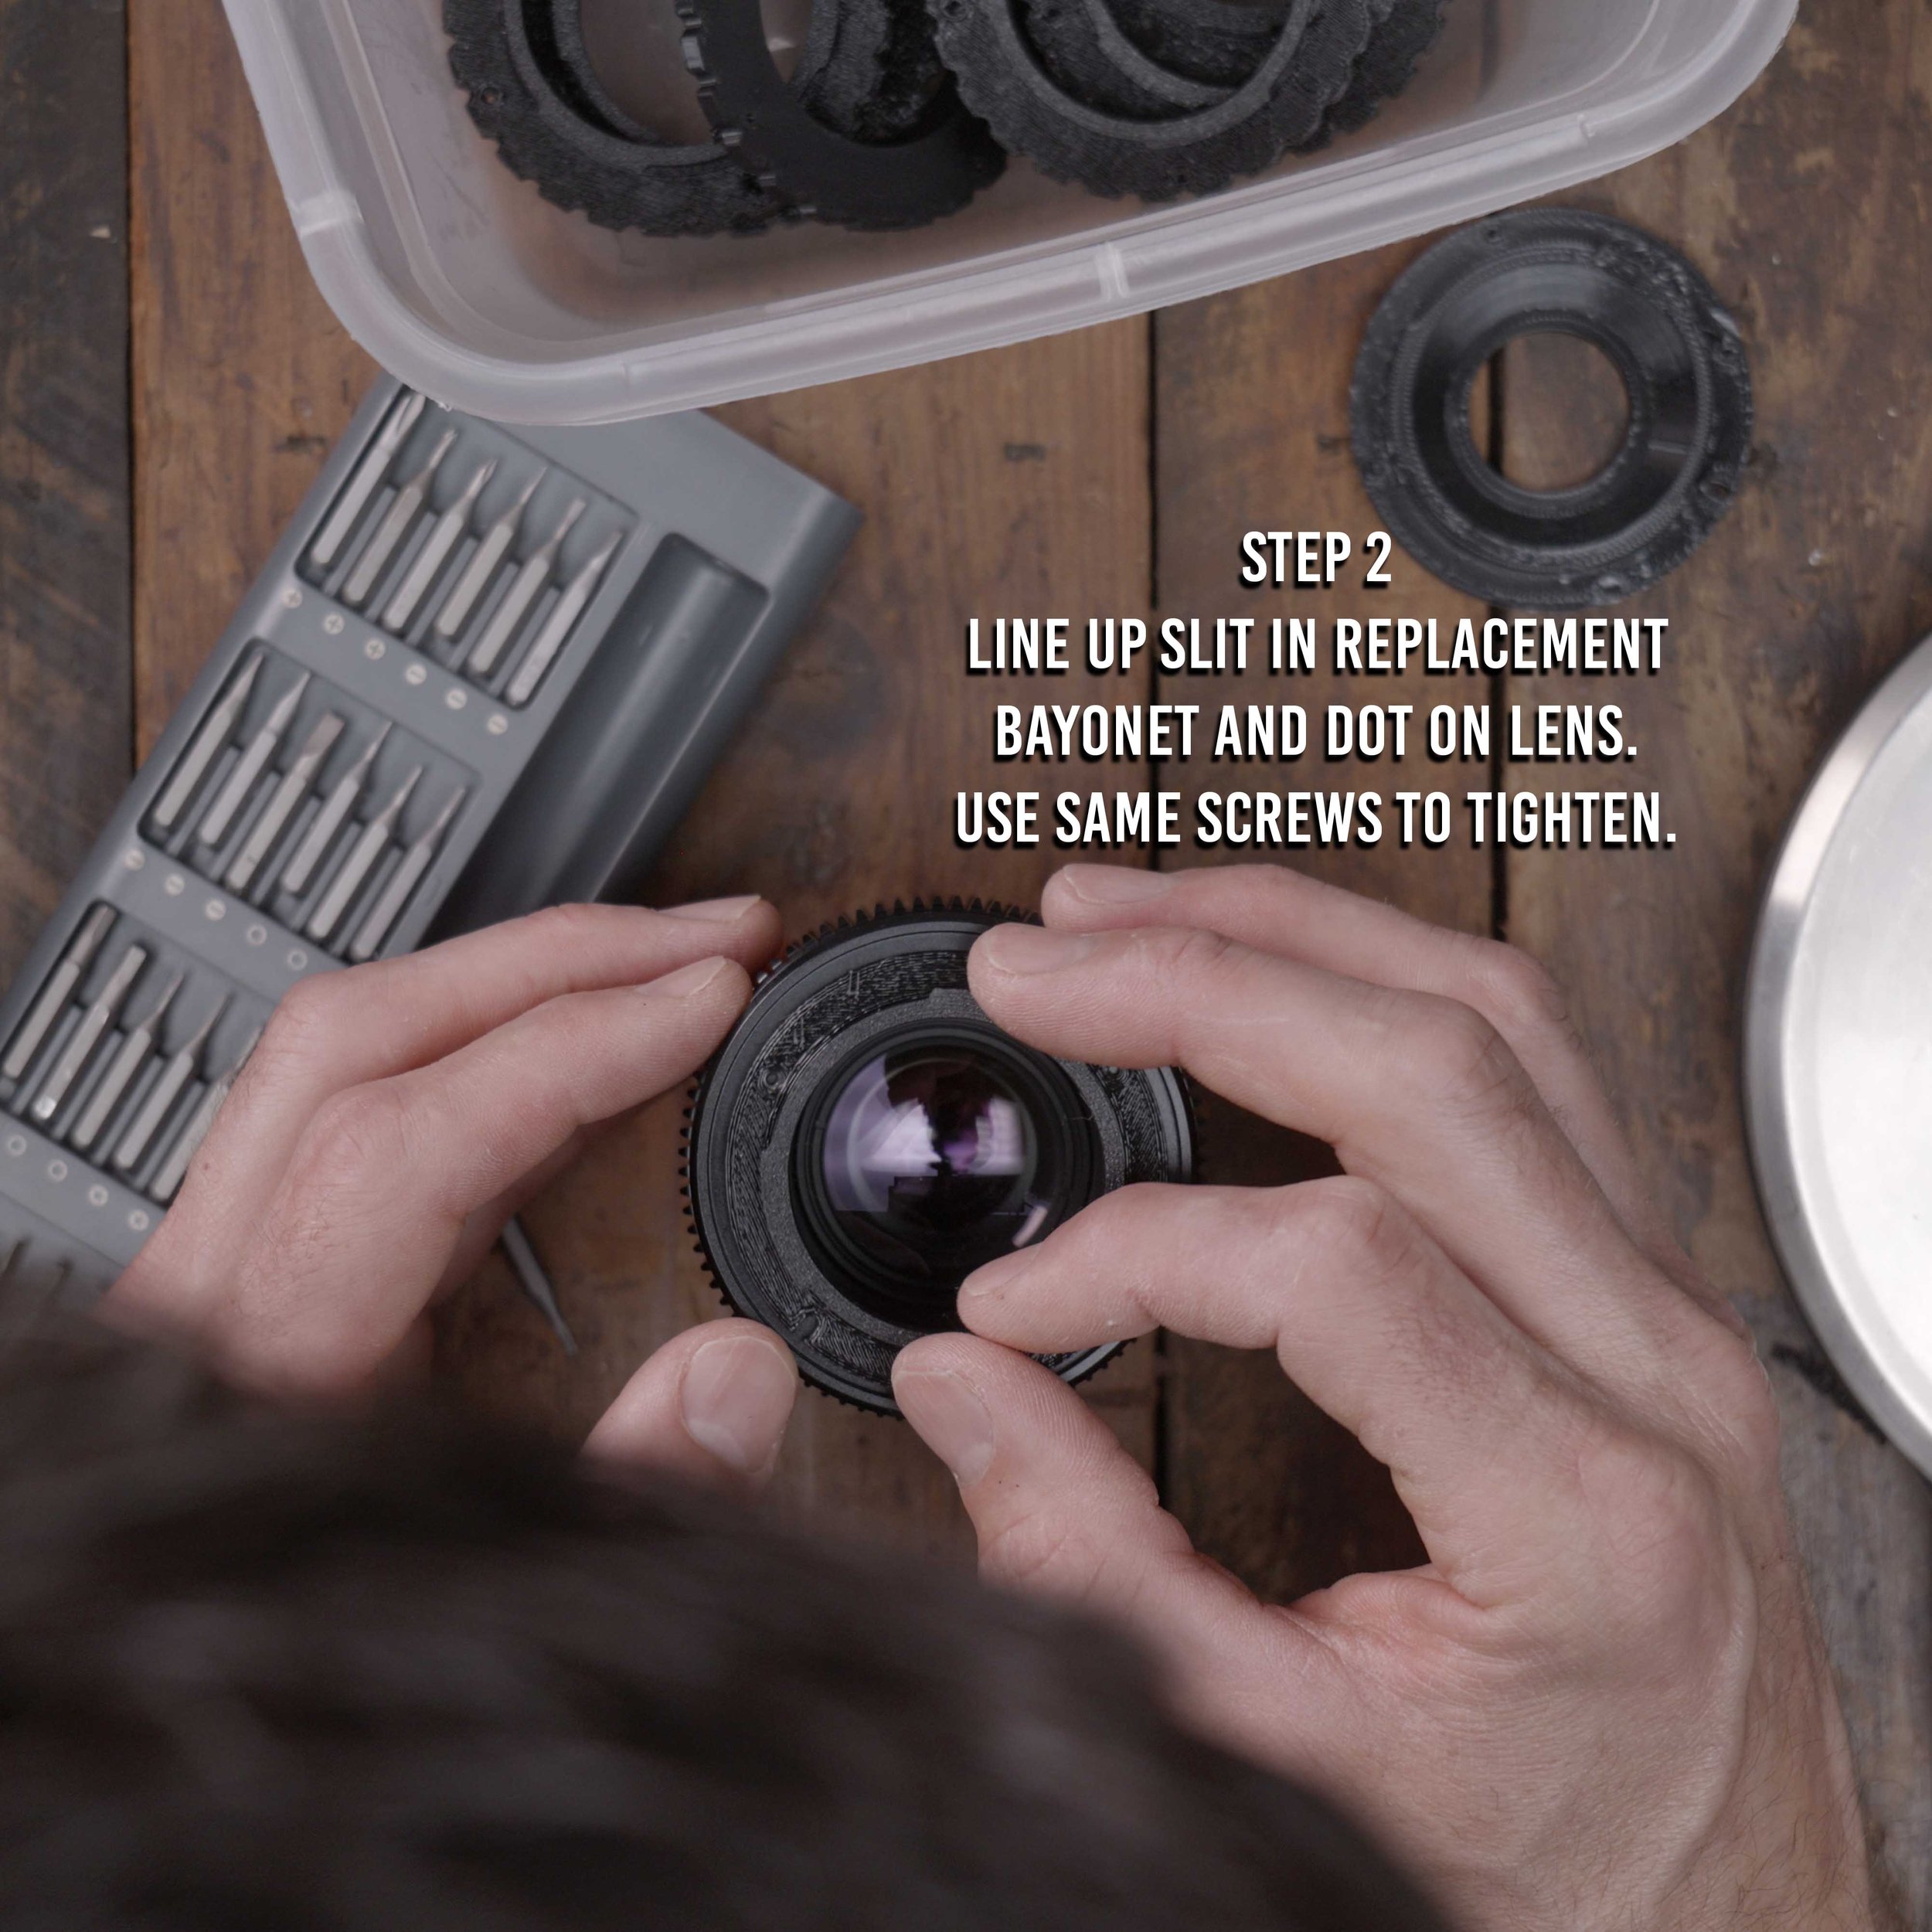


how to mount the 250mm minolta rokkor
Remove metal sun hood on the Minotla Rokkor
Perform a gimbal Calibration with a normal DL lens attached (18mm or 50mm etc…)
Update to latest Firmware on inspire 3 (Latest version has more power to gimbal motors)
Wrap Minolta MD to DL adapter with 1/2 inch Lead tape. Use the whole role and wrap close to the DL side, but not too close that it will obstruct the DL mount and release button on the gimbal.
Balance each axis as well as possible, using tungsten putty for the exact trim.
Fly in smooth weather, avoid high alititude locations '
Try flying in landing gear mode (less wind on the lens) WARNING: you risk the lens hitting the blades, excesize extreme caution when flying in this mode with after market lenses attached.